
HTC Evo 4G LCD Panel Replacement

Giriş
1. adıma gitReplace a broken LCD with this guide.
Neye ihtiyacın var
Parçalar


Aletler


Daha fazlasını göster…
-
-
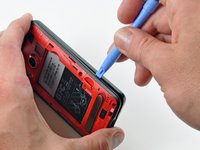
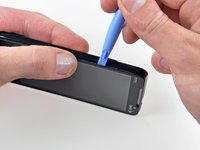
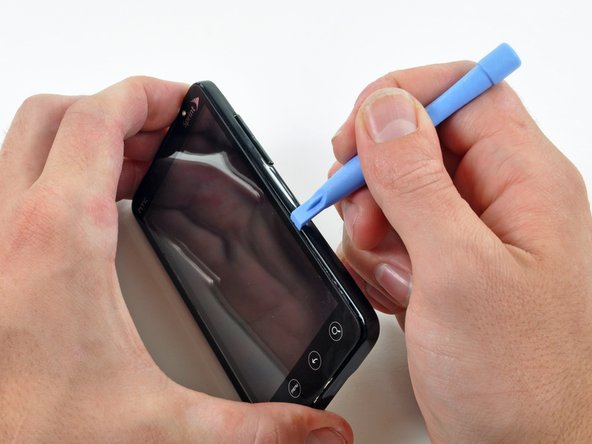
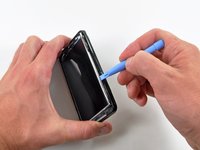
Gently insert an iPod opening tool between the rear panel and the inner rear frame near the headphone jack.
-
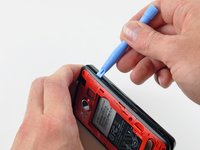
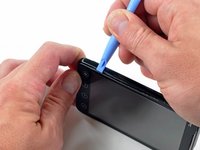
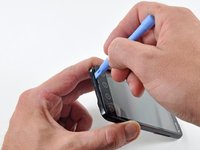
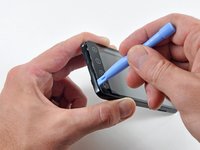
Use your iPod opening tool to pry up the rear case around the perimeter of the Evo.
-
-
-
Using the tip of your finger, lift the battery from the end closest to the camera.
-
Remove the battery from the rear inner frame.
-
-
-
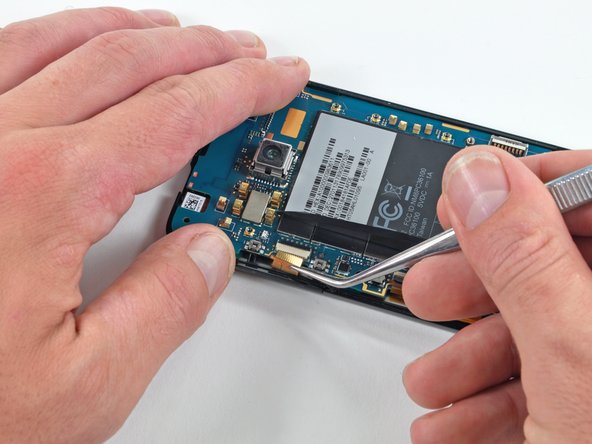
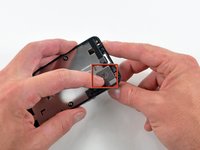
Use the flat end of a spudger to pry up the red MicroSD retainer attached to the inner frame.
-
-
-
Remove six T5 Torx screws securing the rear inner frame to the inner case.
-
-
-
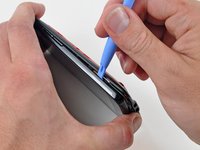
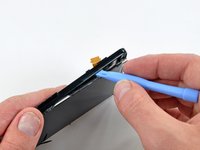
Continue the prying procedure, now focusing on detaching the plastic surround from the bottom of the Evo.
-
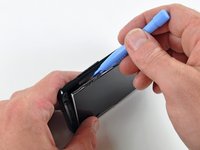
Pry up the rear inner frame along the right edge using the method described in previous steps.
-
Eventually work around the entire perimeter of the rear inner frame until it is lifted slightly from the inner case.
-
-
-
Remove the single Phillips screw securing the motherboard to the inner case near the headphone jack.
-
-
-
-
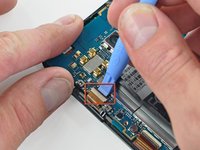
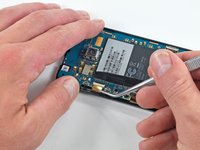
Remove the pieces of tape covering the following ribbon cables:
-
Front-facing camera
-
Front panel ribbon cable
-
Display ribbon cable
I'm not sure why the dimensions I added to the display cable width were not approved for Step 14 (9/32" vs. 17/32"). Maybe I entered it in the wrong section? The reason I added it was because you cannot see the part number on the ribbon without removing the LCD, and I did not want to completely disassemble the phone at that time, rendering it completely inoperable before the part arrived.
I continually ran across "advise" from customers on Amazon (and elsewhere on the interwebs) stating "make sure you buy the LCD with the right width cable". This information, while well meaning, is utterly useless, since none of the advice I came across had the actual dimensions. It should be included somewhere in the teardown manual.
After some searching, I found the dimensions on the LCD product descriptions at www.repairsuniverse.com. I measured my own LCD ribbon, and can verify the 'wide' dimension is accurate:
-
-
Bu adımda kullanılan alet:Tweezers$4.99
-
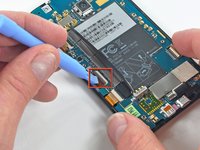
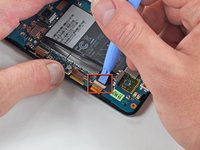
Using the tip of an iPod opening tool, flip up the front-facing camera ribbon cable retaining flap.
-
Be very careful and gentle with these flaps. They are very easy to break or dislodge and equally difficult to reinstall.
-
Use a pair of tweezers to pull the front-facing camera ribbon cable straight out of its socket.
-
-
-
Gently lift the front-facing camera out of its recess in the inner case and remove it from the Evo.
-
-
-
With the heat gun set to low, start by heating the outer black border near the upper left corner of the glass panel.
-
Try not to excessively heat the outer plastic edge of the Evo.
-
-
-
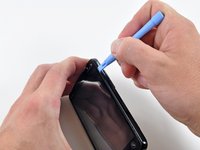
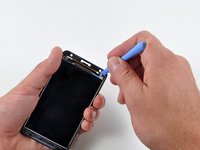
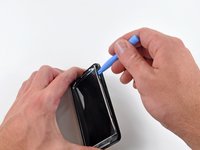
Pry up the front panel along the right edge using the method described in previous steps.
-
Eventually work around the entire perimeter of the front panel until it is lifted slightly from the inner case.
Instead of separating the front-panel glass, I managed to de-laminate the LCD display: the LCD layer, the polarizer, and the backlight (diffuser).
Oops.
I didn't have a heat gun or hair dryer, so I used a sock filled with dry, uncooked rice heated in a microwave oven for a few minutes. That did soften the adhesive, but may it didn't get hot enough?
Otherwise, I had no trouble at all thanks to this great guide! Seriously thanks.
(Full display assemblies can be had on eBay for same price as the bare LCD, so no worries there. I love taking things apart.)
-
-
-
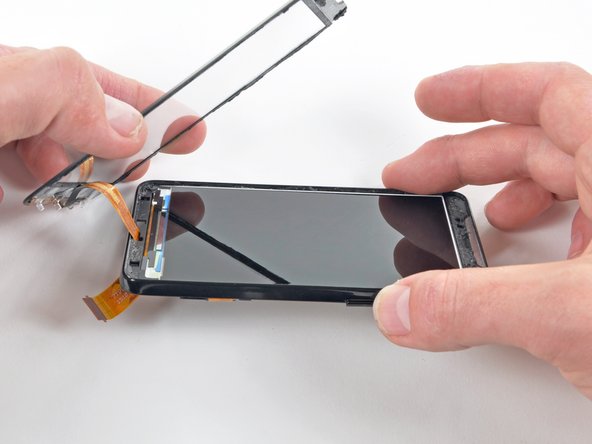
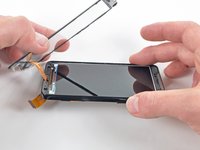
Lift the front panel out of the inner case, minding the cable still routed through the bottom of the Evo.
-
Carefully de-route the front panel ribbon cable through the slot in the inner case.
-
Remove the front panel.
-
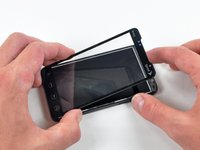
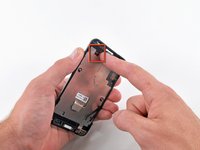
Notice the four (4) clear plastic hooks that are adhered behind the menu buttons. Look closely. Each one is shaped differently and in a particular orientation.
-
If the replacement front panel does not have these installed already, carefully remove and transfer them from the old panel to the replacement.
-
-
-
Peel the piece of tape connecting the underside of the LCD metal tray to the bottom of the inner case.
-


To reassemble your device, follow these instructions in reverse order.
To reassemble your device, follow these instructions in reverse order.
İptal et: Bu kılavuzu tamamlamadım.
30 farklı kişi bu kılavuzu tamamladı.

2Kılavuz Yorumları
This instruction does work, I follow this and I have my phone back, the only thing now the back camera is show negative view, i reset but still the same, however the front camera does does perfect. one more thing I drop my phone and the screen crack will that be the program? and I bought the assembly screen. Very important you must use a heat gun if you going to go all the way, other wise a nice shape screw drive will do