Giriş
Some possible symptoms which could show that your battery needs to be replaced:
- Battery percentage remains low, even after charging.
- The tablet dies when it still has a lot of battery life.
- The tablet becomes hot after using for a short period of time.
If you experience these symptoms, you might need to get a new battery. This battery replacement guide will walk you through the steps on how to remove necessary components in order to get to the battery. Replacing the battery is a moderate five step process using the necessary tools (refer to tools list).
Neye ihtiyacın var
-
-
Use the plastic opening tools from iFixit to safely remove the screen from the back of the device.
-
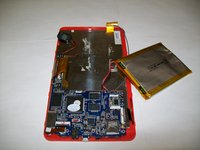
Lift and remove screen to reveal the battery and circuit board as seen in the picture.
 FixBot'a Sor
-
-
-
Preparing to remove the speaker.
-
Use spudger to remove the speaker from the back casing of the device.
-
-
-
Bu adımda kullanılan alet:Tweezers$4.99
-
Remove the black strips as shown in the picture from the wires using the tweezers.
-
-
-
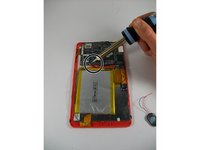
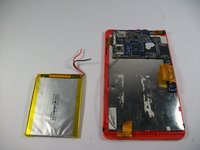
Carefully use the spatula and spudger from iFixit to remove the battery from the device.
-
-
-
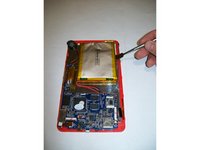
Heat the soldering iron to operating temperature.
-
Locate the black and red wires on the top of the circuit board.
-
Using the soldering iron, apply heat to the shiny solder point on the circuit board (Circled on the picture).
-
Be sure to perform this task for both the black and red wires.
-


To reassemble your device, follow these instructions in reverse order.
İptal et: Bu kılavuzu tamamlamadım.
Bir başkası bu kılavuzu tamamladı.

Ekip

UMass Dartmouth, Team 1-1, Miles Fall 2015 UMass Dartmouth, Team 1-1, Miles Fall 2015 üyesi
UMASSD-MILES-F15S1G1
3 Üyeler
10 adet Kılavuz yazıldı