Ana içeriğe geç

Hisense Sero 8 Speaker Replacement

Neye ihtiyacın var

  1. Hisense Sero 8 Speaker Replacement, Speaker: adım 1, 3 resimden 1. Hisense Sero 8 Speaker Replacement, Speaker: adım 1, 3 resimden 2. Hisense Sero 8 Speaker Replacement, Speaker: adım 1, 3 resimden 3.
    • Remove the back cover of the device using a combination of both plastic opening tools.

    • Use your plastic opening tool to pry open a corner of the device. Continue using the tool down the side of the device to open it completely.

  2. Hisense Sero 8 Speaker Replacement: adım 2, 1 resimden 1.
    • Remove the black tape located to the left of the device.

  3. Hisense Sero 8 Speaker Replacement: adım 3, 1 resimden 1.
    • Use a Phillips head #00 screwdriver to remove the two 4.43mm screws on the bottom that keep the speakers in place.

  4. Hisense Sero 8 Speaker Replacement: adım 4, 2 resimden 1. Hisense Sero 8 Speaker Replacement: adım 4, 2 resimden 2.
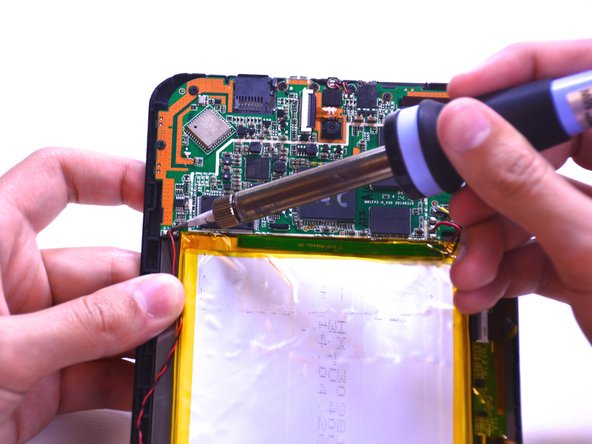
    • Unsolder the red and black wires connecting the speaker to the motherboard. Take a look at this guide to learn how to solder and unsolder connections.

  5. Hisense Sero 8 Speaker Replacement: adım 5, 2 resimden 1. Hisense Sero 8 Speaker Replacement: adım 5, 2 resimden 2.
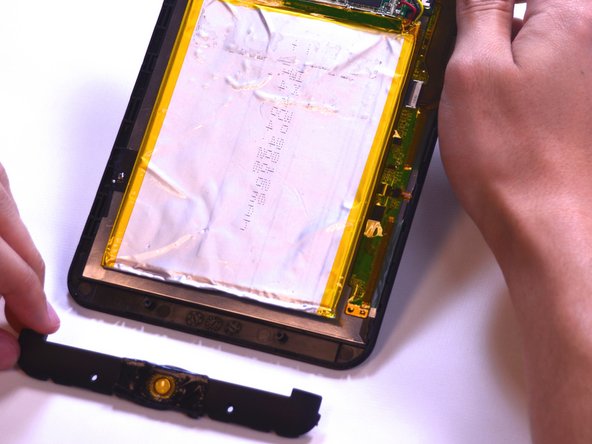
    • Use the spudger tool to remove the speaker panel carefully.

Sonuç

To reassemble your device, follow these instructions in reverse order.

Bir başkası bu kılavuzu tamamladı.

Katharina

Üyelik tarihi: 02/23/15

506 İtibar

2 adet Kılavuz yazıldı

Ekip

USF Tampa, Team 1-2, Leahy Winter 2015 USF Tampa, Team 1-2, Leahy Winter 2015 üyesi

USFT-LEAHY-W15S1G2

3 Üyeler

10 adet Kılavuz yazıldı

0 Yorum

Yorum Ekle

İstatistikleri Görüntüle:

Son 24 Saat: 0

Son 7 gün: 2

Son 30 gün: 11

Her zaman: 576