Neye ihtiyacın var
-
-
Tape the top part of the printer and scanner together
-
*note : I started with the paper trays already removed
-
-
-
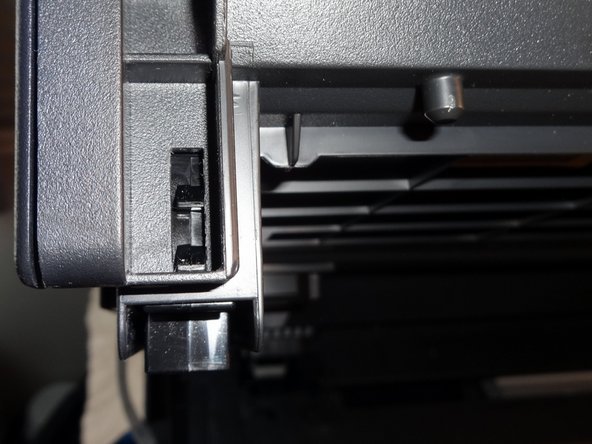
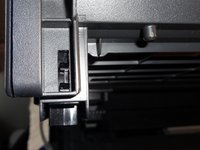
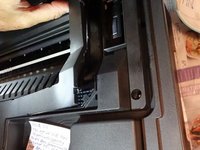
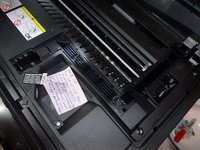
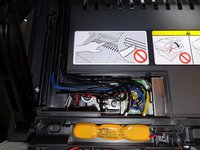
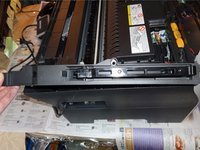
Remove the cover on the right side exposing the ribbon cable gently use the twizzers in the tabs to release it
-
Unplug the ribbon cable and slid it out
-
*note for reassembly: the ribbon cable placement holders can be removed to make it easier to re-thread the ribbon cable by gently pushing down the tabs with the spudger
-
-
-
-
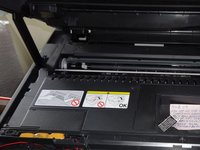
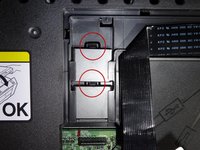
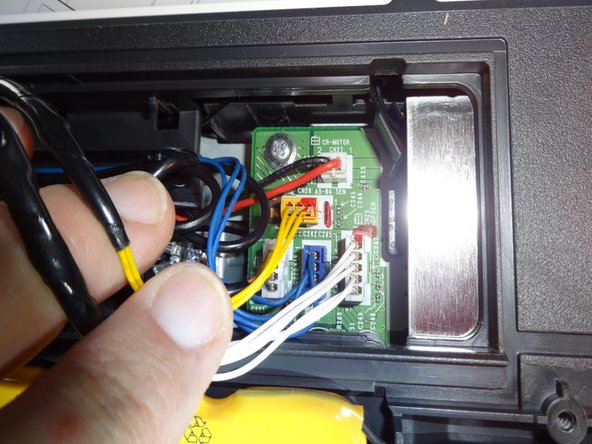
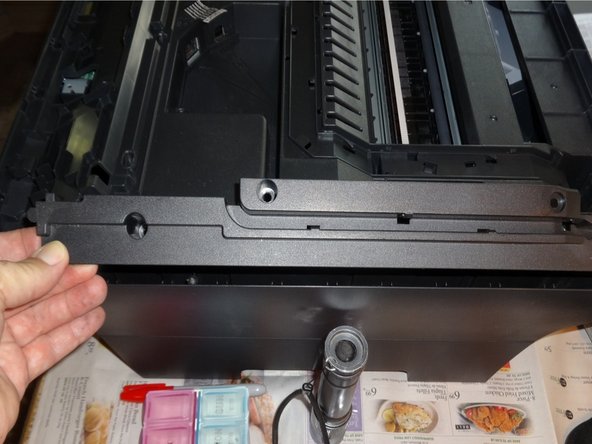
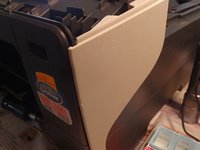
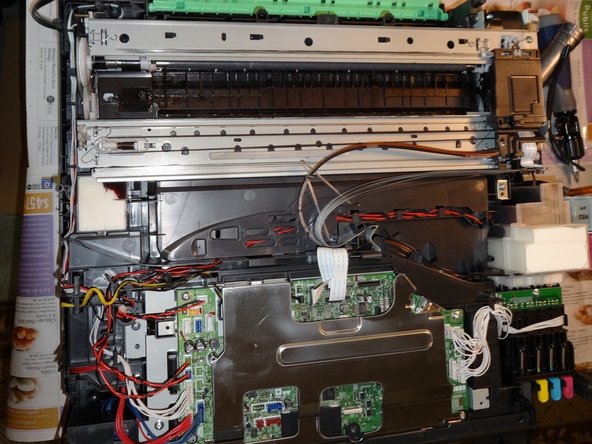
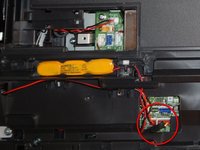
Remove the Panel on the left side exposing the wiring connectors for the top of the printer
-
After dissconecting the connectors remove the whole top of the printer and place it safely out of the way
-
-
-
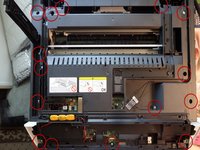
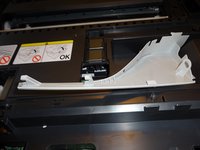
Remove the front corners by gently pulling upwards
-
Open the back paper jam cover.
-
-
-
Lift off the cover and put aside out of the way
-
-
-
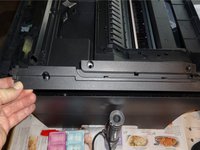
Slide the clear print head guide wire off the tab on the right side
-
*note: Put on gloves if you haven't already. It can get messy.
-
-
-
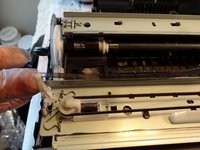
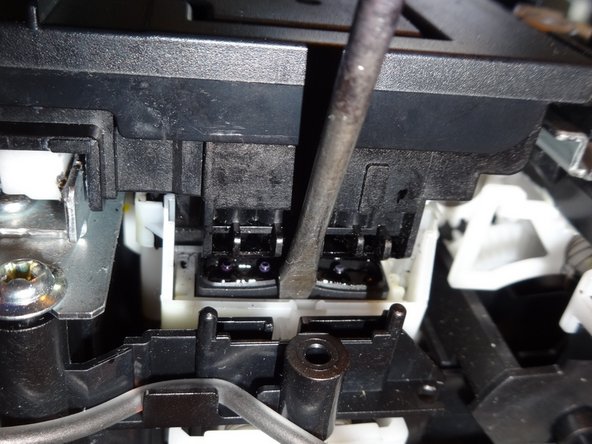
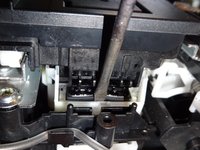
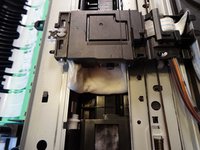
Using a spudger, press down on the plastic housing of the park carriage that the print head rests on.
-
Slide the print head to the left freeing it to move
-
-
-
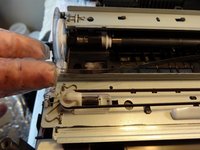
Slide the print head left until it is at the end of the rail. You can feel it release (lift upwards when it aligns with the cut out notch)
-
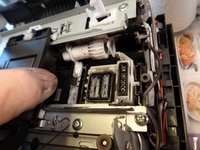
Push the print head unit towards the back of the device and lift the unit from the back rail
-
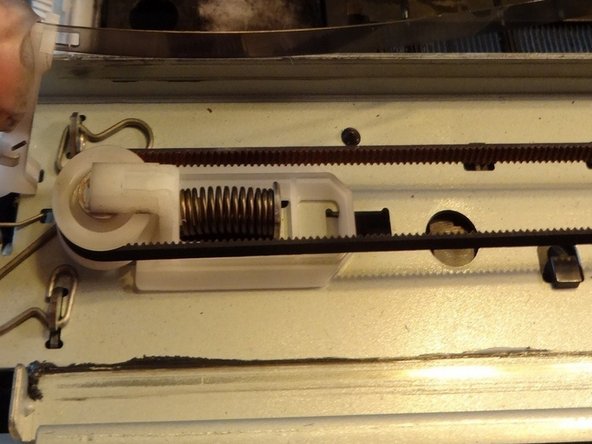
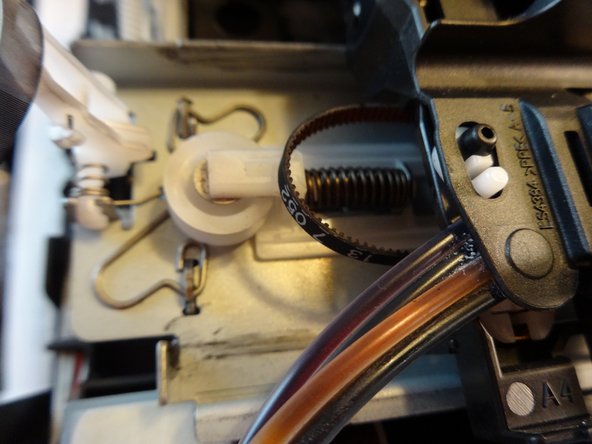
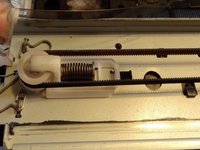
Using the spudger, press the spring section of the white pulley
-
Release the conveyor from the pulley while the spring is still compressed
-
Remove the conveyor from the gear on the other side of the device
My advice? DON'T purchase a brother printer. In as little as a month after your warranty is up, BROTHER Customer Service WILL DO NOTHING TO HELP YOU. I repeat, they will DO NOTHING TO HELP YOU. Brother Pri nters ARE A MONEY PIT just to keep them maintained, and if you don't print some misc. color print pages on "off" days that you don't use it, the print nozzles start to build up with dried ink. Now I know this posting is old but maybe I'll get a response. Step 13- am I to assume that you put the drops of h2o on folded paper towel b4 you rest the print head assembly on it? What does the paper towel/print head assembly rest on? Does it rest on the "park position"? Also, I am opting to do the shorter step as stated by F. Silva, in you comments section. I am aware that his is not a guide, per-say, and I will take that into account. Thank you in advance for your time.
-
-
-
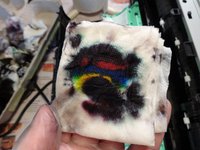
How to clean with paper towel
-
Tear a single sheet of paper towel in half. Fold the sheet in half several times until it is about 1/2 inch wide.
-
Put a few drops of distilled water on top of the paper towel and lay it in the trough under the print head,. Move the print head over the towel and let it sit for at least 15 minutes. This will soften the ink on the print head.
-
Move print head assembly back to its resting position. You will probably notice that the paper towel now has one big black blob of ink on it. (There is so much excess ink on the print head that all the colors are mixing to make black.)
-
If you cannot clearly see individual colors, then dampen another spot on the paper towel and move the print head back over the newly dampened spot on the paper towel. Continue repeating this until you see all the individual colors.
-
*note: when reassembling be certain to move the print head back to its resting position (the extreme right side above the park carriage)
I did NOT disassemble my entire Brother MFC machine but your instructions in the last slide (#13) are excellent! I have used this technique twice on two different Brother MFCs with great success!!
I followed the early instructions from a different post (#1-#2) and finished with your instructions (#3):
1. Use the menu on screen to start a cleaning cycle. Open the entire top of the printer, not just the scanner. The whole top should lift open with no resistance. You will see the print head moving back and forth when you open the printer.
2. Unplug the printer when the print head moves all the way to the left. The print head is difficult to clean when it is in its default position on the right side of the printer, but the printer needs to be off before you start cleaning it. Wait until the print head moves over and then unplug the printer.
3. Place the damp paper town in the print track head and proceed with the instructions shown here...WORKS GREAT!!
-


To reassemble your device, follow these instructions in reverse order.
To reassemble your device, follow these instructions in reverse order.
İptal et: Bu kılavuzu tamamlamadım.
14 farklı kişi bu kılavuzu tamamladı.

26Kılavuz Yorumları
Thanks for the guide. But I don't think you need to tear apart the printer to do that, just start a print cycle and when the printhead moves, plug the printer off. then you can freely move the printhead and put the paper towel under it.
Thank you! Thank you! I was getting no magenta ink at all - I tried this, took me 2 minutes and viola! It works perfectly now! Thank you!!!!!
Yes! Best comment ever! Saved me so much work. Let it sit 15 mins, instant success did 1 Cleaning and perfect printing.
Hello Filipe,
I have a problem with my printer and I came across this page. I have a Brother MFC-240C printer.
How do I reach the printerhead to clean it? Do I need to take off the top cover to reach it?
Thank you for your help.
Thanks Filipe for the extra advice :) I had already tried the paper towel method on my printer it did not work for me my print head was damaged and I had to replace it. I could not find any strip downs of my Printer at the time of posting this tutorial so I thought it was more useful for others in the future going this route
Great post, @crystal_b, and best comment ever, @Filipe. With this, I won't have to buy a new printer! It prints like new again.
This all day long!
My 8 year old MFC was totally 100% dead for black printing.
I stuck a wad of damp paper in the trough under the printhead, and slid the printhead over the wad and left it for a bit. I then slid the printhead over the wad a few times, with a couple of replacement wads on the way, and left it to dry for a few hours.
Black didn't work straight away, but after 3 head cleans it was appearing. After 12 head cleans it was back to full health.
Not cheap, ink-wise, but better than chucking the whole thing out and starting again.
(One tip: do not try using a damp tampon cut to size as your wad. I initially did, and ended up with a print head section covered in gunky gel. Duh.)
Thank you Filipe Silva! You have saved two hours of futility in my life. This worked well to allow for printing again.
your idea is admirable I also do one of this particle with my printer head I made a vacume box on which printer head can be fix over with rubber bands to make airtight as when the air is sucked out from the box the the ink itself open the nozzles and after cleaning it with paper towel replace in its original position then the collected ink in the box should be clean for next use .... The box is 15x5x3.5 cm with side tube to suck air.
Wish I had read the comments before I removed the display cover! UGH!!!!!!!!!!!! However the method of cleaning described in step 16 of just putting the paper towel under the print head with distilled water did wonders for my problem! Thanks!
sir mera printer t500 hai black ink print out nhi nikal raha hai help sir kya karun
www.786aamir@gmail.com
I have Brother DCP-T700W whose color nozzles seem to have got clogged. Auto cleaning did not solve. I want to detach the print head and unclog the clogged nozzles. Could you please provide me the procedure to detach the print head?
Is it OK to just use demineralised water or does it have to be distilled?
Saved me a $200 geeks quad plan and a $150 shop fee. 15 mins with a wet napkin. I still can't believe it!
I am so happy to have run into this article and Felipe Silva’s comment. I used warm (hot out of the faucet, but warm by the time I got it in there) tap water on a paper towel and it worked like magic. Despite many cleaning cycles I was getting only about half of the jets firing in the test print and after this method of cleaning all colors were firing 100%. I suppose if I had to do this every day I would use special water (distilled, demineralized, or de-ionized) to avoid scale buildup, but for a once a year process I have no concern using tap water.
use a better cleaning fluid https://youtu.be/tpJoBMORqww
Possibly dumb question…how do you know when the print head has actually moved to get it off the home position when you remove power. I've used a syringe to push (gently) alcohol through individual colour nozzles and it only unclogged about 50% of them so I thought I'd try this. But that requires more teardown so I thought I'd try Filipes method.
I figured out if I hold a pen in the cover open button, when I print a page I can see the head move to the left then unplug it b4 it starts to print
I DID it!!! Thank you @crystalbic and @Filipe for this post! I used Filipe’s technique for getting the printer head element to be loose on the rails and crystalbic’s technique with the damp paper towel for cleaning the heads. It took about 8 paper towels but it absolutely WORKED with minimal effort! THANK YOU both for contributing your solutions!!!
I tried using the paper towel by sliding it under the print head, and it worked GREAT. To get the print head to the center of the printer, I pressed and held the red X on an MFC-J6935DW. Once the print head moved to the center position, I gently moved the print head across the paper towel that I had cut to fit. I then lifted both ends of the paper towel and slid it back and forth. I printed a test page and was amazed at the results. I was not missing anything on the page.
I had an error 44 "Unable to print" problem with a DCP-J552N printer.
It turned out that the head itself was fine but one of the 2 sensors mounted on the pcb that connects to the head were dirty.
There was no need to replace the head itself.
Somehow a little piece of dust can render this printer completely unusable.
Suspect that I may have the same problem - what is the pcb and any hints on how to recognize it? Thanks.
With the lid open, hold the X or Delete button until the printhead moves halfway to the left. Now the printer is in maintenance mode and you can freely move the printhead. No need for starting a print and unplugging the device.
Thanks To Filipe Silva Comment below, if you only need to clean the print head you do not need to pull the hole printer apart. I needed to replace my printhead and there were no manuals on how to strip the printer down at the time.
Filipe Silva - 02/01/2017
Thanks for the guide. But I don't think you need to tear apart the printer to do that, just start a print cycle and when the printhead moves, plug the printer off. then you can freely move the print head and put the paper towel under it.
crystalbic - Yanıt