
How to repair a taped seam

Giriş
1. adıma gitAfter repeated use or washing of waterproof sports item, taped seams can become damaged as the glue wears away. This can reduce the waterproof performance and you may feel that it's time to buy a new item - but repair is possible! This guide will show how to repair defective taped seams, so that you can continue enjoying going outside in wet weather.
Neye ihtiyacın var
Aletler

Daha fazlasını göster…
-
-
Identify the defective taped seam, and the extent of the damage. Is it only a small area peeling up, or something larger?
-
Note: We will be using a hot iron to re-weld the taped seam, so prepare a tidy area matching the size of your repair.
-
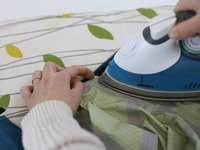
Lay a heatproof material underneath the item, such as an ironing board, or ironing board cover. Set the iron at 150 °C maximum.
-
-
-
Note: In this guide, we assume that the tape cannot be re-welded due to the glue being damaged or worn-out. But if you want to make as test first, move to the next step without adding extra thermo-tape.
-
Prepare the hot-melt tape by cutting a small piece to the same size as the defect. The tape should fit underneath the damaged tape, so that none is protruding out from the edges
-
Tip: we have used a common form of curtain tape here, as it is widely available; but more advanced tapes are also available from sewing/craft stores.
-
-
-
We will now use the head from the iron to melt the hot-melt tape in between the broken seam layers, to bond them together again.
-
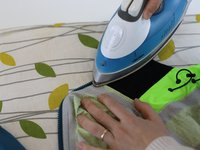
Carefully check the tape is underneath the old taped seam and not protruding out from the edges. Position the heated iron on top of this area, and apply light pressure, for up to 10 seconds.
-
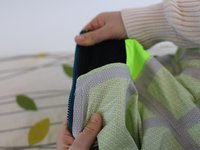
Let the area cool down, and then check whether the hot-melt tape has melted and bonded the defect successfully. If it has not, apply the iron again, and increase the pressure a little. Continue this process until it is fully glued down.
-
Tip: you may find in this process, that some extra hot-melt tape is needed in some areas. simply cut some more small pieces and slide them between the seam, and repeat the steps above.
-
-
-
🛠️🏆👏 Congratulations! The repair is complete, and you're ready to go!
-


In need of another repair? Don't worry! Check out our other guides to find quick solutions for your favourite clothing, footwear and equipment!
In need of another repair? Don't worry! Check out our other guides to find quick solutions for your favourite clothing, footwear and equipment!

Ekip
