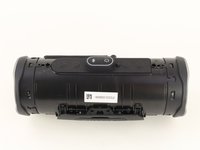
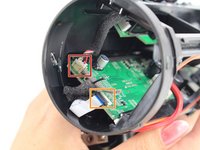
Ana içeriğe geç

JBL Charge 4 Motherboard Replacement

Neye ihtiyacın var

  1. JBL Charge 4 Motherboard Replacement, Speaker Grill: adım 1, 1 resimden 1.
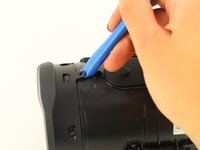
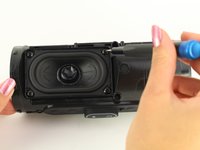
    • Flip your speaker over and insert the plastic opening tool into the slit on the grille.

    • Pry away from yourself towards the back of the speaker to release the clip.

    • Repeat this process for the clip on the other side.

    ich schaffe es nur auf der einen seite. Auf der anderen ist die abdeckung viel zu fest dran ? was kann ich machen ?

    George Ziakos - Yanıt

  2. JBL Charge 4 Motherboard Replacement: adım 2, 2 resimden 1. JBL Charge 4 Motherboard Replacement: adım 2, 2 resimden 2.
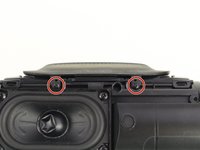
    • Remove the two 8mm Phillips #0 screws from the other edge of the grille.

    You have to remove the 8 mm screws before you try and Prius the other side. They are attached, and will break

    Noah Werthaiser - Yanıt

  3. JBL Charge 4 Motherboard Replacement: adım 3, 1 resimden 1.
    • Pull apart both sides of the grille.

    • Lift the cover off of the speaker.

  4. JBL Charge 4 Motherboard Replacement, Passive Bass Radiators: adım 4, 2 resimden 1. JBL Charge 4 Motherboard Replacement, Passive Bass Radiators: adım 4, 2 resimden 2.
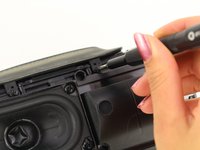
    • Using the plastic opening tool, lift the tab on top of the speaker to release the radiator from the clips.

    • Repeat this process on the other clips around the radiator to release it from the frame.

    There is absolutely no reason to remove the passive radiators if you want to replace the speaker only!

    Just cut to step 6.

    Also the difficulty level is way too high. I found it very easy to disassemble the unit.

    Paul Decaro - Yanıt

  5. JBL Charge 4 Motherboard Replacement: adım 5, 2 resimden 1. JBL Charge 4 Motherboard Replacement: adım 5, 2 resimden 2.
    • Push the radiator off of the frame of the device.

    • Repeat on the other side.

    • The passive bass radiators seal out water from inside the device. Removing them multiple times may compromise the waterproof nature of the speaker.

  6. JBL Charge 4 Motherboard Replacement, Battery: adım 6, 2 resimden 1. JBL Charge 4 Motherboard Replacement, Battery: adım 6, 2 resimden 2.
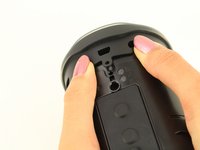
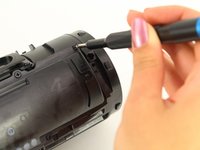
    • Remove the two 6mm Phillips #0 screws on the front side of the port bay cover.

  7. JBL Charge 4 Motherboard Replacement: adım 7, 1 resimden 1.
    • Gently slide the cover back and off the hooks.

    • Remove the port bay cover.

    This charge 4 is different from the one I have

    NOVA JINX - Yanıt

  8. JBL Charge 4 Motherboard Replacement: adım 8, 3 resimden 1. JBL Charge 4 Motherboard Replacement: adım 8, 3 resimden 2. JBL Charge 4 Motherboard Replacement: adım 8, 3 resimden 3.
    • Remove the two 6mm Phillips #0 screws.

    • Remove the four 8mm Phillips #0 screws.

  9. JBL Charge 4 Motherboard Replacement: adım 9, 1 resimden 1.
    • Lift up the battery cover.

  10. JBL Charge 4 Motherboard Replacement: adım 10, 3 resimden 1. JBL Charge 4 Motherboard Replacement: adım 10, 3 resimden 2. JBL Charge 4 Motherboard Replacement: adım 10, 3 resimden 3.
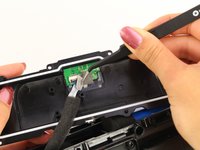
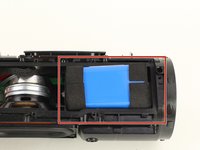
    • Remove the sticky tape to expose the white ribbon cable ZIF connector.

    • Flip up the black locking flap on the ZIF connector with the tip of a spudger or your fingernail to release the cable.

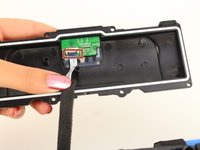
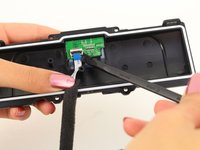
    • Remove the white ribbon cable from the battery cover and place the cover to the side.

    Don't remove this white ribbon cable from the circuit board, it's almost impossible to plug it back. Instead of removing the cable, just remove the circuit board which is glued loosely to the plate. If you can get to the battery itself, you don't have to remove the circuit board neither.

    Htluu - Yanıt

  11. JBL Charge 4 Motherboard Replacement: adım 11, 2 resimden 1. JBL Charge 4 Motherboard Replacement: adım 11, 2 resimden 2.
    • Remove the battery from the battery socket by gently pulling on it.

  12. JBL Charge 4 Motherboard Replacement: adım 12, 3 resimden 1. JBL Charge 4 Motherboard Replacement: adım 12, 3 resimden 2. JBL Charge 4 Motherboard Replacement: adım 12, 3 resimden 3.
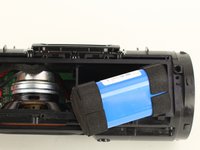
    • Pull out the battery enough to expose the battery's wire connector.

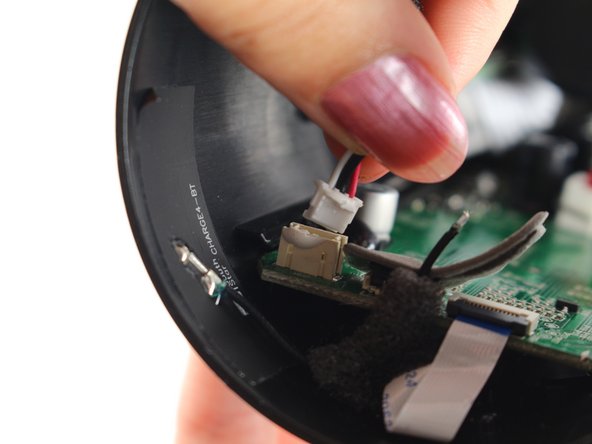
    • Push down on the white tab and gently pull out the battery-device connector.

    手順を見てバッテリー交換したんですが、じゅうでんしてもランプが五つ点灯しません。なぜですか?

    junichi - Yanıt

    外した全てのコネクタは確実に装着できていますか?今一度、確認してみてください。

    Midori Doi -

  13. JBL Charge 4 Motherboard Replacement, Speaker: adım 13, 2 resimden 1. JBL Charge 4 Motherboard Replacement, Speaker: adım 13, 2 resimden 2.
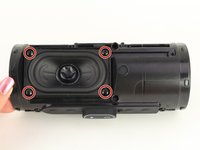
    • Flip the device so that the speaker faces you.

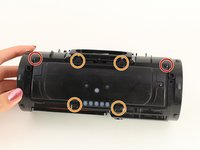
    • Remove the four 8mm Phillips #1 screws.

  14. JBL Charge 4 Motherboard Replacement: adım 14, 1 resimden 1.
    • Gently pull out the speaker.

    Bitte mal Artikel Nr des Lautsprechers

    Meiner schrabt bei hoher Lautstärke

    Tony - Yanıt

  15. JBL Charge 4 Motherboard Replacement: adım 15, 2 resimden 1. JBL Charge 4 Motherboard Replacement: adım 15, 2 resimden 2.
    • Desolder the red and black wires.

    • A guide for soldering and desoldering can be found here.

    Where can I buy the driver from ????

    Annie Angelica Chetty - Yanıt

    If you can’t find a Jbl Charge 4 driver anywhere just try to send it into Jbl maintenance they should have a bunch of them

    A Potato -

    mine is blown also unfortunately :(

    A Potato -

    Error in guide. No need to remove end caps.

    Drew Van Zandt - Yanıt

    There is a major mistake in this guide, there is absolutely no reason to remove the passive radiators! The difficulty should be lowered also.

    PROXYhx - Yanıt

  16. JBL Charge 4 Motherboard Replacement, Motherboard: adım 16, 3 resimden 1. JBL Charge 4 Motherboard Replacement, Motherboard: adım 16, 3 resimden 2. JBL Charge 4 Motherboard Replacement, Motherboard: adım 16, 3 resimden 3.
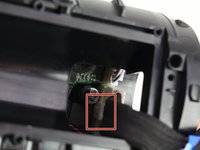
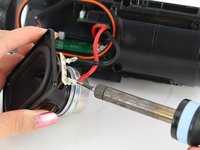
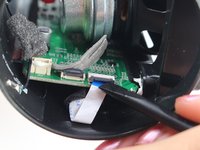
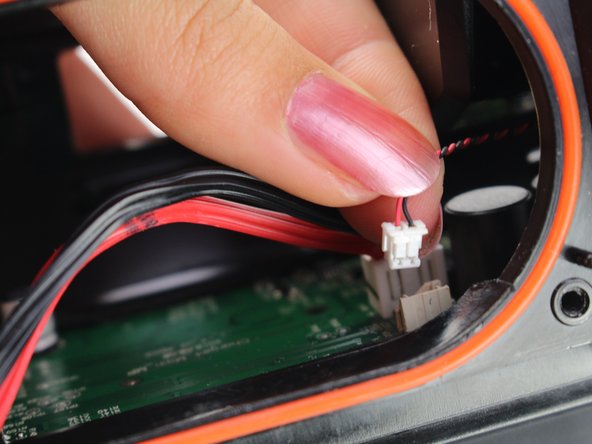
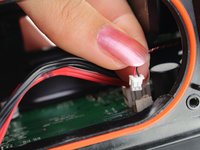
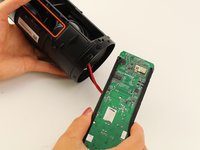
    • Remove the wire harness coming from the port bay on the left side of the motherboard by gently lifting the connector from its housing.

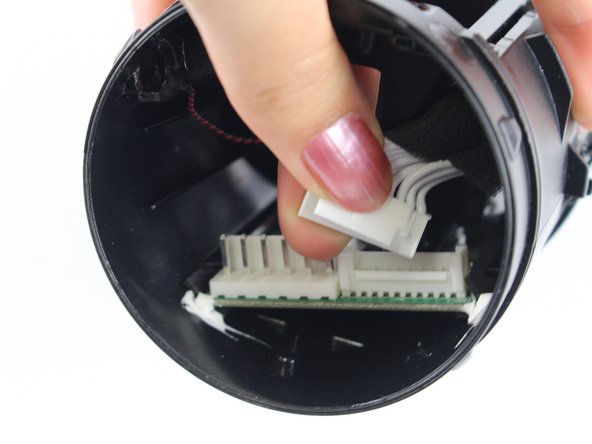
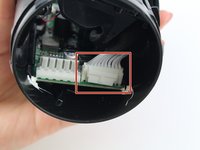
    • Remove the white ribbon cable from the ZIF connector by lifting the black locking flap on the connector with a spudger or your fingernail.

    The Bluetooth antenna wire!

    vanny tran - Yanıt

  17. JBL Charge 4 Motherboard Replacement: adım 17, 2 resimden 1. JBL Charge 4 Motherboard Replacement: adım 17, 2 resimden 2.
    • Remove the ground cable harness next to the speaker wire by gentling pulling it from the connector.

  18. JBL Charge 4 Motherboard Replacement: adım 18, 2 resimden 1. JBL Charge 4 Motherboard Replacement: adım 18, 2 resimden 2.
    • Flip the speaker around to the other side.

    • Remove the wiring harness leading to the port bay by pressing down on the tab and gently pulling the harness from the connector.

  19. JBL Charge 4 Motherboard Replacement: adım 19, 3 resimden 1. JBL Charge 4 Motherboard Replacement: adım 19, 3 resimden 2. JBL Charge 4 Motherboard Replacement: adım 19, 3 resimden 3.
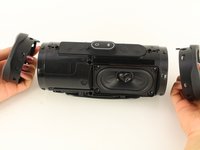
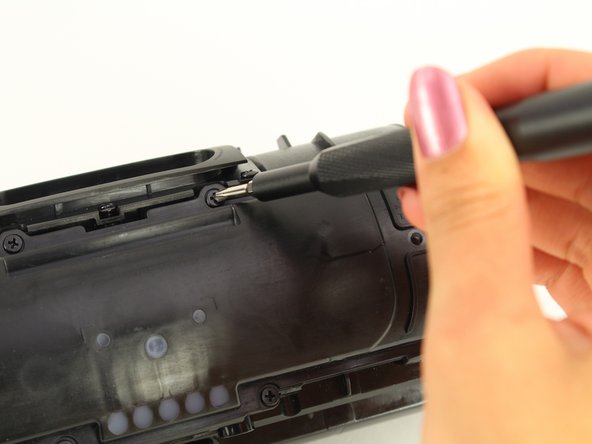
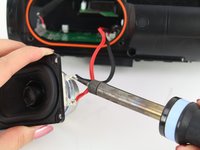
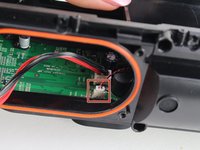
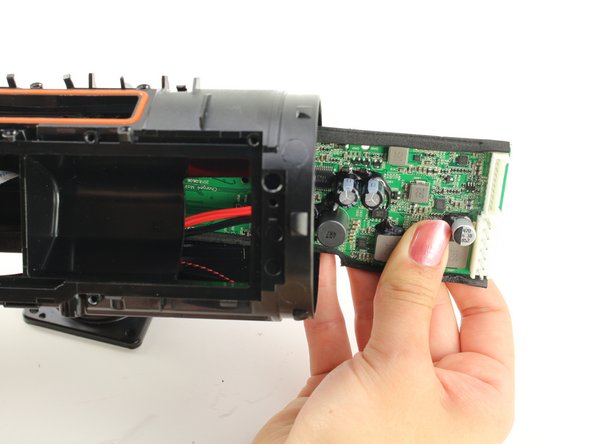
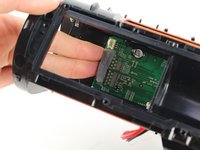
    • Push the motherboard from either side of the housing along its tracks.

    • Pull out the motherboard from the speaker housing.

    • When putting the motherboard back in the housing, ensure that it is between the two tracks on the top side of the speaker.

    Mi tablilla no pasa carga a la batería tiene sobre calentamiento en varios componentes

    Donde puedo conseguir una tablilla (motherboar)

    Estos son los componentes con sobrecalentamiento donde podría mandar las fotos de los componentes?

    Eddy Quintana - Yanıt

    Hi!

    Where can I buy the motherboard? I charged my speaker 3 times and now it does not charge anymore. I opened and I see that a white paste, burst some components.

    Help me pleasee!!!!

    Thanks!

    Pablo Vargas - Yanıt

Sonuç

To reassemble your device, follow these instructions in reverse order.

11 farklı kişi bu kılavuzu tamamladı.

Zachary Colwell

Üyelik tarihi: 01/24/19

2.031 İtibar

5 adet Kılavuz yazıldı

Ekip

Cal Poly, Team S1-G1, White Winter 2019 Cal Poly, Team S1-G1, White Winter 2019 üyesi

CPSU-WHITE-W19S1G1

4 Üyeler

27 adet Kılavuz yazıldı

4Kılavuz Yorumları

Where i could buy a replacement motherboard for jbl charge 4?thank you.

bbt8mikael_06 - Yanıt

This guide has a vital flaw. Just look at the loose wire cause by a broken solder in image 16!

PAJ 101 - Yanıt

that's the antenna cable which was pulled out of the connector. The step of popping the antenna connector out is missing.

Dan Glogoveanu -

from where i buy or replace the motherboard of jbl charge 4?

Aman Bisht - Yanıt

Yorum Ekle

İstatistikleri Görüntüle:

Son 24 Saat: 7

Son 7 gün: 33

Son 30 gün: 184

Her zaman: 14,592