Giriş
Welcome to our guide for replacing the motherboard in your JBL Charge 5 Speaker. This guide is for the TT version, but it's applicable with slight variations for other models. Before you begin the repair, take a look at the JBL Charge 5 Troubleshooting page for assistance. If you've ruled out software, battery, audio, or connectivity issues, follow this guide to replace the motherboard of your JBL Charge 5 Speaker.
Note: This repair requires advanced technical skills.
If uncertain, seek professional help or contact JBL's customer support.
Guide Highlights:
- Detailed step-by-step instructions with illustrations.
- Read the guide entirely before starting.
- Ensure advanced technical skills for this repair.
Check Warranty:
- If under warranty, contact the manufacturer or an authorized service center for assistance.
Model-Specific Considerations:
- Refer to the official service manual or contact JBL for model-specific information.
Post-Repair:
- Conduct a functionality test.
- Verify connectivity, power, and audio performance.
Caution:
- Motherboard replacement may vary by model; follow steps with caution.
- If uncomfortable at any point, seek professional assistance.
Before you begin, be sure the device is powered off and disconnected from the charger.
Neye ihtiyacın var
-
-
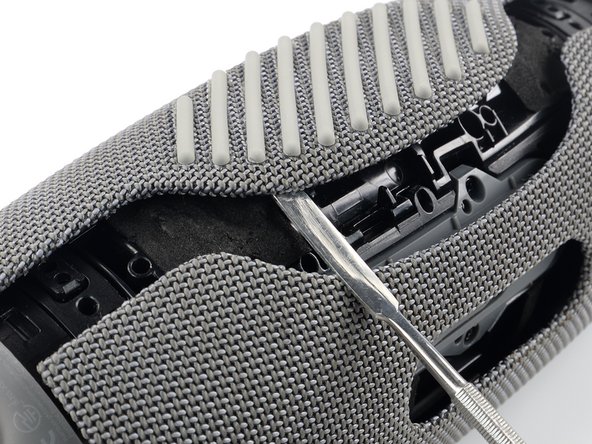
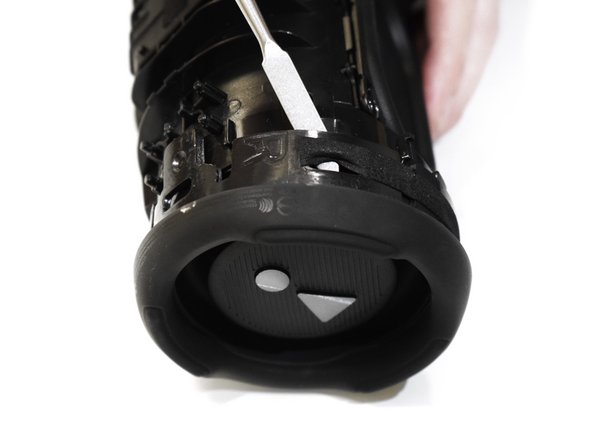
Insert the flat end of a metal spudger into the seam between the two halves of the fabric cover.
-
Push the spudger underneath the edge of the fabric cover without the textured rubber and pry upwards to release its plastic clips.
-
-
-
Repeat the previous step, using your spudger to work your way along the entire seam to release the remaining plastic clips.
-
-
-
Use a Phillips screwdriver to remove the two 10.6 mm-long screws securing the fabric cover.
-
-
-
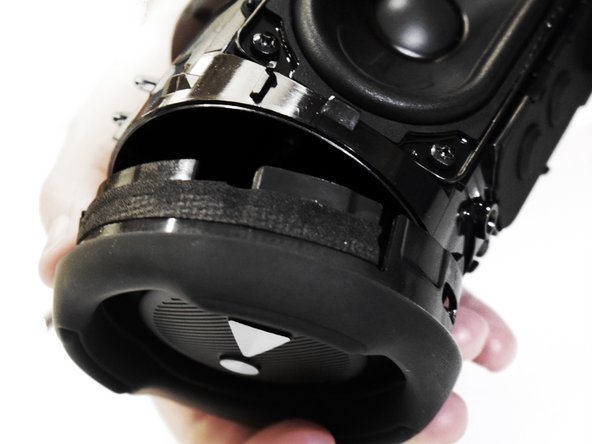
Use your metal spudger to pry up the other edge of the fabric cover—the side with the textured rubber—to release the remaining plastic clips.
-
-
-
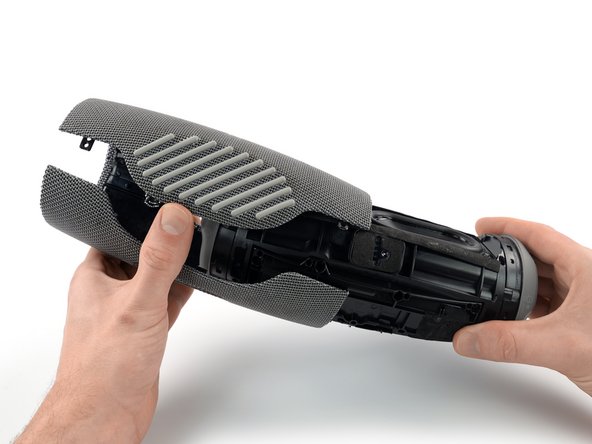
Use one hand to spread the edges of the fabric cover apart and your other hand to pull the speaker assembly away from the cover.
-
Remove the fabric cover.
-
-
-
Use a Phillips screwdriver to remove the eight 10.6 mm-long screws securing the battery cover.
-
-
-
Lift the battery up and shift it out of the way to gain access to the battery connector. Don't try to completely remove it just yet—it's still connected to the device.
-
-
-
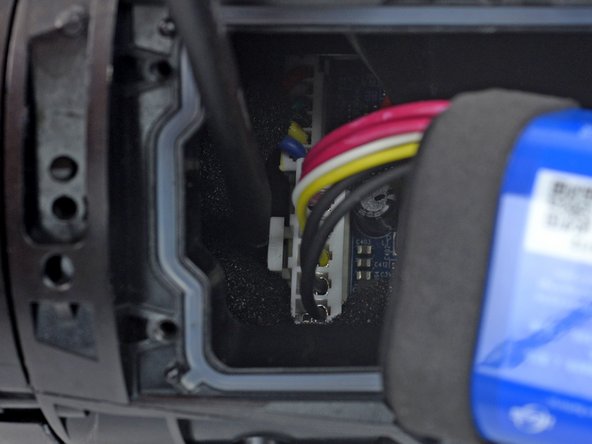
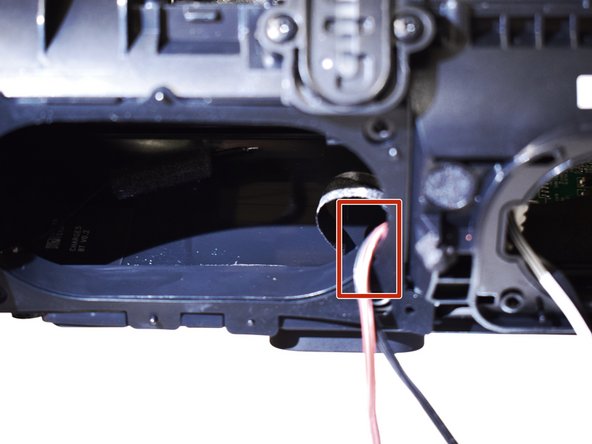
The battery is connected to the motherboard with a power cable connector that has a small tab on the side that locks it in place.
-
-
-
-
Insert a plastic spudger into the battery connector cutout.
-
Use your spudger to squeeze the tab against the connector to release it.
-
Use your free hand to grab the battery cables just above the connector and pull the connector straight up from its socket wiggling it left and right to loosen the clips securing it.
-
-
-
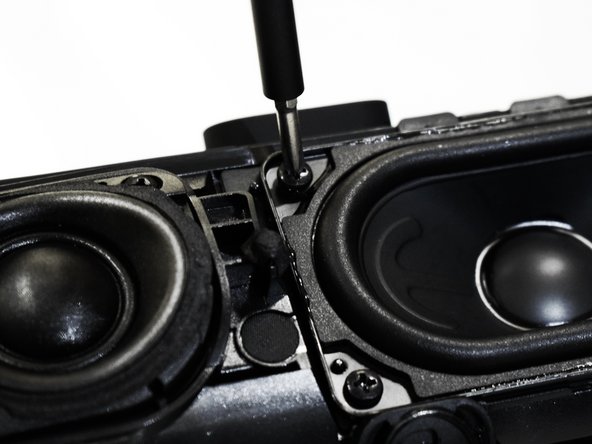
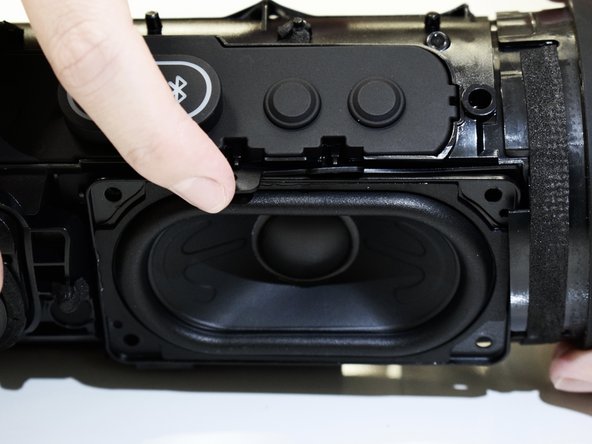
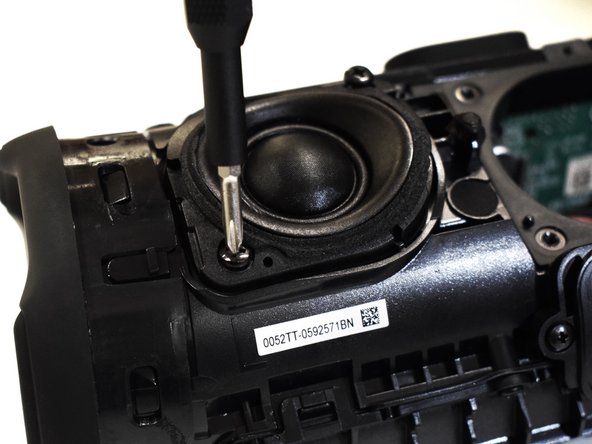
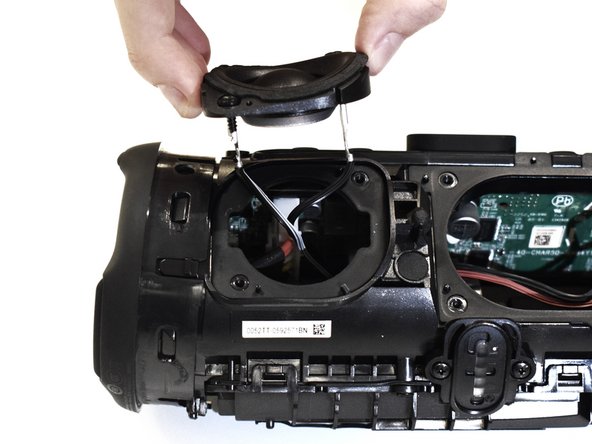
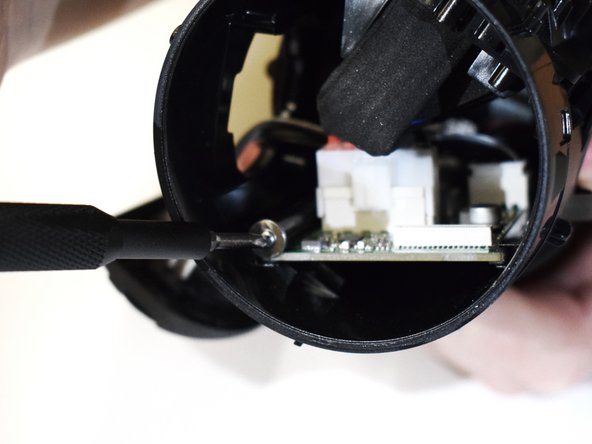
Using a Phillips #1 screwdriver, remove the four 16.5 mm screws on the corners around the oval speaker.
-
-
-
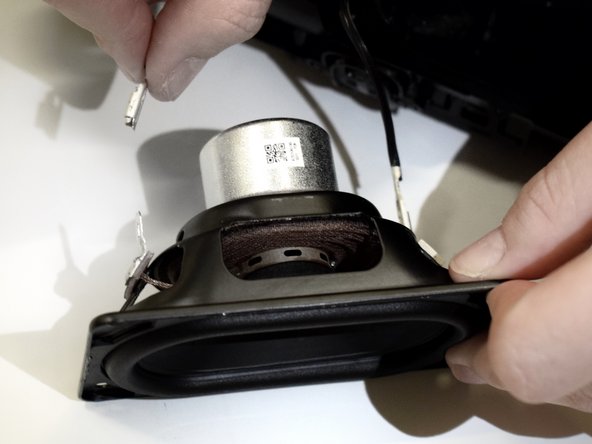
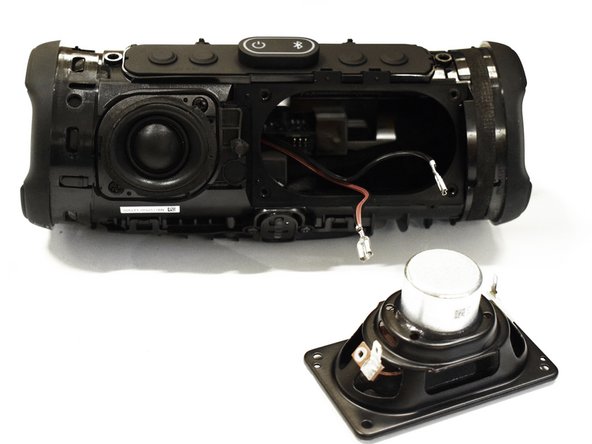
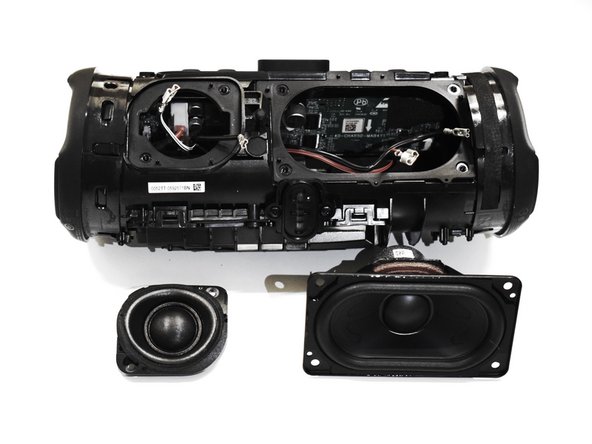
Using a spudger, pry the radiator off of the frame of the device.
-
Repeat on the other side if necessary.
-


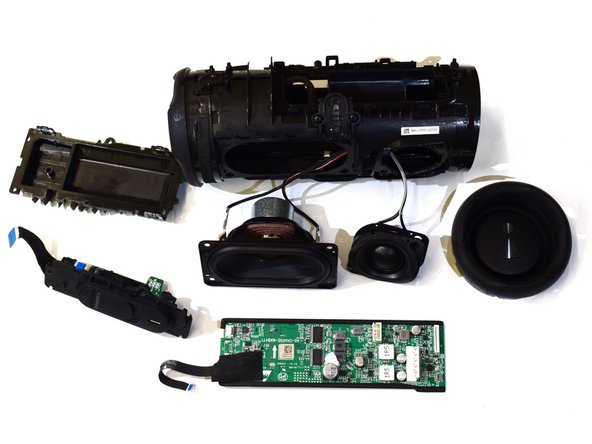
To reassemble your device, follow these instructions in reverse order.
To reassemble your device, follow these instructions in reverse order.
İptal et: Bu kılavuzu tamamlamadım.
Bir başkası bu kılavuzu tamamladı.

Ekip

Western Carolina University, Team 1-2, Virtue Fall 2023 Western Carolina University, Team 1-2, Virtue Fall 2023 üyesi
WCU-VIRTUE-F23S1G2
5 Üyeler
6 adet Kılavuz yazıldı
Bir Yorum
Any suggestions on where to buy a replacement motherboard? I'm coming up blank trying to find one. Any help would be greatly appreciated.