Bu sürüm, hatalı düzenlemeler içerebilir. En son doğrulanmış bellek kopyası dönün.
Neye ihtiyacın var
-
Bu adım çevrilmemiş. Çevrilmesine yardım edin
-
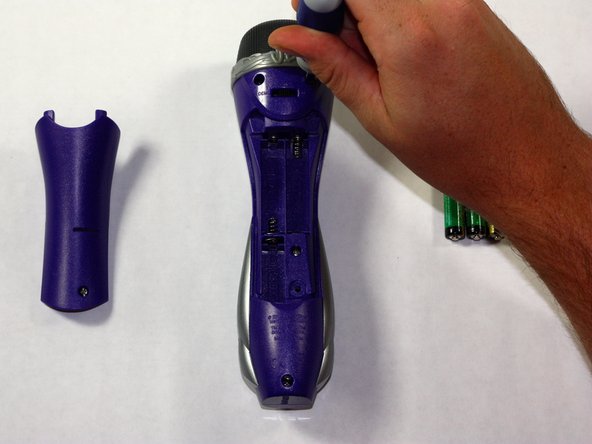
Remove the back panel of the device by unscrewing the single #8 11.6 mm Flathead screw on the back of the device.
-
-
-
Bu adım çevrilmemiş. Çevrilmesine yardım edin
-
Unscrew the other 4, #8 11.5 mm Phillips head screws to remove the entire back half of the device.
-
Pull apart the device once screws are loose, splitting the device in half.
-
-
Bu adım çevrilmemiş. Çevrilmesine yardım edin
-
Keeping all wires connected to their attachments, place the front half of the device face down.
-
-
Bu adım çevrilmemiş. Çevrilmesine yardım edin
-
Remove the 2, #8 11.7 mm speaker guard screws with the Phillips Head screw driver.
-
-
Bu adım çevrilmemiş. Çevrilmesine yardım edin
-
Disconnect the speaker wires from the speaker and replace it with the new one
-
Refer to this guide for help with soldering the wires back onto the speaker.
-


Ekip

Baylor, Team 4-1, Williams Fall 2014 Baylor, Team 4-1, Williams Fall 2014 üyesi
BU-WILLIAMS-F14S4G1
3 Üyeler
4 adet Kılavuz yazıldı