Ana içeriğe geç

Karcher Carpet Cleaner 10066730 2014 Breaker Replacement

Neye ihtiyacın var

  1. Karcher Carpet Cleaner 10066730 2014 Breaker Replacement, Remove the screws securing the front panel: adım 1, 1 resimden 1.
    • Before beginning repairs, disconnect the device from power, disconnect all hoses, drain and depressurize the system, and let the device cool if the heater was recently used.

    • Use a Phillips screwdriver to remove the six screws securing the front panel.

  2. Karcher Carpet Cleaner 10066730 2014 Breaker Replacement, Tilt the front panel down: adım 2, 2 resimden 1. Karcher Carpet Cleaner 10066730 2014 Breaker Replacement, Tilt the front panel down: adım 2, 2 resimden 2.
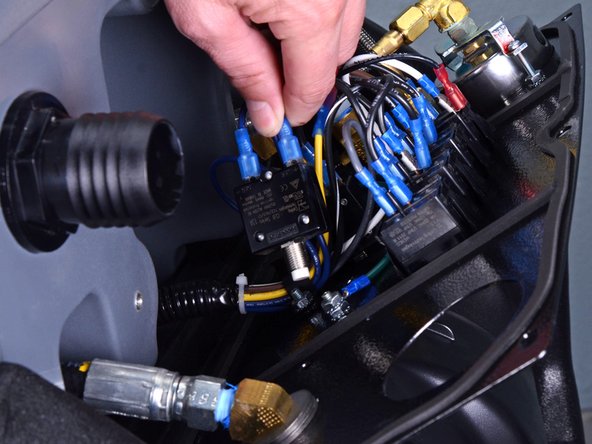
    • Grip the front panel at the top and tilt down to reveal the switch electronics.

    • The front panel will stay attached to the device with the flexible tubing.

  3. Karcher Carpet Cleaner 10066730 2014 Breaker Replacement, Remove the breaker button cover: adım 3, 1 resimden 1.
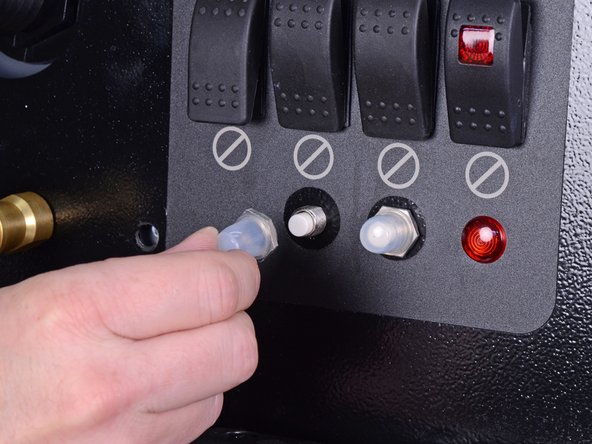
    • Use a 16 mm socket to loosen the nut on the breaker button cover.

  4. Karcher Carpet Cleaner 10066730 2014 Breaker Replacement: adım 4, 2 resimden 1. Karcher Carpet Cleaner 10066730 2014 Breaker Replacement: adım 4, 2 resimden 2.
    • Remove the breaker button cover.

  5. Karcher Carpet Cleaner 10066730 2014 Breaker Replacement, Remove the breaker wires: adım 5, 2 resimden 1. Karcher Carpet Cleaner 10066730 2014 Breaker Replacement, Remove the breaker wires: adım 5, 2 resimden 2.
    • Separate the breaker from the front panel.

  6. Karcher Carpet Cleaner 10066730 2014 Breaker Replacement, Remove the breaker: adım 6, 3 resimden 1. Karcher Carpet Cleaner 10066730 2014 Breaker Replacement, Remove the breaker: adım 6, 3 resimden 2. Karcher Carpet Cleaner 10066730 2014 Breaker Replacement, Remove the breaker: adım 6, 3 resimden 3.
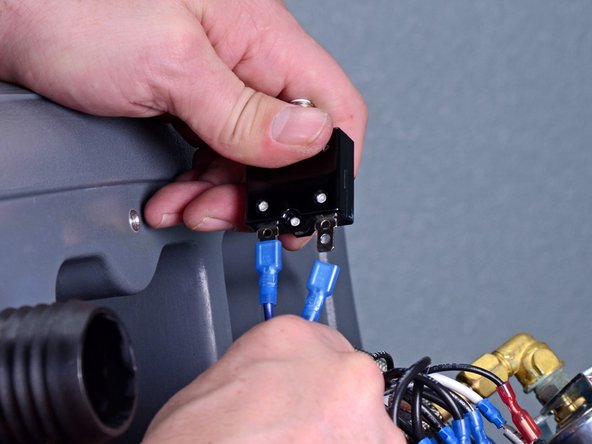
    • Grip the black wire by its blue connector and pull directly away from the breaker to remove it.

    • Grip the dark blue wire by its blue connector and pull directly away from the breaker to remove it.

    • Make a note of which wire goes where to help during reassembly.

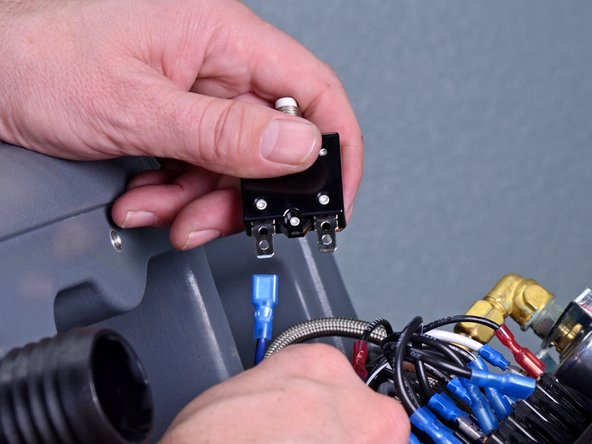
    • Only the breaker remains.

Sonuç

To reassemble your device, follow these instructions in reverse order.

Bir başkası bu kılavuzu tamamladı.

Carsten Frauenheim

Üyelik tarihi: 03/10/20

113.811 İtibar

338 adet Kılavuz yazıldı

Ekip

iFixit iFixit üyesi

Staff

135 Üyeler

16.832 adet Kılavuz yazıldı

0 Yorum

Yorum Ekle

İstatistikleri Görüntüle:

Son 24 Saat: 0

Son 7 gün: 5

Son 30 gün: 20

Her zaman: 406