Kindle Fire HDX 7" Display Assembly Replacement
Giriş
1. adıma gitReplacement guide for the display assembly on a Kindle Fire HDX 7” tablet.
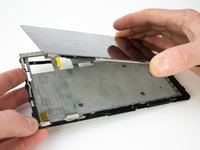
The display assembly is glued to the mid-frame and will require some heat to make removal possible.
Neye ihtiyacın var
-
-
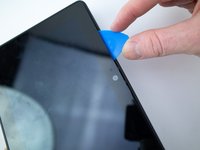
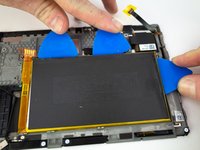
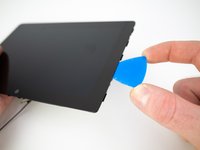
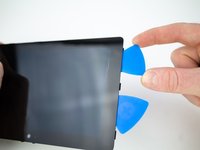
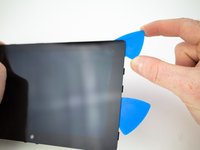
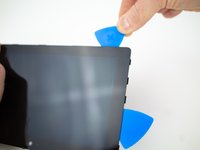
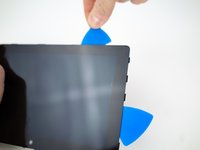
Insert an opening pick underneath the speaker bezel, and slide it along the perimeter to separate it from the tablet.
-
-
-
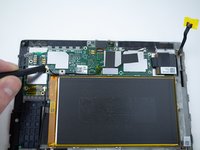
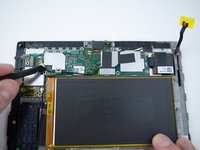
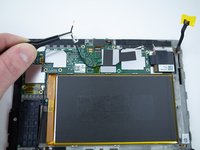
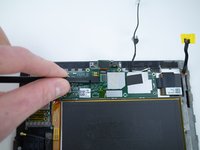
Use the flat end of a spudger to pry up and disconnect the rear panel press-fit connector from the motherboard.
When re assembling the press fit connector will not stay in place when trying the shut the case, it seems too short.
Is there a nack or trick to doing this please?
-
-
-
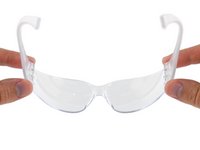
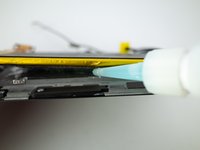
Wear eye protection when handling and applying the adhesive remover. (Eye protection is included in your kit.)
-
Do not wear contact lenses without eye protection.
-
Protective gloves are also included in your kit. If you are concerned about possible skin irritation, put your gloves on now.
-
-
-
-
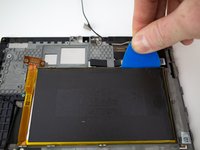
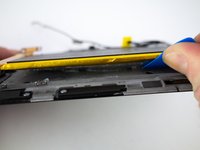
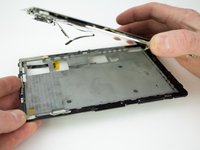
Remove the battery from the mid-frame.
I finished adding the battery and found the directions 100 percent accurate for the disassembly. The assembly is another issue. When you remove the mother board in step 12, you also unplug the two ribbon cables beneath it. Assembly is next to impossible with two ribbon cables below the motherboard moving and not lined up. I was able to get slack on the large ribbon cable but the one with the smaller cable had no extra slack. I then took a small dremel tool and removed the grey structural tab the cable ran under This gave me the slack I needed for installation of the cables. Been two months now and the Kindle is running like new.
-
-
Bu adımda kullanılan alet:Tweezers$4.99
-
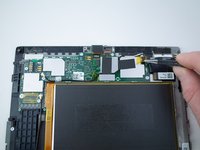
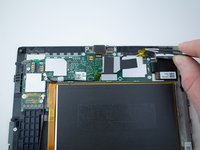
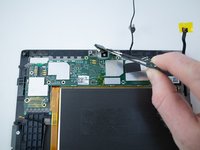
Grab the yellow tape with a pair of tweezers and pull upwards to disconnect the press-fit connector.
-
-
-
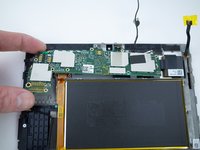
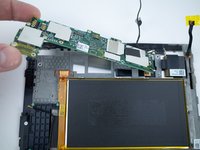
Remove the nine 3mm T6 Torx screws from the motherboard.
What is that black tape holding the antenna called? It is metallic on the other side. I dont think mine will re-stick is there something else I can use or do I need to find the same stuff? For this Kindle, reversing your steps doesnt quite work if you dont know what tapes and adhesives to get to close it up. I found the yellow tape is called a heat transfer tape but I still have no idea what double sided adhesive to get to mount the screen/digitizer assembly and bezel back on. Dont think Ill be putting any back on the battery and dont think I want it to be as difficult as the original, any suggestions please? Im stuck at this step and am having trouble finding the answer anywhere!
-
-
-
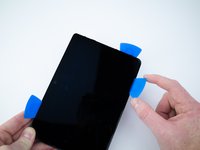
Heating the edges of the tablet will help soften the adhesive securing the display, making it easier to open.
-
Use a hairdryer or prepare an iOpener and apply it to the edge of the tablet for about 90 seconds in order to soften up the adhesive underneath.
-
To reassemble your device, follow these instructions in reverse order.
To reassemble your device, follow these instructions in reverse order.
İptal et: Bu kılavuzu tamamlamadım.
3 farklı kişi bu kılavuzu tamamladı.
10Kılavuz Yorumları
I don’t have access to opening picks or adhesive remover, what can I use in place of these?
Sophie, I regularly use playing cards, plastic lids from various disposable containers, guitar picks, and little metal objects that I get from parts of a clock or other small mechanical device. You’d be surprised how useful some of the little doodads can be as pick or pry tools. Apart from that: look for little tool kits that come with replacement parts. Many sellers include them as part of the deal. They aren’t nearly as good as the iFixIt tools, but they will do in a pinch until you can afford the better tools.
This guide seems to explain how to remove the display, but not how to replace it with a new one, even though the guide clearly states ‘replacement’. All anyone is left with is a ripped apart HDX? Do you have a guide on how to actually replace the screen and not just take out the old one?
I understand where you are coming from. It’s daunting enough to take the thing apart with all the thin ribbon cables and tiny wires, not to mention the PCB and battery removal possibly going wrong. Let me tell you, it’s not too tough to do the replacement by following the instructions in reverse. All you need to do is remember that the fate of the world rests in your steady hand. Just kidding.
My advice: take it one step at a time, take a break if you get impatient or nervous… as long as you need. While you are working on reassembling the device, give it a try in a dry run (without adhesive or screws), then do it for real once (and only when) you are comfortable with the assembly.
Coming to this to do a little screen replacement on the kindle HDX 7” , I noticed your steps seem a bit out of order. Not a major issue as I just scrolled down but some of the steps are in the wrong order, battery, screen and motherboard removal. Which may send some down the wrong path :) Otherwise excellent manual, helped me muchly! Thank you !
So if I am just replacing the screen/digitizer do I need to remove the battery and mother board? How is the digitizer connected? Hope you see this & can answer. Thanks
I noticed that too. I removed the motherboard before the battery.d
Elroy -
A couple of things. What to use to reanchor the display to the frame? The double sided adhesive gets torn up removing the display. Also if the frame is put back together with the battery and the motherboard, it is easier to connect the display’s two cables.
Also: That display is VERY delicate. If you put the picks in too far you will rip the ribbon connections to the display. And when reassembling, where the ribbon wraps from the top needs to be tucked into the frame fist or you will get it together and the display won’t go flat on the frame. Also watch for the little rectangular magnets in the frame. I got some in backwards and the flap on my cover is not attractted to the kindle as before. I did not have to remove the motherboard or battery to change display.


