Giriş
Bir kot düğmesi (raptiye olarak da adlandırılır) bir kot pantolonun belden güvenli bir şekilde bağlanmasını sağlar.
Bu kılavuz yeni bir kot düğmesinin nasıl takılacağını gösterecektir.
Onarıma başlamadan önce kılavuzun tamamını okuyun ve gerekli alet ve malzemeleri toplayın. Patagonia'ya özgü malzemeler ideal olsa da gerekli değildir. Patagonia yedek parçaları Patagonia Müşteri Hizmetleri adresini arayarak veya mesaj atarak temin edilebilir.
Alternatif olarak, Patagonia ürünleri onarım değerlendirmesi için bir lokal perakende mağazasına götürülebilir veya posta ile onarım hizmeti aracılığıyla Patagonia'ya gönderilebilir.
Hadi tamir edelim!
UYARI! Küçük Parçalar. Patagonia, bu onarımların 3 yaş ve altındaki çocuklara yönelik giysiler üzerinde yapılmasını önermemektedir. Bunun yerine, profesyonel onarım hizmetleri için ürünü iade etmenizi öneririz.
İlgili eğitim: İş Pantolonunda Perçin Değişimi
Neye ihtiyacın var
-
-
Bir düğme ve raptiye de dahil olmak üzere yedek parçaları toplayın.
-
Kot pantolonu ön tarafı yukarı bakacak şekilde sağlam bir masa veya tezgahın üzerine koyun.
-
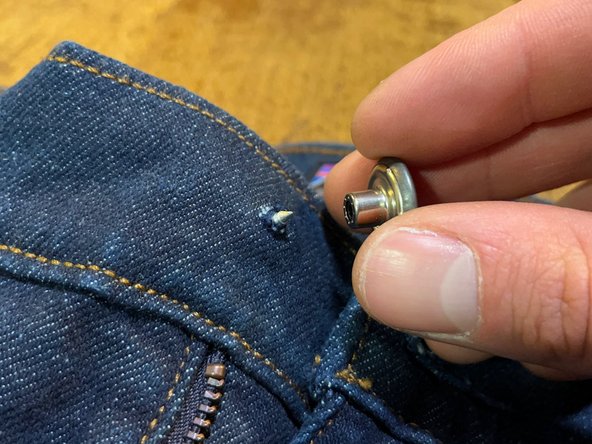
Fermuarı açın ve bel bandında bir önceki düğmenin bulunduğu deliği bulun.
-
Yenisini takmadan önce eski düğmenin kalıntılarını tamamen çıkarın. Eski parçaları sorumlu bir şekilde atın.
-
-
-
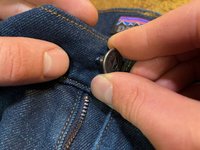
Raptiyeyi deliğin arkasına yerleştirin.
-
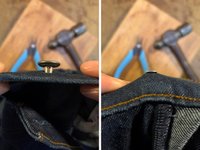
Raptiyeyi bel bandıyla aynı hizaya gelene kadar deliğin içine itin.
-
-
-
-
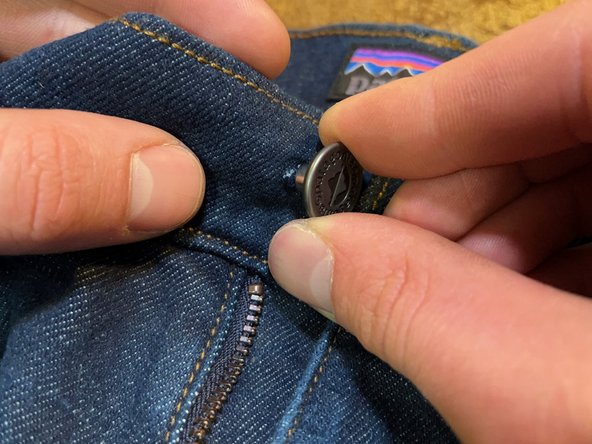
Raptiyeyi arkadan tutarak düğmeyi raptiyenin üstüne yerleştirin ve parçaları parmaklarınızla yerinde tutun.
-
-
-
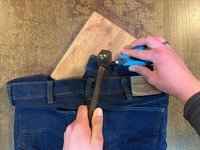
Kot pantolonu ters çevirin ve düğmenin hemen altına yumuşak bir tahta veya deri parçası gibi yumuşak ve düz bir çalışma yüzeyi yerleştirin.
-
Raptiyeyi yerinde tutmak için bir çift iğne uçlu pense kullanın ve raptiye ile düğme parçalarının hala hizalı olduğundan emin olun.
-
Raptiyeyi aşağı doğru düz bir vuruşla çekiçleyin.
-
-
-
Kot pantolonu ilikleyerek ve bel bandını çekerek yeni düğmeyi test edin ve sabitlendiğinden emin olun.
-
İptal et: Bu kılavuzu tamamlamadım.
48 farklı kişi bu kılavuzu tamamladı.
Bu çevirmenlere özel teşekkürler:
100%
Claire Miesch dünyayı onarmamıza yardım ediyor! Katkıda bulunmak ister misiniz?
Çeviriye Başlayın ›
10 Yorum
Nice, but let's consider how this situation occurs. The tack comes out of its hole, just simply replacing it is not realistic, unless the new tack is significantly bigger. So how do you "repair" the hole such that it will hold a tack again?
As noted in step 2, you can move the tack over to where the denim isn't damaged. If that will cause the jeans not to fit properly, you can sew a folded piece of denim behind the hole (sew around the edges on the inside of the jeans) and punch the tack through the new piece.
I didn´t have a new button and was in a pinch. Just ripped the old button off completely, jammed it in the tail end of a hammer and yanked it apart with som pliers. Then i followed the instructions in this fix. Worked like a charm, so far...
Thanks I’m gonna try this first!
The best thing to do is patch the hole. I simply use fabric glue and some pieces of blue jeans that you probably have hanging around. Trim off the extra threads and then apply fabric glue to the back of the waist band covering the hole made by the old button. Do the same on the front and then let dry. about 30 minutes or so, if you have a machine I always stitch back and for on the edges. Trim any edges or use additional glue to tack them down. Now because you have strengthened the hole carefully push the back of the button through where you can see the end, add the front to the nail end and turning the garment face down on a protected hard surface hammer about 3 times and check to see if it is sturdy, continue to hammer until you have reached the objective. Now you have got many more years with that button.


