Giriş
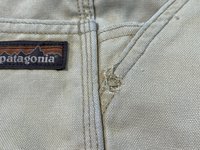
Perçin, genellikle kot pantolonlarda ve iş pantolonlarında bulunan, yırtılmayı önlemek ve giysinin dayanıklılığını artırmak için ceplerdeki ve dikişlerdeki stres noktalarını güçlendiren küçük bir metal bağlantı elemanıdır.
Bu kılavuzda yeni bir metal perçin takmanın iki yolu gösterilecektir:
- Bir el presi ve perçin kalıpları kullanarak (Adım 2 - 5) # Bir çekiç kullanarak (Adım 6 - 8) Onarıma başlamadan önce kılavuzun tamamını okuyun ve gerekli alet ve malzemeleri toplayın. Patagonia'ya özgü malzemeler ideal olsa da gerekli değildir. Patagonia yedek parçaları Patagonia Müşteri Hizmetleri adresini arayarak veya mesaj atarak temin edilebilir.
Alternatif olarak, Patagonia ürünleri onarım değerlendirmesi için bir local retail store mağazasına götürülebilir veya mail-in repair service aracılığıyla Patagonia'ya gönderilebilir.
Hadi tamir edelim!
DİKKAT! Küçük Parçalar. Patagonia, 3 yaş ve altındaki çocuklar için tasarlanan giysilerde bu onarımların yapılmasını önermemektedir. Bunun yerine, profesyonel onarım hizmetleri için ürünün iade edilmesini öneriyoruz.
İlgili öğretici: Jeans Düğmesinin Değiştirilmesi
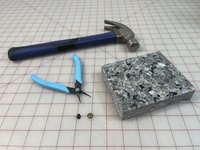
Neye ihtiyacın var
-
-
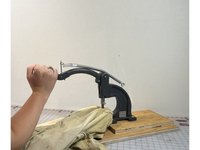
Bir el presi ve perçin kalıplarına erişiminiz varsa, Adım 2 - 5 ile devam edin.
-
El presi ve perçin kalıplarına erişiminiz yoksa, bu onarımı bir çekiçle tamamlamak için 6. Adıma geçin.
-
-
-
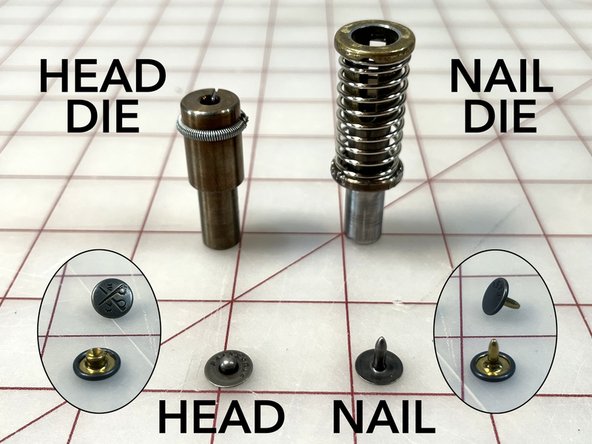
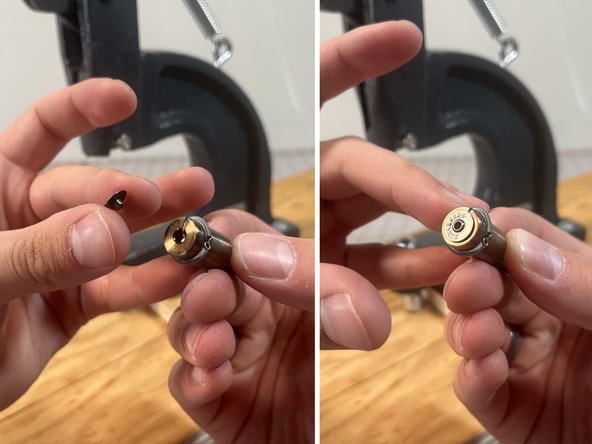
Perçinin (çivinin) arka kısmının çivi kalıbına oturup oturmadığını kontrol edin. Perçin çivisini bir kenara koyun ve çivi kalıbını el presinin alt yuvasına yerleştirin.
-
Perçinin ön kısmını (kafa) kafa kalıbına oturtun. Perçin başı kalıbın içinde güvenli bir şekilde durmalıdır.
-
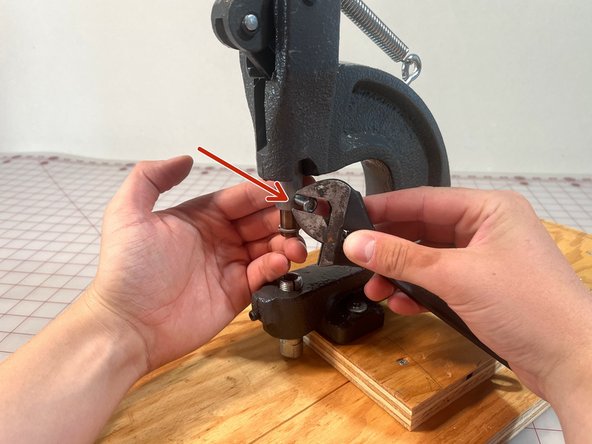
Kafa kalıbını prese yerleştirmek için:
-
Gerektiğinde parmaklarınızı, tornavidayı veya altıgen anahtarı kullanarak presin üst kalıp bağlantısına yakın tarafındaki sıkma mekanizmasını sökün.
-
Kalıbı yukarı doğru yerleştirin ve yerinde tutun.
-
Sıkma mekanizmasını sıkın.
-
-
-
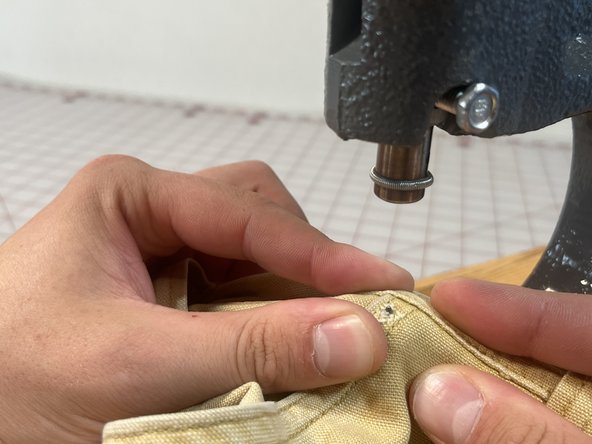
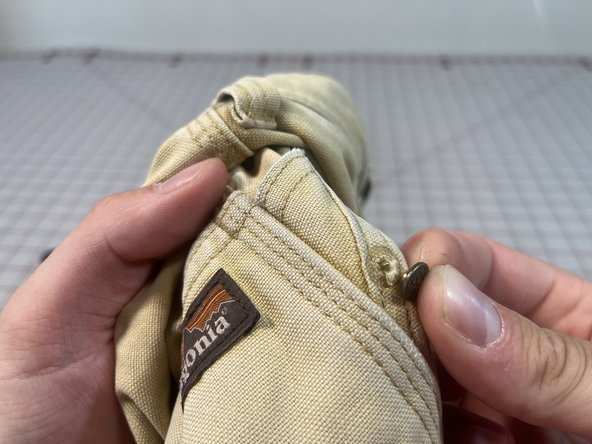
Perçin çivisini arka taraftan bir önceki perçinin bıraktığı deliğe yerleştirin.
-
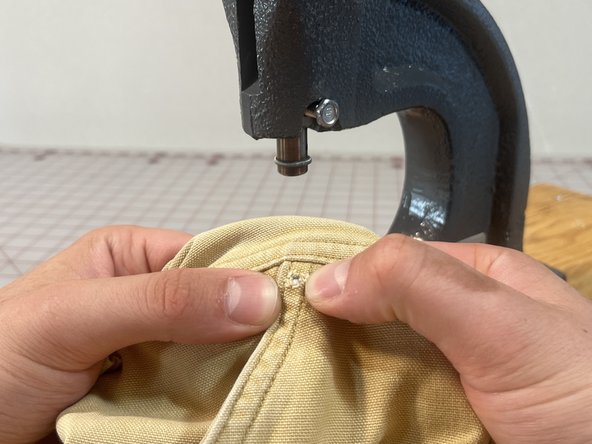
Bring the garment to the hand press and center the rivet nail into the bottom die.
-
Perçin çivisini yerinde, giysi ile aynı hizada ve delikten görülebilir şekilde tutmak için çivi kalıbının yayını aşağı doğru itin.
-
Baskın olmayan elinizle tüm parçaları yerinde tutun.
-
-
-
-
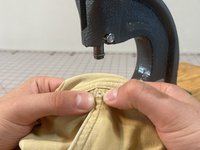
Perçini yerleştirmek için pres kolunu sıkıca aşağı çekin.
-
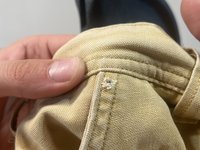
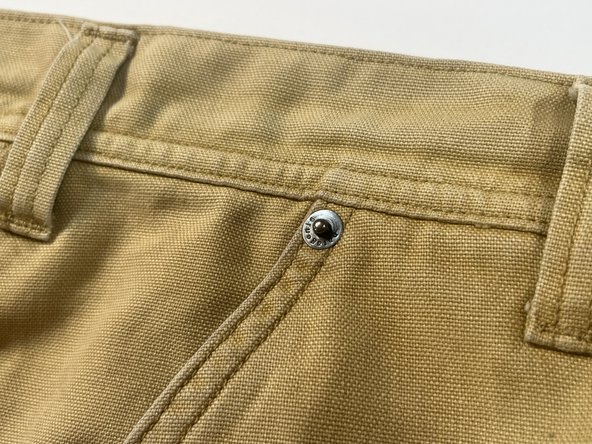
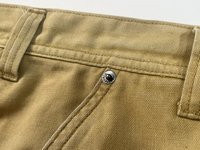
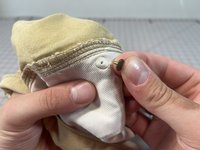
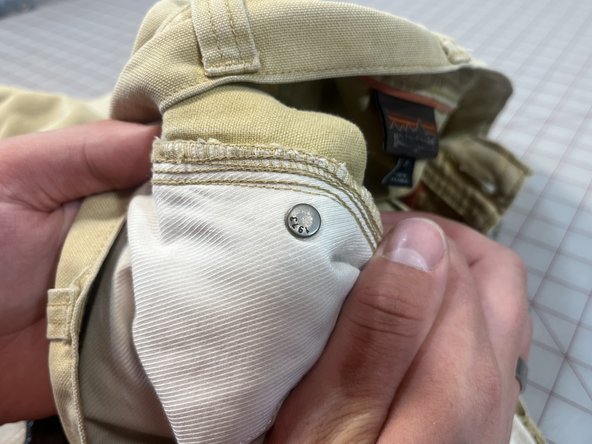
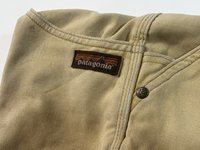
Perçinin sıkıca oturup oturmadığını kontrol edin:
-
Sağlam olduğunu test etmek için perçinin her iki tarafından çekin.
-
Ön ve arka parçalar birbirine paralel olmalı, açılı yerleştirilmemelidir.
-
Perçin dönmemeli.
-
Perçin dönerse, kafayı kafa kalıbına yeniden takın, çivi parçasını çivi kalıbıyla hizalayın ve el presini tekrar sıkıca çekin.
-
-
-
KUMAŞ HASARI: Perçin deliğini çevreleyen kumaş hasar görmüşse, yeni bir perçin yerleştirmeden önce bir takviye yaması dikilmelidir.
-
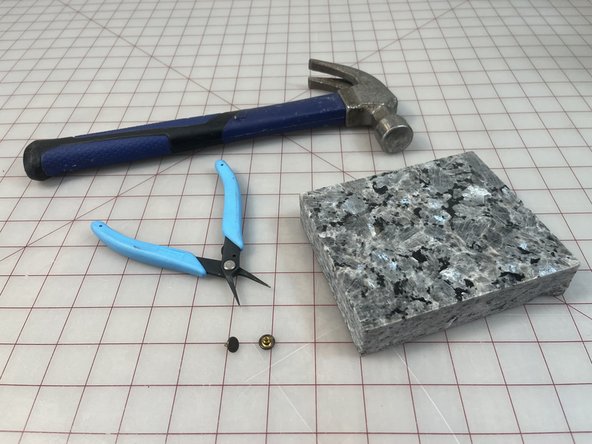
EL PRESİ MEVCUT DEĞİL: El presi kullanmadan perçinleri yerleştirmek mümkündür. Adım 6 - 8 ile devam edin.
-
-
-
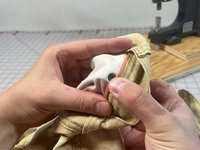
Perçinin baş ve çivi parçalarını orijinal perçinin bıraktığı deliğin her iki tarafına yerleştirin.
-
Perçinin her iki tarafını birlikte sıkıştırmak için parmaklarınızı veya kargaburnu pensesini kullanın.
-
-
-
Giysiyi perçin başı aşağı bakacak şekilde bir taş blok, hurda tahta parçası veya başka bir sert yüzey üzerine koyun.
-
Perçin çivisini yerinde tutmak için iğne uçlu pense kullanın ve baş ile çivi parçalarının hala hizalı olduğundan emin olun.
-
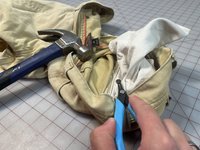
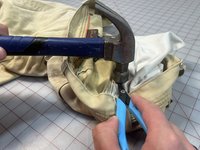
Perçin, pense olmadan hizalanacak kadar sabitlenene kadar perçinin arkasına bir çekiçle hafifçe vurun.
-
Penseyi çıkarın, ardından perçinin etrafındaki kumaşı yerinde tutun ve güvenli bir şekilde sabitlenene kadar perçini dikkatlice çakmaya devam edin.
-
-
-
Perçinin sıkıca oturup oturmadığını kontrol edin:
-
Sağlam olduğunu test etmek için perçinin her iki tarafından çekin.
-
Ön ve arka parçalar birbirine paralel olmalı, açılı yerleştirilmemelidir.
-
Perçin dönmemeli.
-
Perçin dönerse, tamamen sabitlenene kadar çekiçleme işlemini tekrarlayın.
-


İptal et: Bu kılavuzu tamamlamadım.
Bir başkası bu kılavuzu tamamladı.
Bu çevirmenlere özel teşekkürler:
100%

Mariana Roca dünyayı onarmamıza yardım ediyor! Katkıda bulunmak ister misiniz?
Çeviriye Başlayın ›

