Ana içeriğe geç
Lenovo ThinkPad T440p RAM Replacement

Lenovo ThinkPad T440p RAM Replacement

Christian Abad

Christian Abad ve başka bir katkıda bulunan

En son May 16, 2019 tarihinde güncellendi

5 dakika
Orta

The RAM is a simple replacement that only requires your fingers to remove it. Make sure to only apply pressure on the edges and not the RAM itself so as not to damage any parts it might be connected to.

Neye ihtiyacın var

Aletler

  1. Lenovo ThinkPad T440p RAM Replacement, Battery: adım 1, 1 resimden 1.
    • Flip the laptop so that the back is facing up.

  2. Lenovo ThinkPad T440p RAM Replacement: adım 2, 2 resimden 1. Lenovo ThinkPad T440p RAM Replacement: adım 2, 2 resimden 2.
    • Slide the battery latches to the unlocked position.

  3. Lenovo ThinkPad T440p RAM Replacement: adım 3, 2 resimden 1. Lenovo ThinkPad T440p RAM Replacement: adım 3, 2 resimden 2.
    • Slide the battery pack out of the battery slot.

  4. Lenovo ThinkPad T440p RAM Replacement, Back Cover: adım 4, 2 resimden 1. Lenovo ThinkPad T440p RAM Replacement, Back Cover: adım 4, 2 resimden 2.
    • Use a Phillips #1 screwdriver to remove the two 8mm screws holding the back cover.

  5. Lenovo ThinkPad T440p RAM Replacement: adım 5, 1 resimden 1.
    • Slide down the back cover.

  6. Lenovo ThinkPad T440p RAM Replacement: adım 6, 1 resimden 1.
    • Remove the back cover.

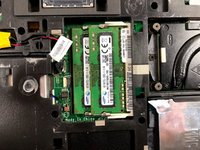
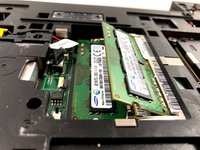
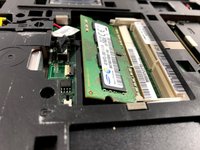
  7. Lenovo ThinkPad T440p RAM Replacement, RAM: adım 7, 3 resimden 1. Lenovo ThinkPad T440p RAM Replacement, RAM: adım 7, 3 resimden 2. Lenovo ThinkPad T440p RAM Replacement, RAM: adım 7, 3 resimden 3.
    • In the first memory slot, use your fingertips to spread the two white tabs that are holding down the RAM. The RAM will raise to an angle.

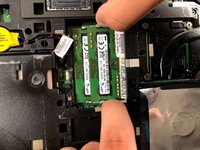
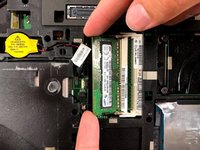
  8. Lenovo ThinkPad T440p RAM Replacement: adım 8, 1 resimden 1.
    • Remove the RAM by holding on its edges.

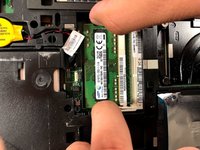
  9. Lenovo ThinkPad T440p RAM Replacement: adım 9, 3 resimden 1. Lenovo ThinkPad T440p RAM Replacement: adım 9, 3 resimden 2. Lenovo ThinkPad T440p RAM Replacement: adım 9, 3 resimden 3.
    • Repeat steps 1 and 2 to remove the second RAM.

Sonuç

To reassemble your device, follow these instructions in reverse order.

3 farklı kişi bu kılavuzu tamamladı.

Christian Abad

Üyelik tarihi: 03/20/19

1.530 İtibar

7 adet Kılavuz yazıldı

Ekip

UMass Dartmouth, Team S6-G5, Peak Spring 2019 UMass Dartmouth, Team S6-G5, Peak Spring 2019 üyesi

UMASSD-PEAK-S19S6G5

3 Üyeler

9 adet Kılavuz yazıldı

0 Yorum

Yorum Ekle

İstatistikleri Görüntüle:

Son 24 Saat: 0

Son 7 gün: 18

Son 30 gün: 60

Her zaman: 3,107