Ana içeriğe geç

Lenovo ThinkPad X1 Yoga Cooling Fan Replacement

Neye ihtiyacın var

  1. Lenovo ThinkPad X1 Yoga Cooling Fan Replacement, Back Cover: adım 1, 3 resimden 1. Lenovo ThinkPad X1 Yoga Cooling Fan Replacement, Back Cover: adım 1, 3 resimden 2. Lenovo ThinkPad X1 Yoga Cooling Fan Replacement, Back Cover: adım 1, 3 resimden 3.
    • Be sure to power off and unplug your device before you begin your repair.

    • Flip the computer over so the bottom is facing up.

    • Remove nine 4mm Phillips #1 screws from the bottom of the computer.

    • Use an iFixit opening tool to pry the back cover off of the laptop.

  2. Lenovo ThinkPad X1 Yoga Cooling Fan Replacement, Cooling Fan: adım 2, 1 resimden 1.
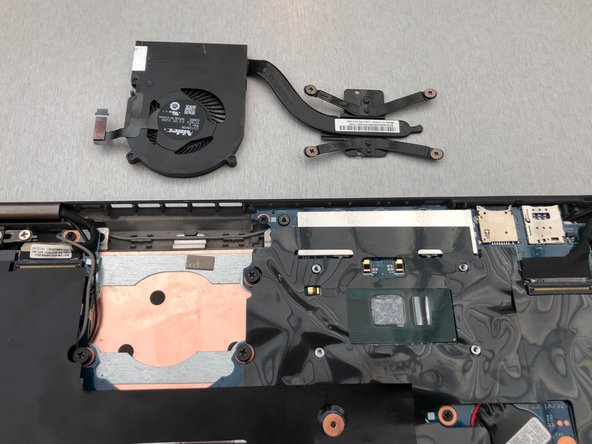
    • Remove four 4.5mm Phillips #1 screws from the corners of the heat sink.

  3. Lenovo ThinkPad X1 Yoga Cooling Fan Replacement: adım 3, 3 resimden 1. Lenovo ThinkPad X1 Yoga Cooling Fan Replacement: adım 3, 3 resimden 2. Lenovo ThinkPad X1 Yoga Cooling Fan Replacement: adım 3, 3 resimden 3.
    • Gently peel back the black plastic covering around the fan.

    • You may hear or feel the adhesive pulling away here.

    • Using an iFixit opening tool, flip up the small black cover of the fan plug.

  4. Lenovo ThinkPad X1 Yoga Cooling Fan Replacement: adım 4, 2 resimden 1. Lenovo ThinkPad X1 Yoga Cooling Fan Replacement: adım 4, 2 resimden 2.
    • Using tweezers, pull the plastic strip out.

  5. Lenovo ThinkPad X1 Yoga Cooling Fan Replacement: adım 5, 2 resimden 1. Lenovo ThinkPad X1 Yoga Cooling Fan Replacement: adım 5, 2 resimden 2.
    • Remove the fan from the computer.

Sonuç

To reassemble your device, follow these instructions in reverse order.

2 farklı kişi bu kılavuzu tamamladı.

0 Yorum

Yorum Ekle

İstatistikleri Görüntüle:

Son 24 Saat: 2

Son 7 gün: 34

Son 30 gün: 152

Her zaman: 6,012