Bu sürüm, hatalı düzenlemeler içerebilir. En son doğrulanmış bellek kopyası dönün.
Neye ihtiyacın var
-
Bu adım çevrilmemiş. Çevrilmesine yardım edin
-
First the case must be opened. Insert the blue plastic opening tool where the two casings meet. Pry up until you hear a clip pop and then carefully move around the device. Do this until the front and back casing are completely separate from one another.
-
-
Bu adım çevrilmemiş. Çevrilmesine yardım edin
-
Carefully remove the speaker by inserting the spudger between the case and the speaker. Pry upwards until the speaker comes out. Set the speaker to the side.
-
-
Bu adım çevrilmemiş. Çevrilmesine yardım edin
-
Use the spudger to repeatedly gouge between the battery and LCD. Work around the battery until it breaks free.
-
-
Bu adım çevrilmemiş. Çevrilmesine yardım edin
-
The tape around the battery's circuit board is extremely thorough. There are 2 pieces of tape, on folded over the side and another wrapped around the circuit board. Simply peel both off.
-
-
-
Bu adım çevrilmemiş. Çevrilmesine yardım edin
-
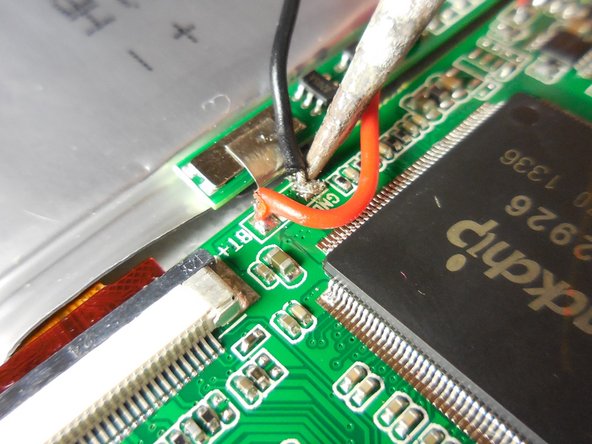
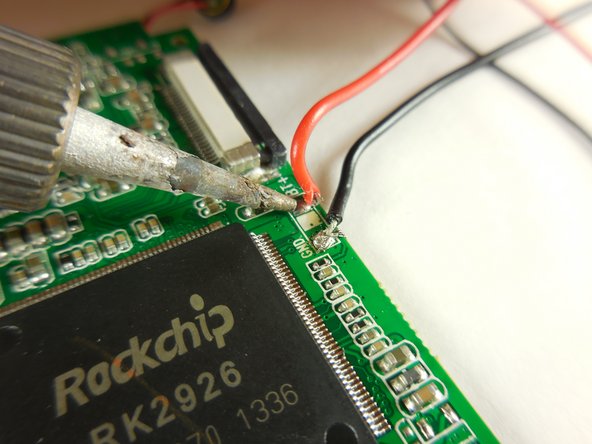
Now that the battery is pry'd free and the tape is removed, the wires should be able to move freely. Give yourself as much room as you need, and solder off the connections on the motherboard.
-
-
Bu adım çevrilmemiş. Çevrilmesine yardım edin
-
Remove the tape from these ribbon cables and their clips.
-
-
Bu adım çevrilmemiş. Çevrilmesine yardım edin
-
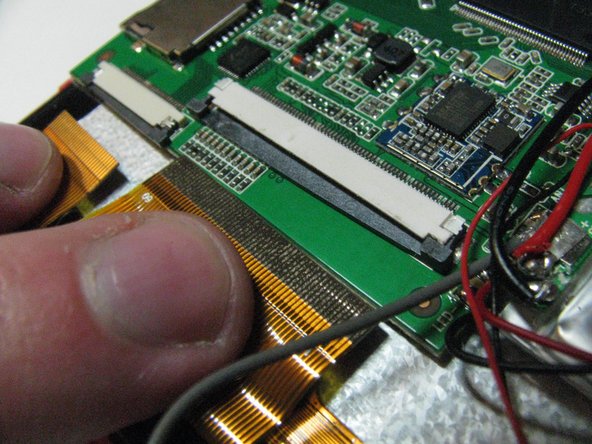
Remove the LCD and Digitizer ribbon cables from the motherboard by holding the clips open and pulling the ribbons out.
-
-
Bu adım çevrilmemiş. Çevrilmesine yardım edin
-
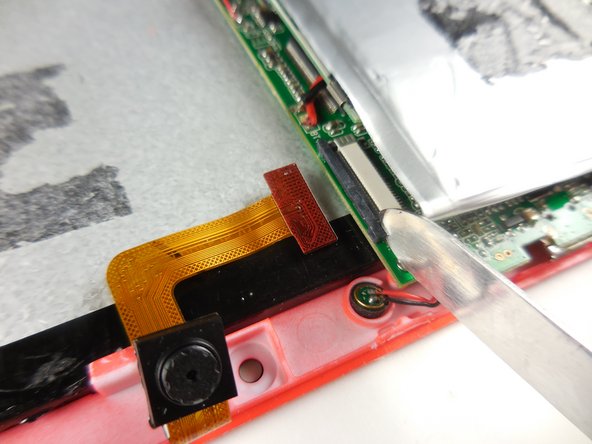
Remove the Camera Ribbon Cable, by holding the clip open and pulling the camera out.
-
-
Bu adım çevrilmemiş. Çevrilmesine yardım edin
-
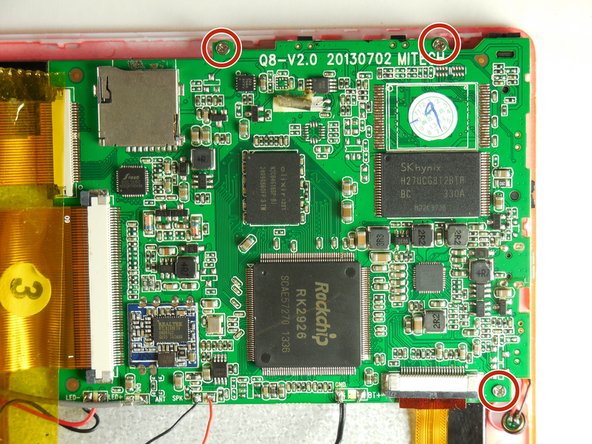
Using a screwdriver, unscrew the 3 screws which hold the motherboard on the case.
-
-
Bu adım çevrilmemiş. Çevrilmesine yardım edin
-
You must now use a soldering kit to remove the connections to the motherboard.
-
The battery wires. (If you had not finished this in an earlier step).
-
The Speaker Wires.
-
The Ground.
-
The LCD wires.
-
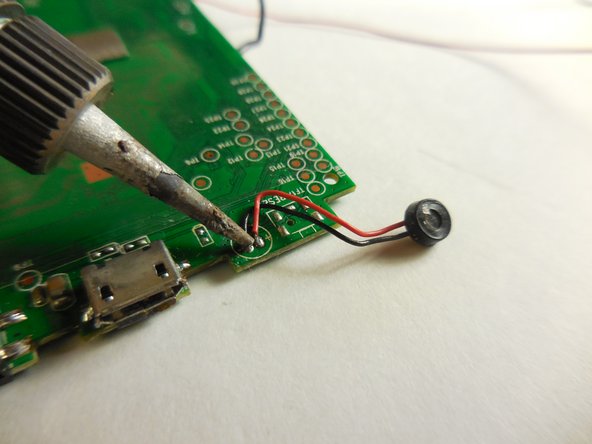
Finally, the microphone, which lies under the board.
-


Ekip

Colorado Springs, Team 2-5, Panko Spring 2015 Colorado Springs, Team 2-5, Panko Spring 2015 üyesi
UCCS-PANKO-S15S2G5
3 Üyeler
10 adet Kılavuz yazıldı