Ana içeriğe geç

Logitech G603 Switch Replacement

Neye ihtiyacın var

  1. Logitech G603 Switch Replacement, Switch: adım 1, 3 resimden 1. Logitech G603 Switch Replacement, Switch: adım 1, 3 resimden 2. Logitech G603 Switch Replacement, Switch: adım 1, 3 resimden 3.
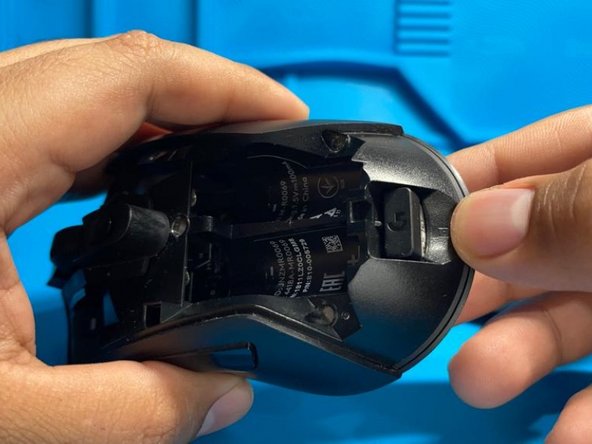
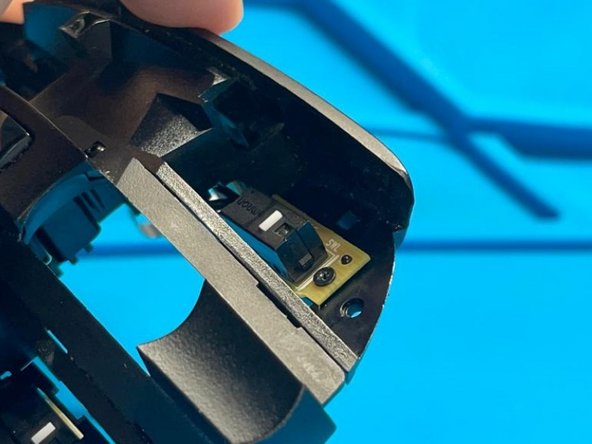
    • Flip the mouse onto its back.

    • Peel back the pads on the top and bottom of the mouse to reveal the four screws.

  2. Logitech G603 Switch Replacement: adım 2, 3 resimden 1. Logitech G603 Switch Replacement: adım 2, 3 resimden 2. Logitech G603 Switch Replacement: adım 2, 3 resimden 3.
    • Remove the four screws with a small Philips screwdriver and set them aside.

    • Remove the battery plate and batteries.

  3. Logitech G603 Switch Replacement: adım 3, 3 resimden 1. Logitech G603 Switch Replacement: adım 3, 3 resimden 2. Logitech G603 Switch Replacement: adım 3, 3 resimden 3.
    • Start at the same location as the previous step, and use your thumb to carefully pry the base from the shell of the mouse.

  4. Logitech G603 Switch Replacement: adım 4, 3 resimden 1. Logitech G603 Switch Replacement: adım 4, 3 resimden 2. Logitech G603 Switch Replacement: adım 4, 3 resimden 3.
    • Now that we have displaced the lower half we need to move to the front of the mouse.

    • There will be two crevices that are attaching the base to the shell of the mouse.

    • Using a spudger, gently and carefully pry along the dotted red line marked in the first photo until the shell and the base are separated.

    • As soon as the base and shell are separated, be careful not to pull them apart as they are still connected via a power and ribbon cable.

  5. Logitech G603 Switch Replacement: adım 5, 1 resimden 1.
    • Use this photo as a reference of what is to be expected when opening the mouse.

    • There will be two cables that need to be disconnected before completely separating the shell from the base.

    • In this photo, the left is the ribbon cable for inputs, and the right is the power cable.

  6. Logitech G603 Switch Replacement: adım 6, 3 resimden 1. Logitech G603 Switch Replacement: adım 6, 3 resimden 2. Logitech G603 Switch Replacement: adım 6, 3 resimden 3.
    • To remove the ribbon cable, use your thumb and index finger to pinch the latch upwards.

    • Once the latch has been released, pull the cable out of its slot.

  7. Logitech G603 Switch Replacement: adım 7, 3 resimden 1. Logitech G603 Switch Replacement: adım 7, 3 resimden 2. Logitech G603 Switch Replacement: adım 7, 3 resimden 3.
    • To remove the power cable, slowly and carefully wiggle the cable out of its socket either with your fingers, a spudger, or a flat head screwdriver.

    • Take your time with this process as the connection is a tight fit and might accidentally remove the socket with the cable.

  8. Logitech G603 Switch Replacement: adım 8, 1 resimden 1.
    • Use this photo as a reference of what the inside of the shell looks like once the power and ribbon cable have been displaced.

    • Here, you will be able to see the underside location of the switches that need to be replaced.

    • Here, you can see the location of the next step which will be to unfasten the side button circuit board.

  9. Logitech G603 Switch Replacement: adım 9, 3 resimden 1. Logitech G603 Switch Replacement: adım 9, 3 resimden 2. Logitech G603 Switch Replacement: adım 9, 3 resimden 3.
    • Because the mouse switch circuit board is connected to the side button circuit board, we will need to remove the screw guard that keeps it fastened to the mouse.

    • Locate the screw marked in the first photo. Remove it by using a Philips head screw driver and twisting in a counter-clockwise motion.

    • Make sure not to lose the guard underneath the head of the screw as it keeps the circuit board from falling out of place.

  10. Logitech G603 Switch Replacement: adım 10, 3 resimden 1. Logitech G603 Switch Replacement: adım 10, 3 resimden 2. Logitech G603 Switch Replacement: adım 10, 3 resimden 3.
    • The switch will be hidden under a cover to prevent debris from entering the device or being displaced. This step will remove that cover.

    • The cover will be secured by a latch and a screw.

    • Use a screwdriver to remove the screw by twisting in a counter-clockwise motion.

    • Using a flat head screwdriver, push the latch upwards and into hole from which it protrudes until the cover loosens.

    • Do not forget to separate and categorize your screws for when the mouse is being put together.

  11. Logitech G603 Switch Replacement: adım 11, 3 resimden 1. Logitech G603 Switch Replacement: adım 11, 3 resimden 2. Logitech G603 Switch Replacement: adım 11, 3 resimden 3.
    • Using your index finger and thumb carefully displace the cover to reveal the switch.

  12. Logitech G603 Switch Replacement: adım 12, 3 resimden 1. Logitech G603 Switch Replacement: adım 12, 3 resimden 2. Logitech G603 Switch Replacement: adım 12, 3 resimden 3.
    • The switch board will be secured by two screws. Using a Philips head screwdriver, remove the two screws using a counter-clockwise motion.

  13. Logitech G603 Switch Replacement: adım 13, 2 resimden 1. Logitech G603 Switch Replacement: adım 13, 2 resimden 2.
    • Using a spudger or a flat head screwdriver lift the circuit board from its slot.

  14. Logitech G603 Switch Replacement: adım 14, 2 resimden 1. Logitech G603 Switch Replacement: adım 14, 2 resimden 2.
    • To reiterate, the mouse switch board is held down by the side button circuit board. Now that we have unfastened the side board, use tweezers to dislodge it out of its slot.

    • Once there is enough room, pinch the board loose with your index finger and thumb

  15. Logitech G603 Switch Replacement: adım 15, 3 resimden 1. Logitech G603 Switch Replacement: adım 15, 3 resimden 2. Logitech G603 Switch Replacement: adım 15, 3 resimden 3.
    • With the side board in hand, twist the board until there is enough room for the switch board to exit the gap located in the last photo.

  16. Logitech G603 Switch Replacement: adım 16, 3 resimden 1. Logitech G603 Switch Replacement: adım 16, 3 resimden 2. Logitech G603 Switch Replacement: adım 16, 3 resimden 3.
    • Now that we have the first switch displaced, repeat steps 11-14 to displace the other.

    • Proceed to step 16 to remove the mouse switch from its hole

  17. Logitech G603 Switch Replacement: adım 17, 1 resimden 1.
    • Now that the switches have been displaced, prepare your soldering equipment for the final steps.

    • The setup in the photo contains the minimum of an exhaust vent, a solder sponge, a soldering iron, a solder, and flux.

  18. Logitech G603 Switch Replacement: adım 18, 3 resimden 1. Logitech G603 Switch Replacement: adım 18, 3 resimden 2. Logitech G603 Switch Replacement: adım 18, 3 resimden 3.
    Bu adımda kullanılan alet:
    Desoldering Pump
    $3.99
    Satın Al
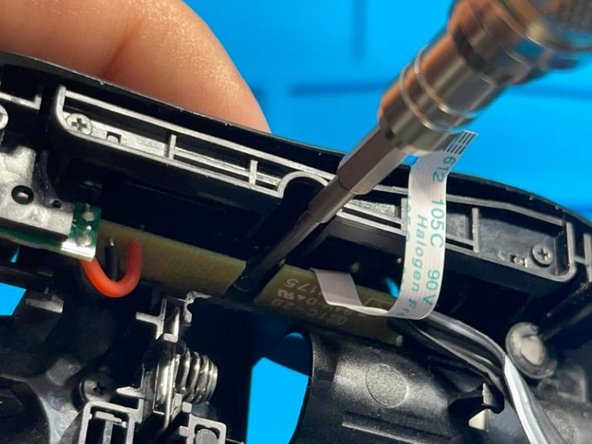
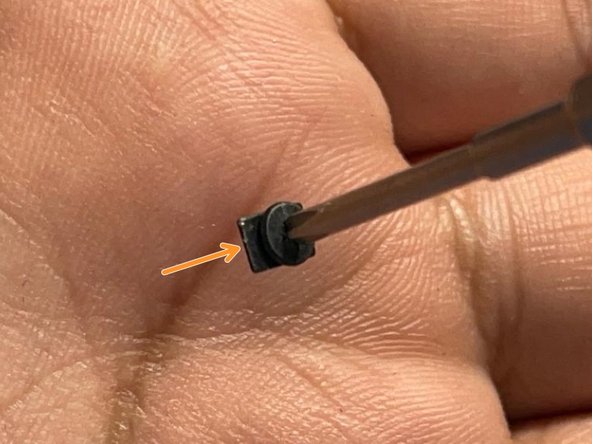
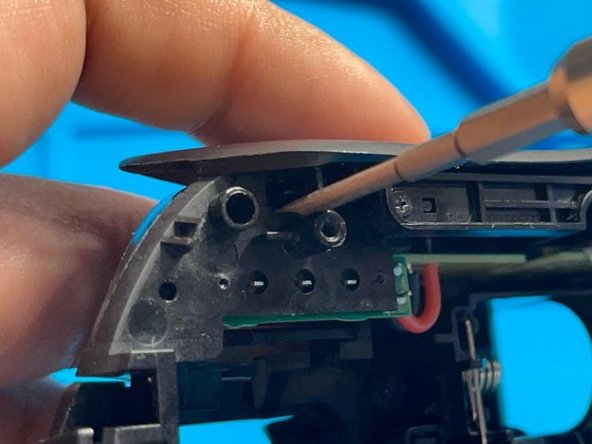
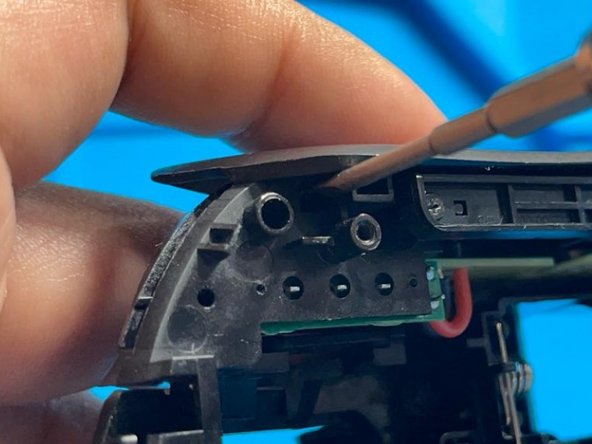
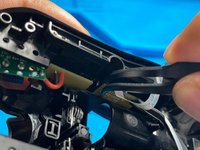
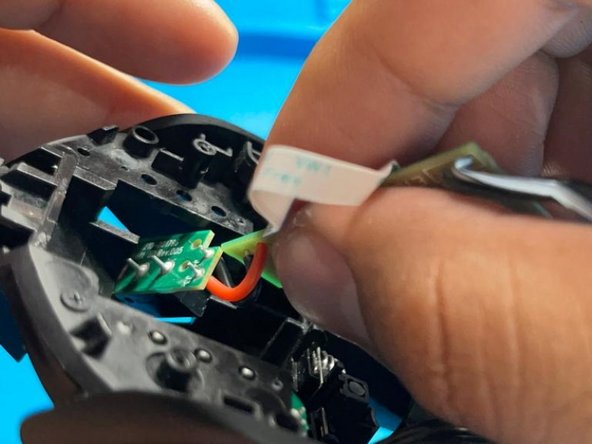
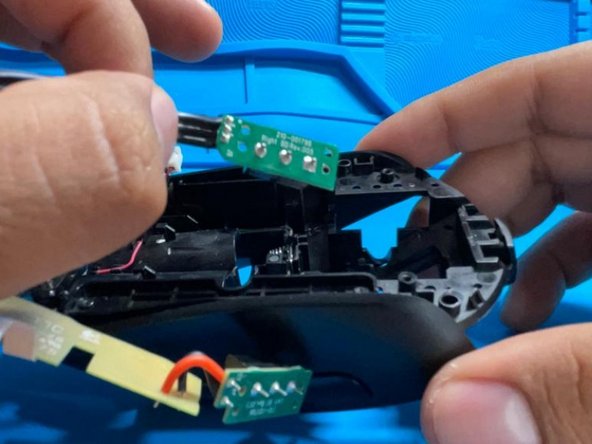
    • Remove solder from the pin joints to displace the switch by using solder pump.

    • Flux can be used to evenly distribute the heat from the soldering iron to the solder joins.

    • Use 91% Isopropyl alcohol or above to remove residual flux.

  19. Logitech G603 Switch Replacement: adım 19, 2 resimden 1. Logitech G603 Switch Replacement: adım 19, 2 resimden 2.
    • Once the residual soldering flux has been clean, begin soldering in the new switch into the board. Repeat steps 19 and 20 for the other switch.

    • Clean all residual flux.

Sonuç

To reassemble your device, follow these instructions in reverse order.

Bir başkası bu kılavuzu tamamladı.

0 Yorum

Yorum Ekle

İstatistikleri Görüntüle:

Son 24 Saat: 8

Son 7 gün: 47

Son 30 gün: 188

Her zaman: 750