Giriş
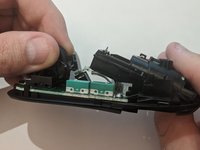
If the scroll wheel on your Logitech M510 is broken or worn out, use this guide to replace it. Be sure to unplug the wireless USB, and discharge any static electricity or use antistatic gloves when working with electronics.
Neye ihtiyacın var


To reassemble your device, please follow these instructions in reverse order.
İptal et: Bu kılavuzu tamamlamadım.
6 farklı kişi bu kılavuzu tamamladı.

Ekip

Embry-Riddle Aeronautical University, Team S11-G6, Salas Spring 2020 Embry-Riddle Aeronautical University, Team S11-G6, Salas Spring 2020 üyesi
ERAU-SALAS-S20S11G6
2 Üyeler
4 adet Kılavuz yazıldı
3Kılavuz Yorumları
Thanks for the guide. My scroll wheel just needed a bit of cleaning to get it to work properly. Only cost me 15 min of work productivity and I’m back up and running :)
Thank you for this! I wasn’t sure if there were screws hidden under the rubber feet, so I’m so glad I checked before tearing things apart. 2 simple screws in the battery compartment is simple enough, but I needed to do a full teardown and there was one more screw inside holding the board to the base of the mouse. I also had to mess with the ribbon cable for the optical sensor and that’s fine, but if you need to do the same, it will be much easier to remove the sensor and leave the ribbon attached.
I’ve had this mouse for years and love it, but mine has a semi-defective middle-click button that means I often have to mash the button for it to register as a click. I’ve learned a little bit recently about tactile momentary switches (buttons) for a project I’ve been working on, so my goal was to replace it. Once I got it all apart, I simply desoldered the old button and replaced it with another one I had. Now it works perfectly!
Symptoms for me were the scroll wheel would only scroll down, not up. At first I thought driver or software, but then realized it was just filthy with 8 or 9 years of hair and dust! After dissassembly and careful cleaning, works like new.