Giriş
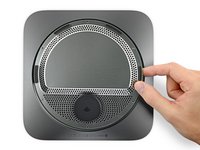
If your fan is noisy or clogged with dust, use this guide to remove it for cleaning or replacement.
Neye ihtiyacın var
-
Bu adımda kullanılan alet:Magnetic Project Mat$19.95
-
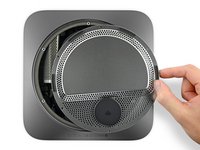
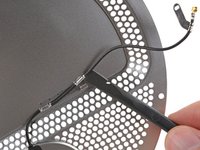
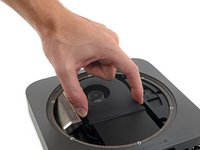
Remove six TR6 Torx security screws securing the antenna plate, of the following lengths:
-
Three 4.1 mm shoulder screws
-
Three 1.8 mm screws
-
-
-
-
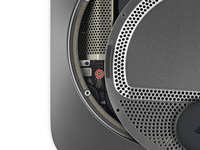
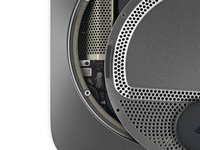
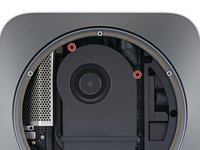
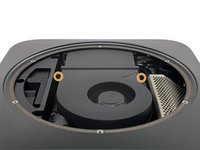
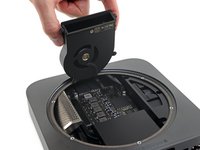
Use a T6 Torx driver to remove the four 7.2 mm screws securing the fan:
-
Two screws securing the fan to the logic board
-
Two screws with rubber shoulders securing the fan to the exhaust vent
-


Compare your new replacement part to the original part—you may need to transfer remaining components or remove adhesive backings from the new part before installing.
To reassemble your device, follow the above steps in reverse order.
Take your e-waste to an R2 or e-Stewards certified recycler.
Repair didn’t go as planned? Check out our Answers community for troubleshooting help.
İptal et: Bu kılavuzu tamamlamadım.
10 farklı kişi bu kılavuzu tamamladı.


2Kılavuz Yorumları
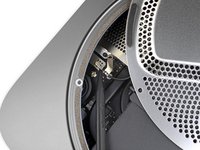
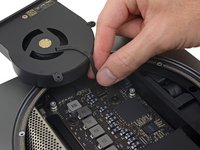
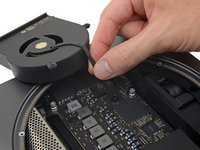
Hi, thank you for this guide. I am getting ready to do the same. Regarding the fan connector: is it perhaps the slide-in type which can be disconnected by pulling the wires horizontally backwards, instead of pulling upwards? The photos are good but still not enough magnification to be able to tell. Thanks in advance.
It appears to be the type of connector to slide laterally rather than needing to be pulled vertically in order to be disconnected.
Zac Hall -