Giriş
Use this guide to replace a faulty or broken display on your MacBook Air 13" Early 2017.
Neye ihtiyacın var
-
Bu adımda kullanılan alet:P5 Pentalobe Screwdriver Retina MacBook Pro and Air$5.99
-
Use a P5 Pentalobe driver to remove ten screws securing the lower case, of the following lengths:
-
Two 9 mm screws
-
Eight 2.6 mm screws
 FixBot'a Sor
-
-
-
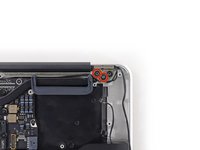
Wedge your fingers between the display and the lower case and pull upward to pop the lower case off the Air.
-
Remove the lower case and set it aside.
-
-
-
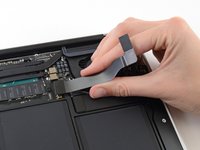
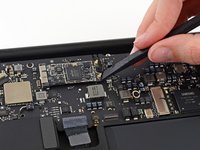
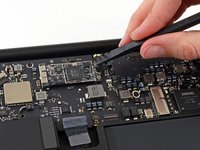
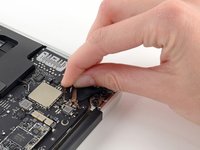
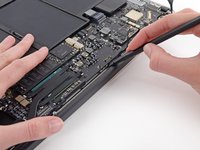
Grab the clear plastic pull tab attached to the battery connector and pull it parallel to the board toward the front edge of the Air.
-
-
-
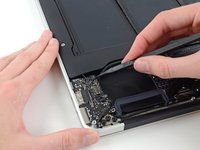
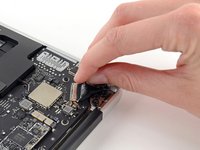
Use the flat end of a spudger to pry the I/O board cable connector up out of its socket on the I/O board.
-
-
-
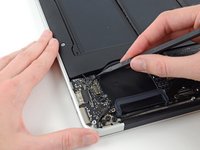
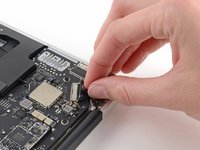
Carefully peel the I/O board cable from the adhesive securing it to the top of the fan.
-
-
-
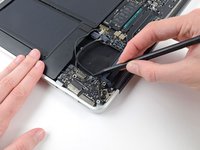
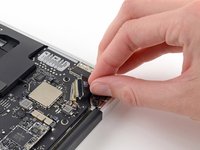
While gently pulling the I/O board cable upward near its connection to the logic board, use the flat end of a spudger to pry up on alternating sides of the connector to help "walk" it out of its socket.
-
Remove the I/O board cable.
-
-
-
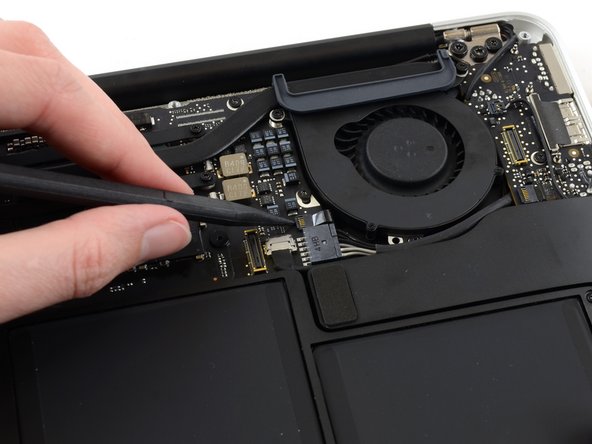
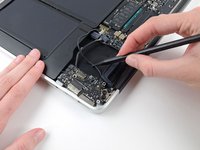
Use the tip of a spudger to carefully flip up the retaining flap on the fan cable ZIF socket.
-
-
-
Remove the following three screws securing the fan to the upper case:
-
One 5.2 mm T5 Torx screw
-
One 3.3 mm T5 Torx screw
-
One 4.4 mm T5 Torx screw with a short head
-
-
-
-
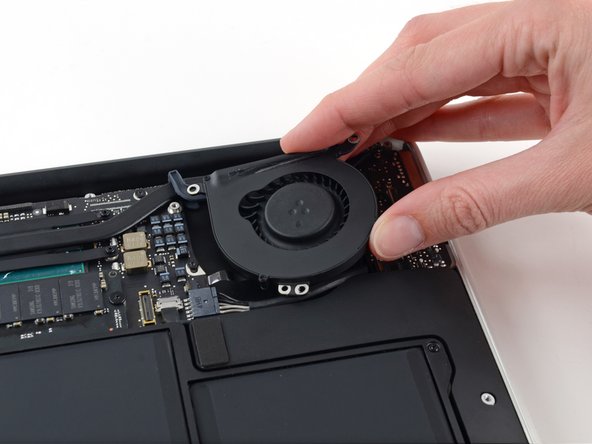
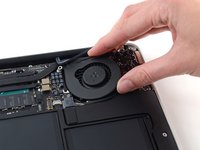
Lift the fan from the I/O board side and pull it free from the upper case.
-
Removing the fan will also disconnect the fan ribbon cable. Be careful not to snag it.
-
-
-
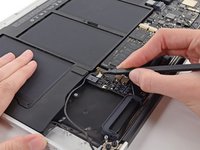
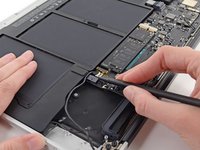
Disconnect the I/O board by pulling its power cable away from its socket on the logic board.
-
-
-
Use the flat end of a spudger to pry the left speaker cable connector up and out of its socket on the I/O board.
-
-
-
Use the tip of a spudger to carefully flip up the retaining flap on the microphone ribbon cable ZIF socket.
-
-
-
Remove the single 4.1 mm T5 Torx screw securing the I/O board to the upper case.
-
-
-
Gently de-route the camera cable from its notch on the I/O board and push it out of the way with the tip of a spudger.
-
-
-
Lift the I/O board from the logic board side and pull it free from the upper case.
-
Removing the I/O board will also disconnect the microphone ribbon cable. Be careful not to snag it.
-
-
-
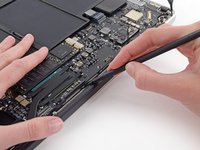
Use the flat end of a spudger to pry each of the antenna connectors up from their sockets on the AirPort/Bluetooth card.
-
-
-
Disconnect the camera cable connector with the tip of a spudger.
-
Pull the camera cable parallel to the face of the I/O board toward the front edge of the Air to disconnect it from its socket.
-
-
-
Remove the inner four (two on each side) 5.6 mm T8 Torx screws securing the right and left display hinges to the upper case.
-
-
-
Gently de-route the antenna cables out of the channel cut into the upper case.
-
-
-
While holding the Air steady, remove the remaining 5.6 mm T8 Torx screw from the left display bracket.
-
-
-
Remove the last 5.6 mm T8 Torx screw securing the display to the upper case.
-
-
-
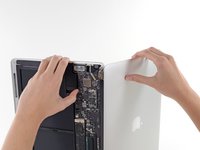
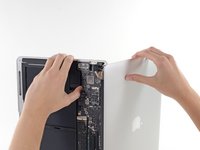
Open the Air slightly to allow room for the hinges to slide out of their notches.
-
Push the upper case slightly toward the display assembly, then push it back from the hinges.
-
Once the two display hinges have cleared the upper case, remove the display and set it aside.
-


To reassemble your device, follow these instructions in reverse order.
Take your e-waste to an R2 or e-Stewards certified recycler.
Repair didn’t go as planned? Try some basic troubleshooting, or ask our Answers community for help.
İptal et: Bu kılavuzu tamamlamadım.
37 farklı kişi bu kılavuzu tamamladı.

6Kılavuz Yorumları
Thank you so much! I fixed my Macbook Air display! I feel like a champion lol
My MacBook air screen needed to be replaced. There were lines vertical and horizontal. I decided to replace the screen. Got everything put back together from the directions up top. Everything worked except the screen stay black. I hooked the MacBook up to a second screen to make sure. I decided maybe it was a broken replacement so I put the old one back and its also a blank screen also. Before I took the MacBook apart the screen and apple logo both lit up and now I cant get the old screen to come on.