Bu sürüm, hatalı düzenlemeler içerebilir. En son doğrulanmış bellek kopyası dönün.
Neye ihtiyacın var
-
Bu adım çevrilmemiş. Çevrilmesine yardım edin
-
Remove ten Phillips screws securing the lower case to the MacBook Air:
-
Six 2.8 mm screws
-
Two 3.8 mm screws
-
Two 5.4 mm screws
-
-
Bu adım çevrilmemiş. Çevrilmesine yardım edin
-
Slightly lift the lower case near the vents and push it toward the rear of the computer to free the mounting tabs.
-
-
Bu adım çevrilmemiş. Çevrilmesine yardım edin
-
Disconnect the battery connector by pulling it straight out of its socket.
-
-
Bu adım çevrilmemiş. Çevrilmesine yardım edin
-
Remove the following nine screws securing the battery to the Air:
-
Four 2.9 mm Phillips.
-
Four 3.8 mm Phillips.
-
One 7.2 mm Phillips.
-
-
-
Bu adım çevrilmemiş. Çevrilmesine yardım edin
-
Lift the battery out of the Air.
-
Charge it to 100%, and then keep charging it for at least 2 more hours. Then, unplug and use it normally to drain the battery. When you see the low battery warning, save your work, and keep your laptop on until it goes to sleep due to low battery. Wait at least 5 hours, then charge your laptop uninterrupted to 100%.
-
If you notice any unusual behavior or problems after installing your new battery, you may need to reset your MacBook's SMC.
-
-
Bu adım çevrilmemiş. Çevrilmesine yardım edin
-
Remove the following two screws securing the speaker assembly to the upper case.
-
One 3 mm Phillips.
-
One 5.8 mm Phillips.
-
-
Bu adım çevrilmemiş. Çevrilmesine yardım edin
-
Use a spudger to lift the audio-out connector board off the adhesive that secures it to the hard drive bracket.
-
Disconnect the audio out connector from its socket.
-
-
Bu adım çevrilmemiş. Çevrilmesine yardım edin
-
Rotate the speaker assembly toward the center of the Air.
-
Use a spudger to pry the speaker cable connector up off the audio board.
-
-
Bu adım çevrilmemiş. Çevrilmesine yardım edin
-
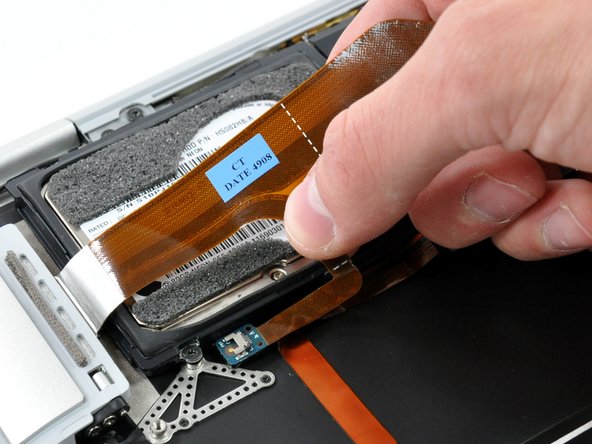
Disconnect the port hatch ribbon cable from the logic board by pulling it straight up by its black pull tab.
-
If necessary, pull the audio out ribbon cable off the adhesive securing it to the upper case.
-
-
Bu adım çevrilmemiş. Çevrilmesine yardım edin
-
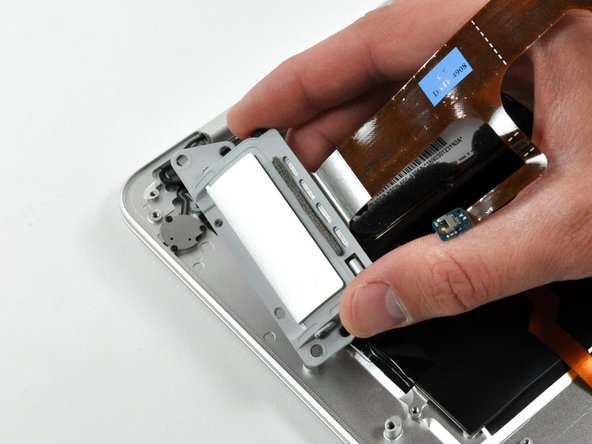
Remove the four 3.2 mm Phillips screws securing the port hatch assembly to the upper case.
-
Lift the port hatch assembly out of the upper case.
-


İptal et: Bu kılavuzu tamamlamadım.
7 farklı kişi bu kılavuzu tamamladı.
