Ana içeriğe geç

MacBook Pro 13" Retina Display Early 2013 LCD Cable Replacement

Neye ihtiyacın var

  1. MacBook Pro 13" Retina Display Early 2013 LCD Cable Replacement, Lower Case: adım 1, 1 resimden 1.
    Bu adımda kullanılan alet:
    Magnetic Project Mat
    $19.95
    Satın Al
    • Remove the following ten screws securing the lower case to the upper case:

    • Two 2.3 mm P5 Pentalobe screws

    • Eight 3.0 mm P5 Pentalobe screws

    • Throughout this repair, keep track of each screw and make sure it goes back exactly where it came from to avoid damaging your device.

  2. MacBook Pro 13" Retina Display Early 2013 LCD Cable Replacement: adım 2, 1 resimden 1.
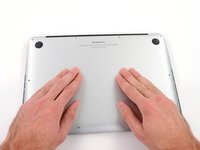
    • Wedge your fingers between the upper case and the lower case.

    • Gently pull the lower case away from the upper case.

    • Remove the lower case and set it aside.

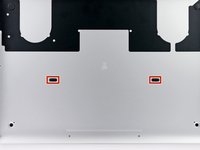
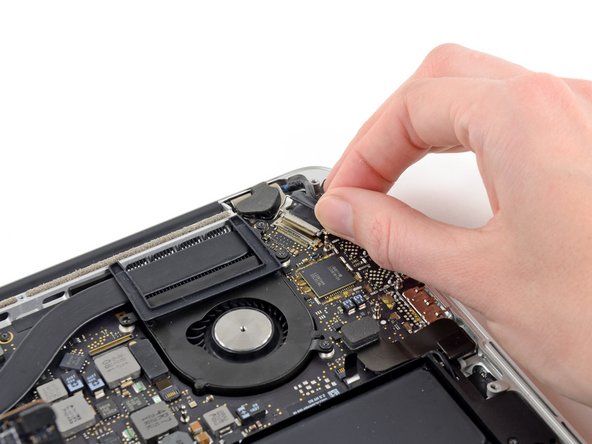
  3. MacBook Pro 13" Retina Display Early 2013 LCD Cable Replacement: adım 3, 3 resimden 1. MacBook Pro 13" Retina Display Early 2013 LCD Cable Replacement: adım 3, 3 resimden 2. MacBook Pro 13" Retina Display Early 2013 LCD Cable Replacement: adım 3, 3 resimden 3.
    • During reassembly, gently push down the center of the lower case to reattach the two plastic clips.

    • The lower case is connected to the upper case at the center, with two plastic clips.

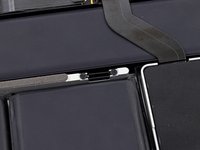
  4. MacBook Pro 13" Retina Display Early 2013 LCD Cable Replacement, Battery Connector: adım 4, 1 resimden 1.
    • Remove the plastic cover adhered to the battery contact board.

  5. MacBook Pro 13" Retina Display Early 2013 LCD Cable Replacement: adım 5, 1 resimden 1.
    • Remove the following screws securing the battery connector board to the logic board:

    • Two 2.8 mm T6 Torx screws

    • One 7.0 mm T6 Torx shouldered screw

  6. MacBook Pro 13" Retina Display Early 2013 LCD Cable Replacement: adım 6, 2 resimden 1. MacBook Pro 13" Retina Display Early 2013 LCD Cable Replacement: adım 6, 2 resimden 2.
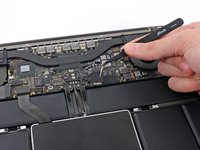
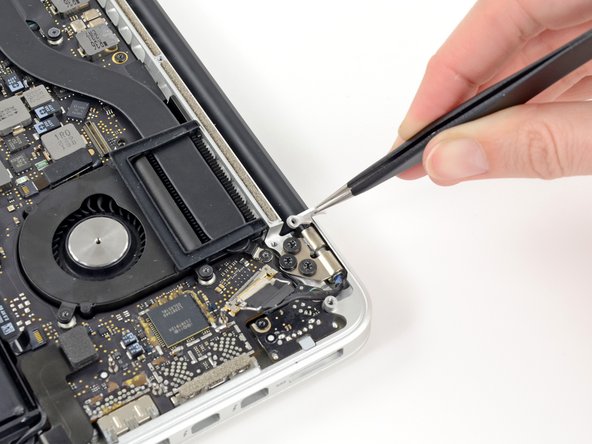
    • Use tweezers to remove the small plastic cover located near the bottom right of the battery connector board.

  7. MacBook Pro 13" Retina Display Early 2013 LCD Cable Replacement: adım 7, 1 resimden 1.
    • Remove the wide head 6.4 mm T6 Torx screw securing the battery connector to the logic board assembly.

  8. MacBook Pro 13" Retina Display Early 2013 LCD Cable Replacement: adım 8, 2 resimden 1. MacBook Pro 13" Retina Display Early 2013 LCD Cable Replacement: adım 8, 2 resimden 2.
    • Carefully lift the battery connector board up off the logic board.

    • It is recommended to bend the battery cables just slightly, to keep the board suspended up above the logic board and out of the way.

    • Do not fold the board completely over, or crease the cables, as this may damage the battery.

  9. MacBook Pro 13" Retina Display Early 2013 LCD Cable Replacement, Battery Contact Board: adım 9, 2 resimden 1. MacBook Pro 13" Retina Display Early 2013 LCD Cable Replacement, Battery Contact Board: adım 9, 2 resimden 2.
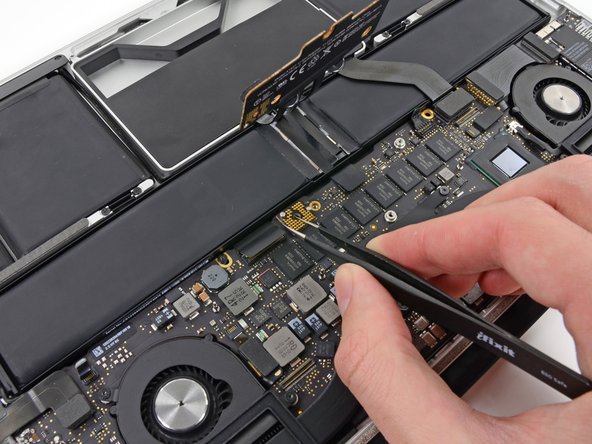
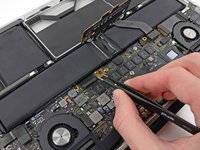
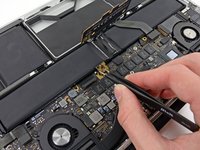
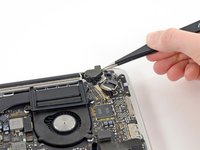
    • Grasp the Interposer with tweezers.

    • An interposer is the name for an interface that links one electrical connection to another. In this repair, it is the board connecting the battery to logic board.

    • Lift the Interposer off the logic board and remove it.

    • Removing this board will ensure that the battery remains disconnected throughout your repair, preventing your computer from accidentally powering on. It's also a good idea to take it out so it doesn't fall out unexpectedly.

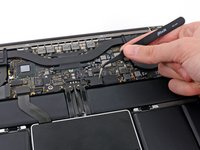
  10. MacBook Pro 13" Retina Display Early 2013 LCD Cable Replacement, iSight Camera Cable: adım 10, 2 resimden 1. MacBook Pro 13" Retina Display Early 2013 LCD Cable Replacement, iSight Camera Cable: adım 10, 2 resimden 2.
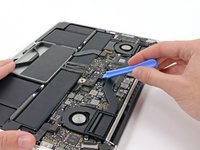
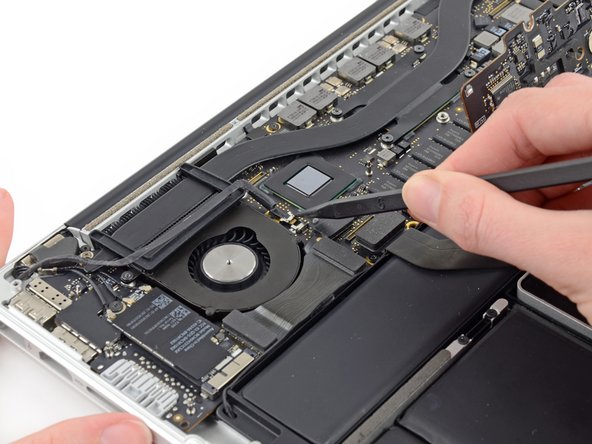
    • Use the tip of a spudger to push the iSight camera cable connector straight away from its socket on the logic board.

    • It is recommended to carefully push on both sides of the connector to "walk" it out of its socket.

  11. MacBook Pro 13" Retina Display Early 2013 LCD Cable Replacement: adım 11, 1 resimden 1.
    • Move the iSight camera cable aside.

  12. MacBook Pro 13" Retina Display Early 2013 LCD Cable Replacement, AirPort Board Assembly: adım 12, 3 resimden 1. MacBook Pro 13" Retina Display Early 2013 LCD Cable Replacement, AirPort Board Assembly: adım 12, 3 resimden 2. MacBook Pro 13" Retina Display Early 2013 LCD Cable Replacement, AirPort Board Assembly: adım 12, 3 resimden 3.
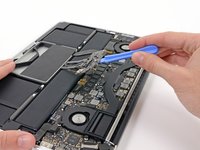
    • Use the flat end of a spudger to pry and disconnect the three antenna cable connectors from the AirPort board.

    • The three cables are coded with black sleeves of different lengths. During reassembly:

    • Connect the long-sleeved cable to the socket closest to the ports.

    • The short-sleeved cable connects next to the screw.

    • The remaining cable has no sleeve, and connects in the last empty socket, next to the fan.

  13. MacBook Pro 13" Retina Display Early 2013 LCD Cable Replacement: adım 13, 1 resimden 1.
    • Move the antenna cables aside, clear of the AirPort board.

  14. MacBook Pro 13" Retina Display Early 2013 LCD Cable Replacement, Display Assembly: adım 14, 3 resimden 1. MacBook Pro 13" Retina Display Early 2013 LCD Cable Replacement, Display Assembly: adım 14, 3 resimden 2. MacBook Pro 13" Retina Display Early 2013 LCD Cable Replacement, Display Assembly: adım 14, 3 resimden 3.
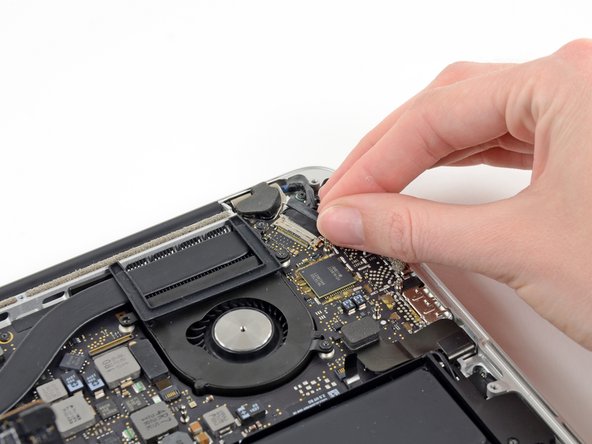
    • Grab the black pull tab secured to the display data cable lock and rotate it toward the DC-In side of the computer.

    • Pull the display data cable straight out of its socket on the logic board.

    • Do not lift up on the display data cable, as its socket is very fragile. Pull the cable parallel to the face of the logic board.

  15. MacBook Pro 13" Retina Display Early 2013 LCD Cable Replacement: adım 15, 2 resimden 1. MacBook Pro 13" Retina Display Early 2013 LCD Cable Replacement: adım 15, 2 resimden 2.
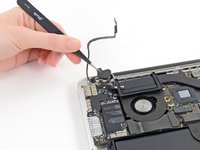
    • Use a pair of tweezers to lift the rubber hinge covers up off the right and left display hinges.

  16. MacBook Pro 13" Retina Display Early 2013 LCD Cable Replacement: adım 16, 2 resimden 1. MacBook Pro 13" Retina Display Early 2013 LCD Cable Replacement: adım 16, 2 resimden 2.
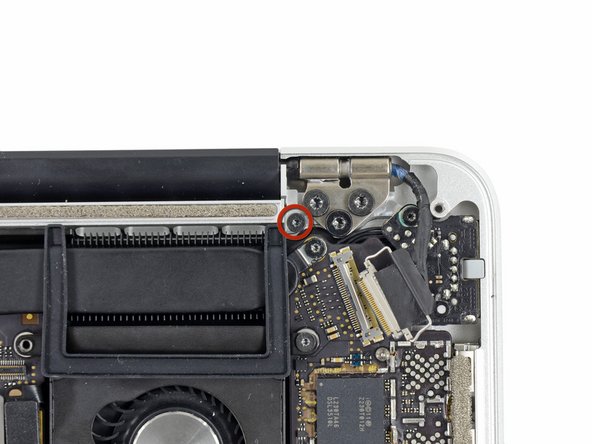
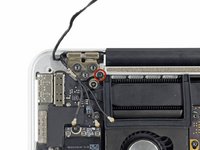
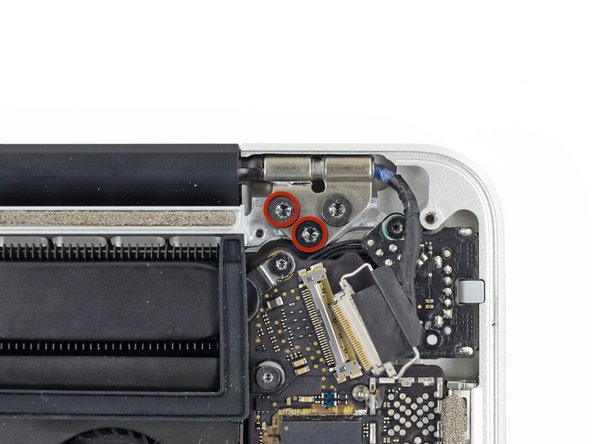
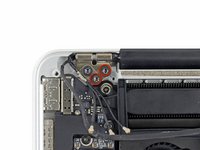
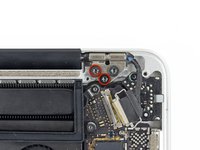
    • Remove the two 3.1 mm T5 Torx screws securing the aluminum hinge brackets.

  17. MacBook Pro 13" Retina Display Early 2013 LCD Cable Replacement: adım 17, 2 resimden 1. MacBook Pro 13" Retina Display Early 2013 LCD Cable Replacement: adım 17, 2 resimden 2.
    • Use a pair of tweezers to lift aluminum hinge brackets off the right and left display hinges.

  18. MacBook Pro 13" Retina Display Early 2013 LCD Cable Replacement: adım 18, 2 resimden 1. MacBook Pro 13" Retina Display Early 2013 LCD Cable Replacement: adım 18, 2 resimden 2.
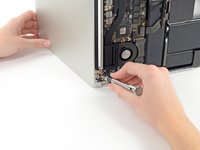
    • Remove the four inner 5.3 mm T8 Torx screws (two on each side) securing the display to the upper case.

  19. MacBook Pro 13" Retina Display Early 2013 LCD Cable Replacement: adım 19, 2 resimden 1. MacBook Pro 13" Retina Display Early 2013 LCD Cable Replacement: adım 19, 2 resimden 2.
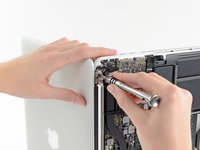
    • Open the MacBook Pro approximately 110 degrees, and place it sideways on the table, as shown.

    • While holding the display and upper case together with your left hand, remove the remaining T8 Torx screw from the upper display bracket.

    • Be sure to hold the display and upper case together with your left hand. Failure to do so may cause the freed display/upper case to fall, potentially damaging each component.

    • Remove the last remaining T8 Torx screw securing the display to the upper case.

  20. MacBook Pro 13" Retina Display Early 2013 LCD Cable Replacement: adım 20, 3 resimden 1. MacBook Pro 13" Retina Display Early 2013 LCD Cable Replacement: adım 20, 3 resimden 2. MacBook Pro 13" Retina Display Early 2013 LCD Cable Replacement: adım 20, 3 resimden 3.
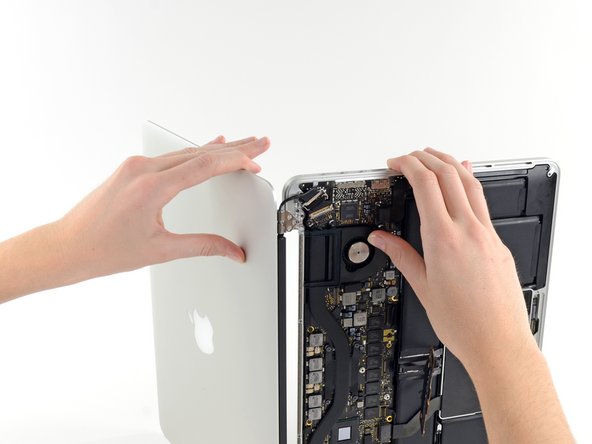
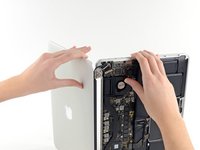
    • Grip both halves of the device, one in each hand.

    • Gently push forward on the bottom half of the device to detach it from the display assembly.

    • Carefully set each component aside, making sure to set down the lower half keyboard-side down.

  21. MacBook Pro 13" Retina Display Early 2013 LCD Cable Replacement, LCD Cable: adım 21, 2 resimden 1. MacBook Pro 13" Retina Display Early 2013 LCD Cable Replacement, LCD Cable: adım 21, 2 resimden 2.
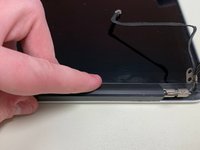
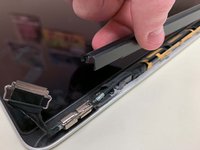
    • With the display facing towards you and the plastic clutch cover down, grab the clutch cover and slide it all the way to the right, towards the hinge.

    • Lift the plastic cover from the bottom and remove it from the display.

  22. MacBook Pro 13" Retina Display Early 2013 LCD Cable Replacement: adım 22, 1 resimden 1.
    • Peel up the tape covering the cable connector.

  23. MacBook Pro 13" Retina Display Early 2013 LCD Cable Replacement: adım 23, 1 resimden 1.
    • Remove the two screws securing the cable to the case:

    • Two T8 Torx screws.

  24. MacBook Pro 13" Retina Display Early 2013 LCD Cable Replacement: adım 24, 1 resimden 1.
    • Remove the six screws securing the antenna assembly in place:

    • Six PH00 Phillips screws.

    • Lift the antenna assembly to reveal the LCD cable connector underneath the left side.

  25. MacBook Pro 13" Retina Display Early 2013 LCD Cable Replacement: adım 25, 1 resimden 1.
    • Grab the metal bar securing the LCD cable connector in place and rotate it towards the bottom of the display.

    • Pull the LCD cable straight out of its socket on the display.

    • Do not lift up on the display data cable, as its socket is very fragile. Pull the cable parallel to the face of the display.

Sonuç

To reassemble your device, follow these instructions in reverse order.

16 farklı kişi bu kılavuzu tamamladı.

Jonah Aragon

Üyelik tarihi: 08/05/18

5.255 İtibar

5 adet Kılavuz yazıldı

Ekip

Experimax Coon Rapids Experimax Coon Rapids üyesi

Business

3 Üyeler

17 adet Kılavuz yazıldı

6 Yorum

Hi,

Can anyone help me ? It might be possible that my MacBook Pro 13” early 2015 restarts by it self once in a few minutes because this cable is slightly damaged? It had before LCD problems and has been serviced. As I have noticed, when I touch the cable and move it a little bit, computer restarts immediately, so I thought this might be the restarting problem.

(I have to say that I have already tried other options : I have fresh reinstalled the operating system, so theres no software issue, I have repasted the processor, I have checked the cables connections). The only strange thing is that it doesn’t turn on with the battery disconnected…

Does anyone have any suggestion?

Thanks a lot!!

Ina - Yanıt

Are there instructions using the MacBook Pro (Retina, 15-inch, Early 2013)? The inside is completely different. Alas.

Jennifer Dibble Fanning - Yanıt

I'm getting this because the hing broke. The real problem is both hinges have broken. Seems like the other hinge is not possible to replace. Is that right? Will just this one side be enough to open with light use? My Mac is a early 2013 15inch pro. Model A1398

Stewart Lyon - Yanıt

This works on a mid-2015 Pro Retina also. The display is *slightly* different in that the black antenna cover does not simply slide to one side and come off. It has little tiny end caps that can be popped on/off. Apart from that and the antenna had one more screw all the way on the right (away from the display connecter) that doesn’t have to be removed to just lift up the antenna and while holding the antenna slightly up, you can remove and replace the LCD connector. All else was the same and I was able to fix my Mid 2015 MacBook Retina Pro. Thanks iFixit!!!

larry schuler - Yanıt

Hey peeps, hope you are all doing well

I have a backlight issue with my MacBook Pro early 2013 Retina display 13 in and I am trying to figure out where the issue is stemming from. I am wondering if i could use the LCD cable from an older model (Unibody mid 2010 matchbook pro 13in), would that work or be compatible with my current device? Any insight would be highly appreciated, Thank you.

AlharithAlshaqsi - Yanıt

Yorum Ekle

İstatistikleri Görüntüle:

Son 24 Saat: 3

Son 7 gün: 24

Son 30 gün: 123

Her zaman: 14,974