Giriş
Follow this guide to Improve Your MacBook's Cooling Performance
"For your safety, discharge your MacBook Pro's battery below 25%" before you begin. A charged lithium-ion battery, if accidentally damaged, can start a dangerous and uncontrollable fire.
After the repair, my MacBook Pro's (2.2GHz 6-core i7 & Radeon Pro 555X 4GB) performance under full load improved from a falling 3.1GHz-2.6GHz at 100°C to a continuous 3.2GHz at 95°C.
Neye ihtiyacın var
-
-
Power on your Mac and launch Terminal.
-
Copy and paste the following command (or type it exactly) into Terminal:
-
sudo nvram AutoBoot=%00
-
Press [return]. If prompted, enter your administrator password and press [return] again. Note: Your return key may also be labeled ⏎ or "enter."
-
sudo nvram AutoBoot=%03
-
-
Bu adımda kullanılan alet:Magnetic Project Mat$16.96
-
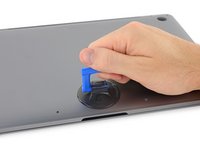
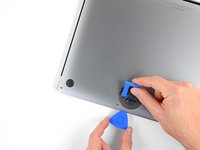
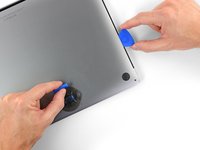
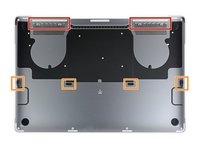
Use a P5 Pentalobe driver to remove six screws securing the lower case, of the following lengths:
-
Four 4.7 mm screws
-
Two 6.6 mm screws
-
-
-
-
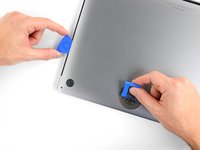
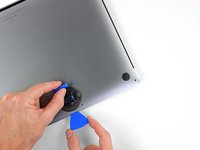
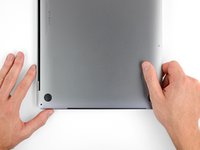
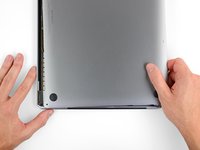
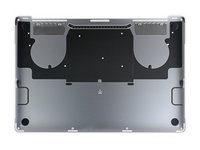
Remove the lower case.
-
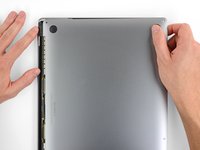
Set it in place and align the sliding clips near the display hinge. Press down and slide the cover toward the hinge. It should stop sliding as the clips engage.
-
When the sliding clips are fully engaged and the lower case looks correctly aligned, press down firmly on the lower case to engage the four hidden clips underneath. You should feel and hear them snap into place.
-
-
-
Cut the thermal pad to fit the CPU and GPU.
-
Dimensions: 50 mm x 50mm x 0.8-1 mm
-
Remove the first protective film from the pad and carefully place it on the two visible areas (CPU and GPU) and press it down lightly.
-
After pressing the pad firmly to ensure full contact, remove the second protective film.
-


Work through the steps in reverse order to reassemble your device.
İptal et: Bu kılavuzu tamamlamadım.
27 farklı kişi bu kılavuzu tamamladı.
Bu çevirmenlere özel teşekkürler:
100%

Bu çevirmenler dünyayı onarmamıza yardım ediyor! Katkıda bulunmak ister misiniz?
Çeviriye Başlayın ›

12Kılavuz Yorumları
It would be useful to mention the thermal pad and thermal paste at the beginning.
Please provide specifications for the thermal pad and thermal paste, or suggestions for each.
This guide was also useful when just wanting to take everything apart to clean the fans.
Amazing! Thank you for this safe 'n easy guide. I mean that is a difference... Twitter post