Giriş
Replacing the MagSafe DC-In board requires removal of the logic board.
Neye ihtiyacın var
-
-
Remove the following ten screws securing the lower case to the upper case:
-
Three 13.5 mm (14.1 mm) Phillips screws.
-
Seven 3 mm Phillips screws.
-
-
-
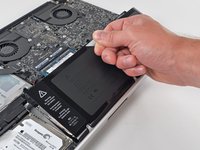
Remove the two 7.4 mm Tri-point screws securing the battery to the upper case.
-
Note: For certain repairs (e.g. hard drive), removing the battery is not necessary but it prevents any accidental shorting of electronics on the motherboard. If you do not remove the battery, please be careful as parts of the motherboard might be electrified.
-
-
-
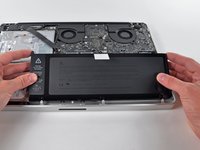
Tilt the battery away from the logic board enough to access the battery cable connector.
-
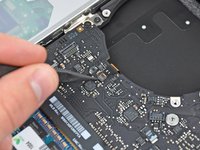
Pull the battery cable connector away from its socket on the logic board and remove the battery from the upper case.
-
Charge it to 100%, and then keep charging it for at least 2 more hours. Next, unplug and use it normally to drain the battery. When you see the low battery warning, save your work, and keep your laptop on until it goes to sleep due to low battery. Wait at least 5 hours, then charge your laptop uninterrupted to 100%.
-
If you notice any unusual behavior or problems after installing your new battery, you may need to reset your MacBook's SMC.
-
-
-
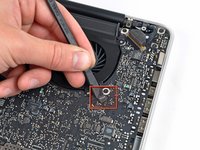
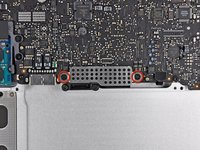
Remove the three 3.4 mm T6 Torx screws securing the left fan to the logic board.
-
-
-
-
Remove the three T6 Torx screws securing the right fan to the upper case.
-
-
-
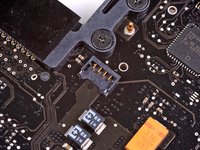
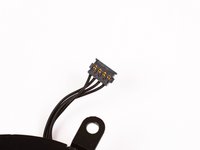
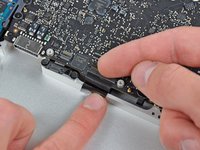
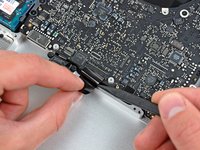
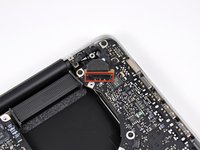
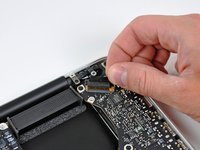
Disconnect the DC-In board by pulling its cable toward the heat sink.
-


To reassemble your device, follow these instructions in reverse order.
İptal et: Bu kılavuzu tamamlamadım.
67 farklı kişi bu kılavuzu tamamladı.

4Kılavuz Yorumları
Excellent walkthrough! This was my first ifixit repair and I was able to successfully replace my damaged magsafe board. The 64-Bit driver kit was the perfect companion to this project and the many more that will come in the future.
Thanks for your help! I think something on the mainboard is toast and the computer is a total loss, but it was worth it to take a chance and see if the cheap mag board would fix it. Good guide!
Good guide - gave me the confidence to have a go - thanks - I would say to others be very gentle with the cable connectors - mine weren’t exactly the same type as shown in the guide - be patient and you’ll work it out.
I did the same procedure yesterday replacing a malfunction on magsafe board, just before signing up for Fixit and viewing this document. The walkthrough depicted here is really detailed and very well done. Excellent.