Ana içeriğe geç

Merch Source Projector Entertainment II Cooling Fan Replacement

Neye ihtiyacın var

  1. Merch Source Projector Entertainment II Cooling Fan Replacement, Outer Casing: adım 1, 2 resimden 1. Merch Source Projector Entertainment II Cooling Fan Replacement, Outer Casing: adım 1, 2 resimden 2.
    • Flip the projector onto its back and unscrew the nine 15mm screws using the Phillips #0 screw driver.

  2. Merch Source Projector Entertainment II Cooling Fan Replacement: adım 2, 1 resimden 1.
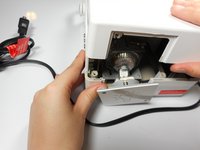
    • Flip the projector right side up and unscrew the two 12mm screws on the light bulb panel located at the rear of the projector with a Phillips #0 screw head.

    • The bottom right panel screw does not come completely out the panel door.

  3. Merch Source Projector Entertainment II Cooling Fan Replacement: adım 3, 2 resimden 1. Merch Source Projector Entertainment II Cooling Fan Replacement: adım 3, 2 resimden 2.
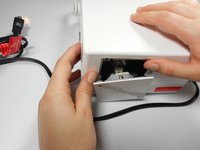
    • Using your hands, gently pry the top and bottom of the projector casing apart.

  4. Merch Source Projector Entertainment II Cooling Fan Replacement, Cooling Fan: adım 4, 2 resimden 1. Merch Source Projector Entertainment II Cooling Fan Replacement, Cooling Fan: adım 4, 2 resimden 2.
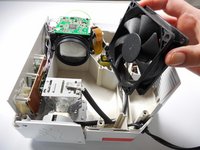
    • Locate the 80 mm fan and slide upward straight out of the housing.

  5. Merch Source Projector Entertainment II Cooling Fan Replacement: adım 5, 2 resimden 1. Merch Source Projector Entertainment II Cooling Fan Replacement: adım 5, 2 resimden 2.
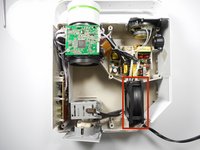
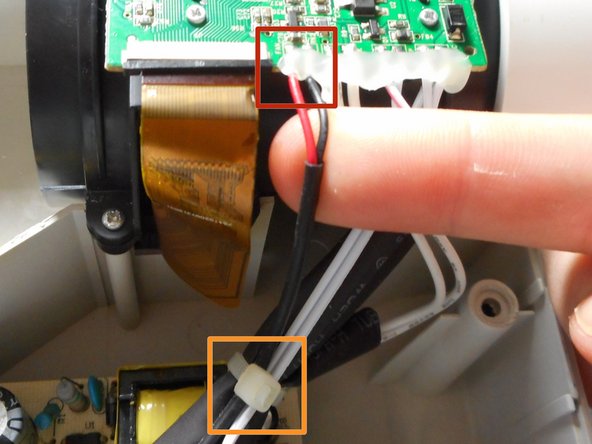
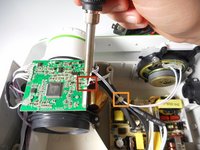
    • Unsolder the red and black connections off of the motherboard.

    • If there are zip ties around the cables, they will need to be cut to remove the fan.

    • Need some help? Follow this guide to learn soldering basics.

    • While soldering the metal connections will get very hot. Never touch the iron with your hand.

    • Make sure that the projector is fully turned off and not plugged in. Allow up to 30 minutes for projector to cool down.

    • If there is hot glue within the connection in on the motherboard, you will need to peel it off simply using your fingers.

Sonuç

To reassemble your device, follow these instructions in reverse order.

Bir başkası bu kılavuzu tamamladı.

Stephanie

Üyelik tarihi: 01/08/15

276 İtibar

3 adet Kılavuz yazıldı

Ekip

Cal Poly, Team 18-3, Maness Winter 2015 Cal Poly, Team 18-3, Maness Winter 2015 üyesi

CPSU-MANESS-W15S18G3

3 Üyeler

4 adet Kılavuz yazıldı

0 Yorum

Yorum Ekle

İstatistikleri Görüntüle:

Son 24 Saat: 1

Son 7 gün: 2

Son 30 gün: 16

Her zaman: 2,242