Bu çeviri, kaynak kılavuzdaki en son güncellemeleri yansıtmayabilir. Çeviriyi güncellemeye yardımcı olun veya kaynak kılavuzunu görüntüleyin.
Giriş
You should be able to disassemble other vacuums using this guide as well.
The vacuum has to be unplugged from the wall during the whole procedure. There are exposed live contacts inside the machine.
Neye ihtiyacın var
-
-
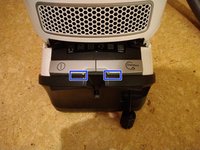
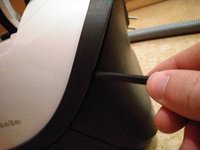
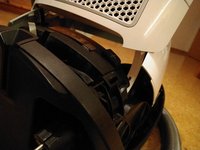
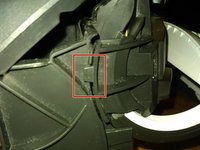
The white cover and the black "ribbon" are secured with clips. To remove them, you first insert a spudger between the cover and the vacuum itself (picture 1). Then you can insert a spudger between the ribbon and the vacuum and slide it around the whole vacuum to detach the ribbon from the machine.
-
-
-
-
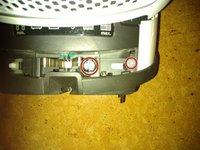
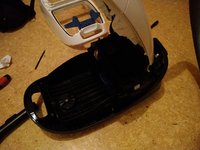
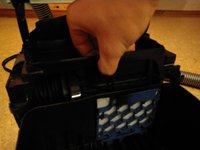
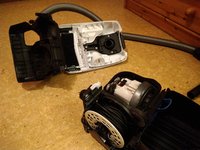
Now you can remove the whole rear part of the vacuum, together with the flap. You might need to pull on multiple places and use a bit of force.
-
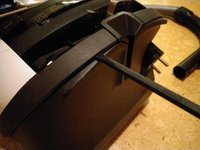
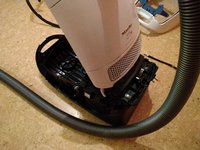
Now you can remove the plug from the motor and subsequently simply pull out the motor and the cable spool upwards. Make sure that you don't rip off any cables or connectors!
-


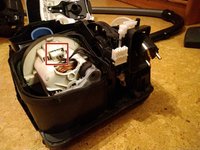


Follow these instructions in reverse order to reassemble your device. There's one exception: Attach the black cover (step 9) to the part that houses the electronics first. Then attach that part to the flap (step 10). After that you can mount the whole thing to the vacuum.
Make sure that the two white connectors (see step 8 and 10) are aligned properly, so that they will connect again.
İptal et: Bu kılavuzu tamamlamadım.
10 farklı kişi bu kılavuzu tamamladı.
Bu çevirmenlere özel teşekkürler:
85%

Bu çevirmenler dünyayı onarmamıza yardım ediyor! Katkıda bulunmak ister misiniz?
Çeviriye Başlayın ›
5Kılavuz Yorumları
Hi,
I found my Miele C3 just stopped working. this article:
https://howtofixit.net/miele-vacuum-not-...
suggested a common problem was that the electric cord pulls away from the contacts, which is exactly what had happened to my vacuum.
Your article has much better steps to disassemble the vacuum, you then need to solder the wires back on. Relatively simple.
Thanks.
Hi Richard,
Ein Tipp: Eine wichtige Schraube ist in der Anleitung oben unerwähnt geblieben. Diese befindet sich unter dem Motorluft-Auslass, wenn man den Luftfilter entnimmt. Diese Schraube sollte ebenfalls im Schritt 7 und vor Schritt 8 entnommen werden.
Der richtige Zusammenbau war bei mir tricky: Das Hinterteil wird zuallererst von hinten unten hinter den rückseitigen Aufnahmekanal für den Saugschlauch geschoben. Dann wird die zusammengebaute Schaltereinheit mit Gefühl eingesetzt. Damit dabei die Tasten an der hinteren Kante des weißen Hauptdeckels vorbeipassen, muss der Deckel mehrfach vorsichtig auf- und zu bewegt werden. Dann klickt das Schalterteil irgendwann in die richtige Position. Hier nicht die Nerven verlieren (!) - Der Miele-Sauger ist hier wohl nicht mehr ganz so reparaturfreundlich wie noch bei meinem 728er-Modell von roundabout 2005, den ich vor ein paar Tagen restauriert hatte.
Cheers - Chris
Thanks a lot for the guide! My vacuum was making a lot of noise and heating up, cleaning the motor fixed all that, and saved me 300€ for buying a new one
Vielen Dank, das hat gut funktioniert. Ich finde, das Gerät ist gar nicht so schlecht konstruiert.
Vielen Dank für diese Anleitung! Wir hatten einen Kabelbruch, wo das Kabel auf die Aufrollautomatik gesteckt wird.
Super Anleitung, sehr hiflreich!