Ana içeriğe geç

Bu sürüm, hatalı düzenlemeler içerebilir. En son doğrulanmış bellek kopyası dönün.

Neye ihtiyacın var

  1. Bu adım çevrilmemiş. Çevrilmesine yardım edin

    : adım 1, 3 resimden 1. : adım 1, 3 resimden 2. : adım 1, 3 resimden 3.
    • Before you begin, make sure to power off and unplug the device from the outlet.

    • If the clear water pump hose is connected, remove it now.

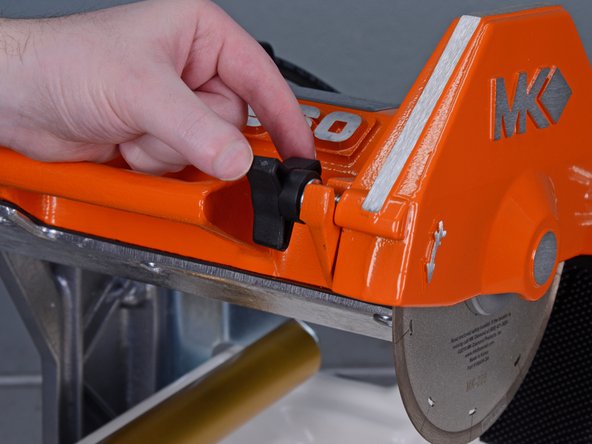
    • Loosen the plastic knob holding the saw's cutting head in place.

    • Lower the cutting head while keeping it steady.

  2. Bu adım çevrilmemiş. Çevrilmesine yardım edin

    : adım 2, 2 resimden 1. : adım 2, 2 resimden 2.
    • Unscrew the knob.

    • Remove it from the cutting head.

  3. Bu adım çevrilmemiş. Çevrilmesine yardım edin

    : adım 3, 2 resimden 1. : adım 3, 2 resimden 2.
    • Loosen the plastic knob holding the blade cover in place.

  4. Bu adım çevrilmemiş. Çevrilmesine yardım edin

    : adım 4, 3 resimden 1. : adım 4, 3 resimden 2. : adım 4, 3 resimden 3.
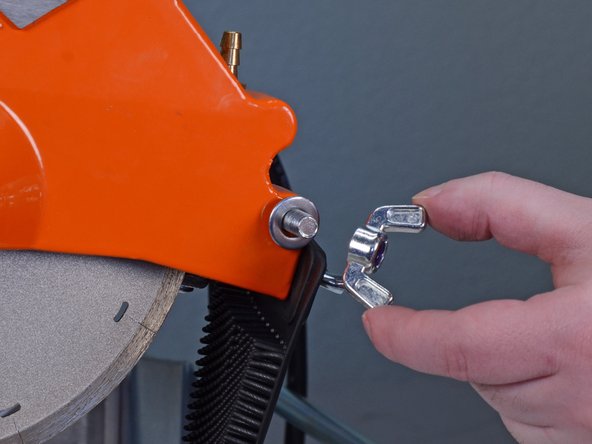
    • Loosen the wing nut on the blade cover pivot shaft.

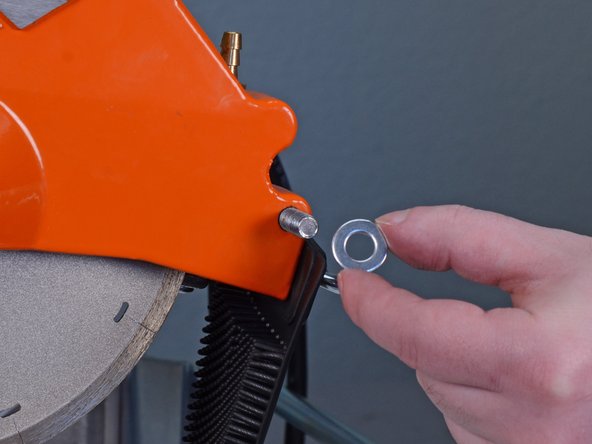
    • Remove the wing nut and accompanying washer.

  5. Bu adım çevrilmemiş. Çevrilmesine yardım edin

    : adım 5, 2 resimden 1. : adım 5, 2 resimden 2.
    • Pivot the blade cover up and pull it off the shaft.

  6. Bu adım çevrilmemiş. Çevrilmesine yardım edin

    : adım 6, 3 resimden 1. : adım 6, 3 resimden 2. : adım 6, 3 resimden 3.
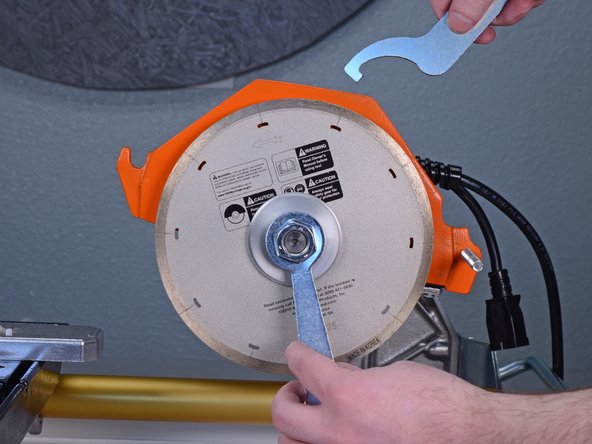
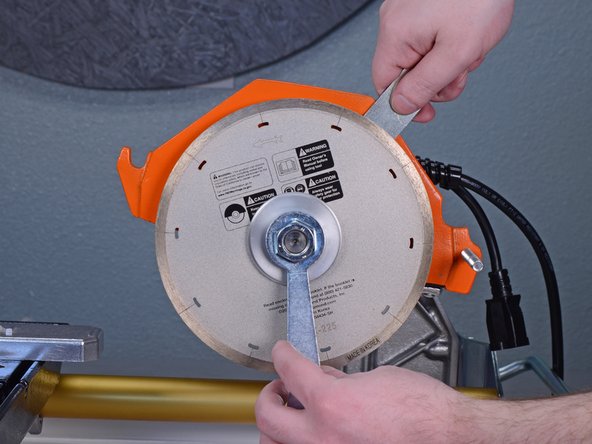
    • Insert the provided spanner wrench into one of the four tightening holes on the inner flange behind the blade.

    • Use the the provided nut wrench to loosen the hex nut while providing counterforce with the spanner wrench.

  7. Bu adım çevrilmemiş. Çevrilmesine yardım edin

    : adım 7, 2 resimden 1. : adım 7, 2 resimden 2.
    • Remove the hex nut.

    • Remove the outer flange.

  8. Bu adım çevrilmemiş. Çevrilmesine yardım edin

    : adım 8, 2 resimden 1. : adım 8, 2 resimden 2.
    • Remove the cutting blade.

    • The blade can be sharp, so handle with care.

  9. Bu adım çevrilmemiş. Çevrilmesine yardım edin

    : adım 9, 3 resimden 1. : adım 9, 3 resimden 2. : adım 9, 3 resimden 3.
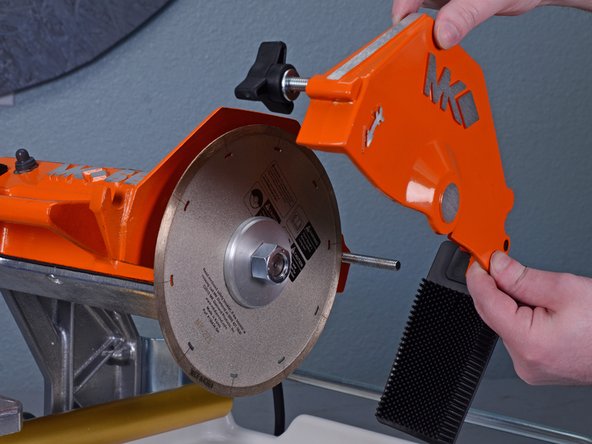
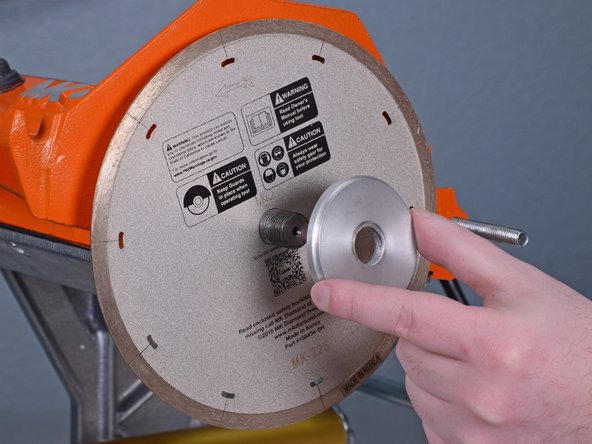
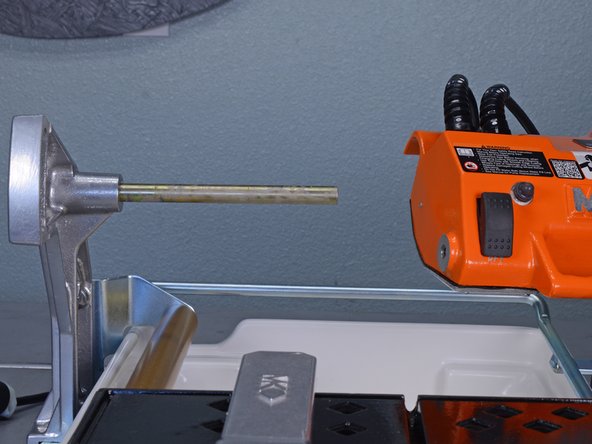
    • Pull the entire cutting head straight off the shaft holding it in place.

  10. Bu adım çevrilmemiş. Çevrilmesine yardım edin

    : adım 10, 1 resimden 1.
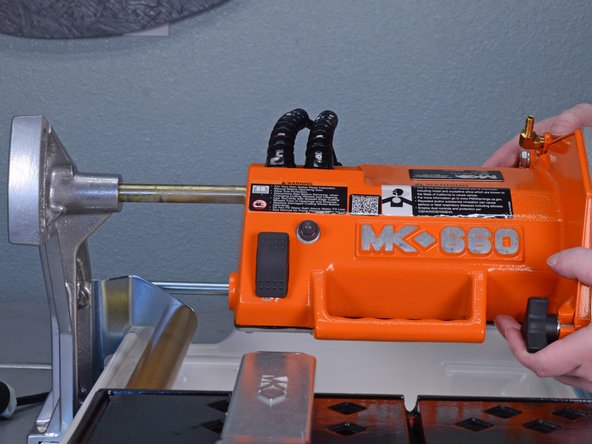
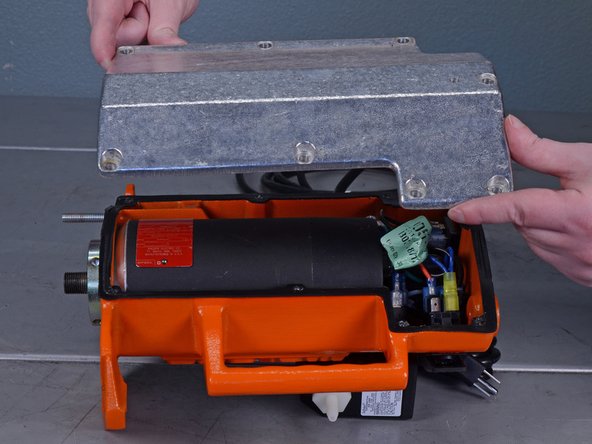
    • Remove the eight Phillips #2 screws on the underside of the cutting head.

  11. Bu adım çevrilmemiş. Çevrilmesine yardım edin

    : adım 11, 2 resimden 1. : adım 11, 2 resimden 2.
    • Remove the bottom cover.

Bitiş Çizgisi

Carsten Frauenheim

Üyelik tarihi: 03/10/20

115.400 İtibar

339 adet Kılavuz yazıldı

Ekip

iFixit iFixit üyesi

Staff

136 Üyeler

17.430 adet Kılavuz yazıldı

0 Yorum

Yorum Ekle

İstatistikleri Görüntüle:

Son 24 Saat: 1

Son 7 gün: 1

Son 30 gün: 13

Her zaman: 186