Moleskine Journey Travel Light Battery Replacement

Giriş
1. adıma gitHere is my take on replacing the battery of the Moleskine Journey Travel Light.
Inspired by the following article, I have got myself a new-in-box light, understanding that it will need battery replacement right away.
Introduced somewhere around 2016, this light, sadly, lacked public attention. As such, there are little to no reviews with a fair bit of comments being left for a different model and/or by non-tech savvy users.
To me, this light resembles a certain MP3 player with its many clones. The looks are very simple, and the clip design seems like something I would come up with myself. In addition, the Moleskine brand, while new to me, looks like one, that would be stamped on a product of certain design effort and build quality.
Let's pry it open and find out if it is worth anyone's time, shall we?
Neye ihtiyacın var
Parçalar
Aletler


Daha fazlasını göster…
-
-
You may or may not have experience doing repairs on old electronics. The following repair will require patience, semi-destructive methods, and soldering. From my experience, it is not as tricky as, say, an iPod classic, yet has enough stuff to mess up.
-
Please take your time, clean your workspace, and ensure good lighting and ventilation. The required tools are listed above.
-
-
-
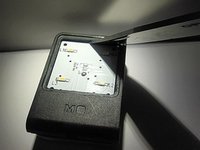
The device has a clip on a hinge, and the body itself. It is NOT possible to remove the clip without opening the body.
-
The body shell consists of two non-transparent pieces and a matt-white light diffuser panel. To make things easier, I'll call them "the diffuser", "the wall", and "the base".
-
As it turns out, the three pieces are held together with some sort of glue. The wall has about 1mm of overlap with the diffuser, where those are glued together. The same goes for the base. To swap the battery we'll have to do some prying and then gluing, unfortunately.
-
To start the disassembly, find the biggest gap between the diffuser and the other part. Use a flat, sharp tool. Apply pressure downward and inward on the most area possible. Don't let the tool slip, don't put pressure on one point, and be patient. Once one side gets loose, move your tool toward the end of the opening, undoing more and more glue.
-
It is possible to leave no scratches and cracks. Take your time, try different tools, and be careful. Little cracking noise is ok when the glue is being broken.
-
-
-
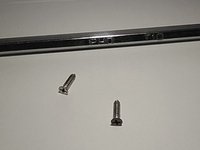
Once the diffuser is off, you'll find a PCB, held by two Phillips head screws (guess someone has stashed a bunch of screws for themselves, hehe).
-
Don't make a rookie mistake. Always use the correct screwdriver bit (PH0), and hold it tight all the way out. To prevent stripping the screw head, apply moderate pressure down the screwdriver with your palm, twisting it with your fingers
-
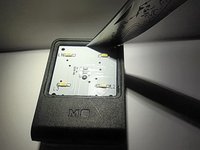
The screws are out. Here comes the know-how. My guesstimate was incorrect. The PCB cannot indeed be pulled out from the case without further prying. However, there is an easy way to pry the case open cleanly. Put a knife inside the gap between the PCB and the wall. Pressing against the PCB, put the knife at an angle, and push the wall outward.
-
The goal is to detach the wall from the base. You should not need much force to hear it unglue with some cracking noise. Be careful with the knife. Use eye-protection. Once you repeat the procedure with the other sides, the base should come loose. Watch the hinge. Once the base is loose, the whole package can be pushed downward.
-
-
-
You'll need a soldering iron anyway, so don't worry if you brake the switch wire (of which there is one only, sic.).
-
To get a detailed view of the connections, please refer to the previous guide. I have put the link in the introduction.
-
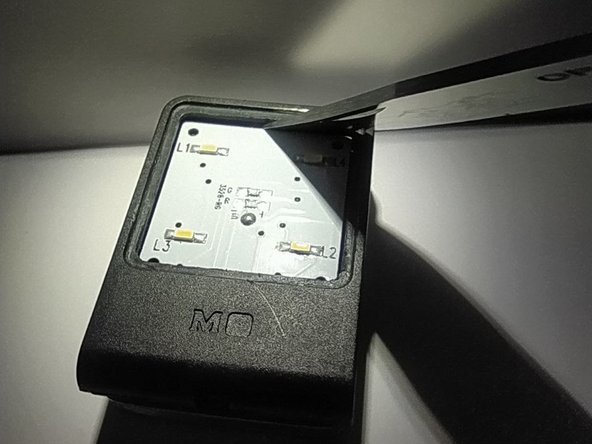
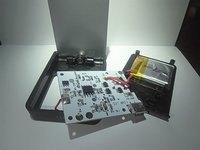
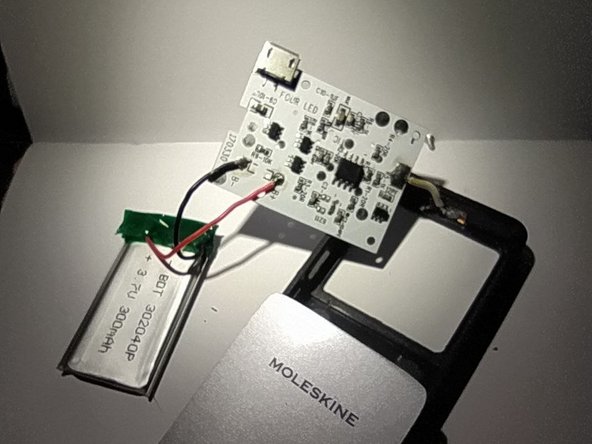
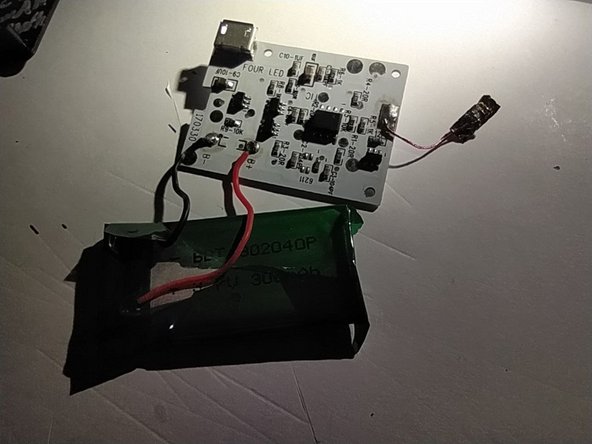
Observing the innards, I have made some important points. First: the PCB is double-sided, with a bunch of SMD components and wires, connected from one side only. What it means to us, is that one should be rather careful handling it. SMD is hard to resolder, and you don't want to peel a mounting point with the wire.
-
Second: the charging controller is contained on the main PCB (contrary to my assumptions in the previous article). This should be a plus since there is more choice for the replacement.
-
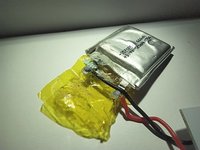
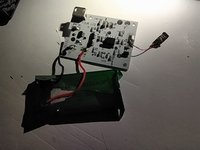
Third: the battery has leaked. Cut the wires, put the battery in a safe place (should be disposed of properly and not trashed), and wash your hands thoroughly.
-
-
-
I am no expert in the field, yet this part should not be too hard. Although, I encourage some advice on the topic.
-
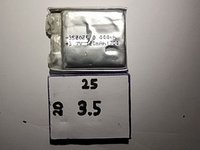
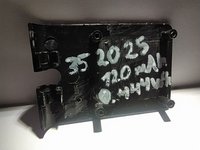
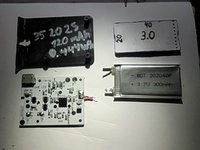
What we have here is a Lithium polymer battery (Li-po) of certain size and specs. The "352025" stands for 3.5mm thick, 20mm x 25mm in size. It should be noted, that the length includes the thin part, where the contacts are located. As for the specs, we look for a battery of 3.7V voltage, with two wires (black-ground, red-power), and no charging circuit (debatable).
-
If you are ok with current specs and don't want the risk, look for the same exact size and specs. I am guessing that the voltage is what matters, so no worry if you find a slightly different-sized battery.
-
-
-
It can be hard to find a similar-sized battery. No worries, as more battery = more better.
-
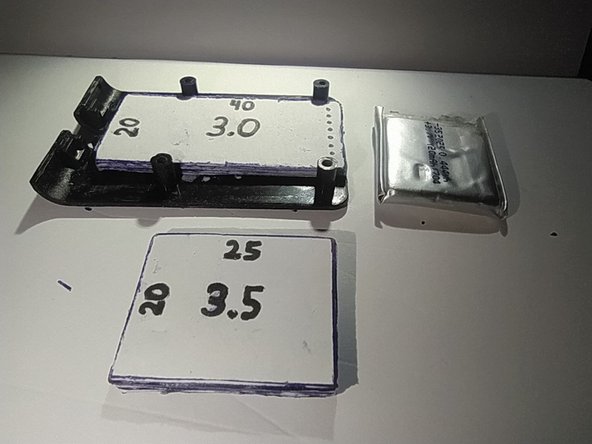
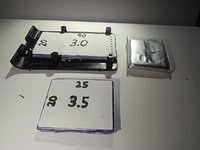
I have experimented with paper mock-ups, and here are my findings.
-
The original battery thickness of 35 (3.5mm) is optimal, if not too large. The swollen old battery has marks from SMD components all over it. I say, go for 3.5mm or less. 40 won't fit.
-
The other dimensions are limited by the PCB posts and the size of the body itself. Without modifications, the biggest battery you can fit in is roughly 352330. Vertically or horizontally, the space is the same.
-
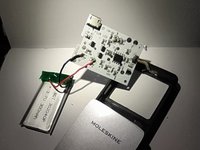
However, there is some sweet space, constricted by a post, marked in white. The post serves the purpose of stopping the micro-USB connector from being pushed inside. For my personal use, this should be superfluous.
-
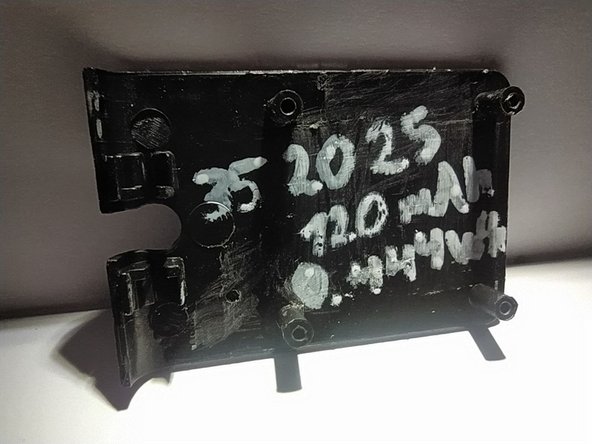
Using a knife, I cut the post flush with the base. Now there is 15mm more battery space. Cool. Searching for a battery, I found a 302040 unit. It has 300mAh capacity and fits perfectly. Hopefully, the charging controller won't be against it. To be continued...
-
-
-
So, the batteries have arrived. Just in case, I have ordered some smaller ones, as well as the mighty 302040.
-
The wires were soldered (bat+ to PCB+, bat- to PCB-), and I tried to put back the device.
-
Here comes the annoying bit: the sensory switch. Or One-Wire Touch Detector to be more precise. The thing consists of some magic on the PCB, a wire, and a copper plate. Touching the wire works, so does touching the PCB. If you mess with it once the good battery is attached, you'll be blinded quite fast.
-
To assemble the device without being blinded, use some electrical tape to cover the LEDs. To make the thing easier to assemble, use an audio wire instead of a stock one for the switch. A touch of CA glue (or epoxy in my case), and the light is as good as new (or even better).
-