Ana içeriğe geç

Nikon Coolpix P100 Motherboard Access

Neye ihtiyacın var

  1. Nikon Coolpix P100  Motherboard Access, Nikon Coolpix P100  Motherboard Access: adım 1, 1 resimden 1.
    • Turn the front of the camera toward you.

  2. Nikon Coolpix P100  Motherboard Access: adım 2, 3 resimden 1. Nikon Coolpix P100  Motherboard Access: adım 2, 3 resimden 2. Nikon Coolpix P100  Motherboard Access: adım 2, 3 resimden 3.
    • On the left side of the camera, use a Phillips #00 Precision Screwdriver to remove the two marked screws.

  3. Nikon Coolpix P100  Motherboard Access: adım 3, 1 resimden 1.
    • On the right side of the camera, remove the first visible screw above the HDMI and A/V OUT cover.

  4. Nikon Coolpix P100  Motherboard Access: adım 4, 1 resimden 1.
    • Lift the HDMI and A/V OUT cover to access the hidden screw between the two ports.

    • Remove the screw

  5. Nikon Coolpix P100  Motherboard Access: adım 5, 1 resimden 1.
    • Flip the camera upside down and remove the seven marked screws.

  6. Nikon Coolpix P100  Motherboard Access: adım 6, 2 resimden 1. Nikon Coolpix P100  Motherboard Access: adım 6, 2 resimden 2.
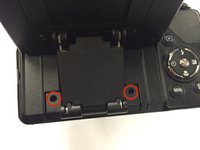
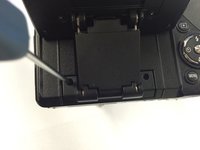
    • Turn the back of the camera toward you.

    • Lift the display panel and remove the two marked screws

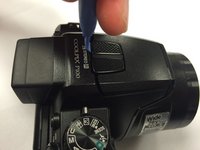
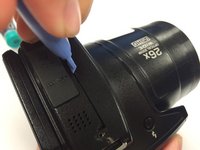
  7. Nikon Coolpix P100  Motherboard Access: adım 7, 3 resimden 1. Nikon Coolpix P100  Motherboard Access: adım 7, 3 resimden 2. Nikon Coolpix P100  Motherboard Access: adım 7, 3 resimden 3.
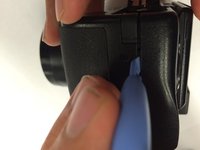
    • Use a plastic iFixit opening tool to gently loosen the top and sides of the camera.

  8. Nikon Coolpix P100  Motherboard Access: adım 8, 1 resimden 1.
    • Before fully opening the camera, identify the two marked ribbon cables

    • Properly detach the ribbons before proceeding

  9. Nikon Coolpix P100  Motherboard Access: adım 9, 1 resimden 1.
    • Carefully open the camera.

    • Now you have partial access to the camera's motherboard.

  10. Nikon Coolpix P100  Motherboard Access: adım 10, 1 resimden 1.
    • Remove the five indicated screws that are attached to the metal plate.

  11. Nikon Coolpix P100  Motherboard Access: adım 11, 1 resimden 1.
    • Remove the hidden top screw that is attached to the metal plate.

  12. Nikon Coolpix P100  Motherboard Access: adım 12, 1 resimden 1.
    • Use a plastic iFixit opening tool to carefully loosen the metal plate.

    • Remove the metal plate to access the camera's motherboard.

  13. Nikon Coolpix P100  Motherboard Access: adım 13, 1 resimden 1.
    • Now you have access to the camera's motherboard

Sonuç

To reassemble your device, follow these instructions in reverse order.

Rikki Brown

Üyelik tarihi: 01/09/15

267 İtibar

2 adet Kılavuz yazıldı

Ekip

USF Tampa, Team 1-1, Tanski Winter 2015 USF Tampa, Team 1-1, Tanski Winter 2015 üyesi

USFT-TANSKI-W15S1G1

3 Üyeler

8 adet Kılavuz yazıldı

Bir Yorum

y como cambia el lente si se atasca

djalfonsodaza - Yanıt

Yorum Ekle

İstatistikleri Görüntüle:

Son 24 Saat: 0

Son 7 gün: 2

Son 30 gün: 8

Her zaman: 2,436