-
Adım 1 Battery
Dikkatli ol: adımlar 1-2 yapım altında olarak işaretlenen bir kılavuzdan alınmıştır.
-
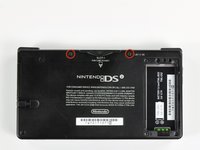
Loosen the two screws on the battery panel. Then lift the panel up to remove it.
-
-
-
L Button.
-
Top of the battery pack.
-
To remove the battery pack, place your fingernail or a spudger at the top of the battery near the L button. Gently lift the battery out.
-
-
-
Two screws are hidden underneath two rubber feet highlighted in red.
-
Use the tip of a spudger to pry the rubber feet out of the lower case.
One of the feet did break on me, tweezers came in handy for picking it out
I unfolded and sharpened a paperclip. You can use that to stab and hook the rubber without tearing it, as the rubber is thick enough to reseal when reinserted.
-
-
-
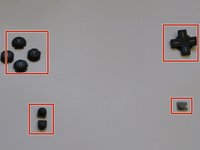
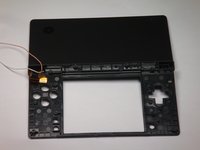
Remove the following screws securing the lower case to the body of the DSi:
-
Six 5.2 mm Phillips #00 screws.
-
One 2.7 mm Phillips #00 screw.
Impossible d'enlever les vises… trop serré! comment faire?
i can't get the screw by the gamecard slot out, PH#00 is too small and PH#0 is too big
same problem here. maybe try a JIS?
-
-
-
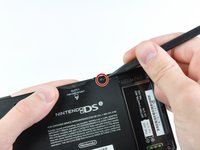
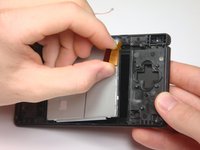
Insert the spudger in between the lower casing and lower panel near the top right corner of the DSi.
-
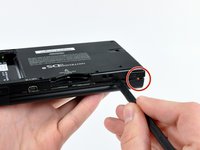
Carefully run the spudger along the edge of the outer casing, creating an opening between the body and the casing.
-
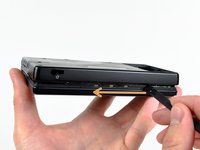
Continue running the spudger around the body of the DSi until the majority of the lower case has been separated.
-
-
-
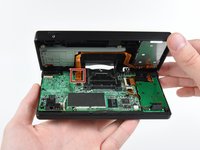
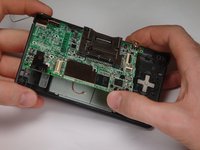
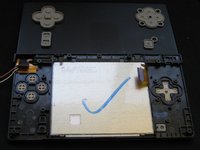
Carefully lift the lower casing from its bottom edge.
-
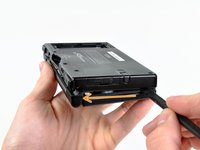
Pry the volume and SD board cable up from its socket on the motherboard using a spudger.
-
Once the cable is completely removed, then you may take off the entire outer casing.
Any help removing the ribbon cable, I have absolutely no clue how to remove this.
-
-
-
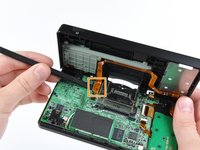
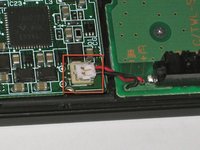
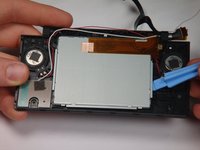
Flip up the black latch and disconnect the D-Pad/Power Button ribbon cable.
-
-
-
The connector is two pieces -- a white "male" piece (connected to the wires), and a beige "female" part (soldered to the main board).
-
There is a small "notch" in the female part, to give you a place to insert a small flat-head screwdriver. Put the corner of your screwdriver in there, and twist it gently to push the white part up (away from the main board). Do not try to pull it to the right (towards the battery board).
-
-
Adım 9 Motherboard
Dikkatli ol: adımlar 9-10 yapım altında olarak işaretlenen bir kılavuzdan alınmıştır.
-
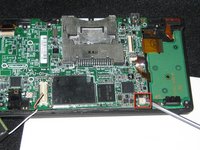
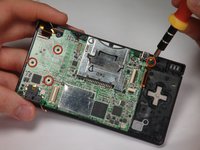
Remove 4 Phillips screws from the board.
-
Lift the main board from the bottom end and flip it over to reveal the last connector.
-
-
-
-
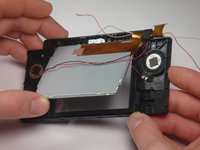
On the bottom cover, use a screwdriver to remove the 3 Phillips screws holding the battery compartment.
-
Removing the 2 lower screws also removes the "L" trigger.
-


To reassemble your device, follow these instructions in reverse order.
To reassemble your device, follow these instructions in reverse order.
İptal et: Bu kılavuzu tamamlamadım.
2 farklı kişi bu kılavuzu tamamladı.
Ekip

Cal Poly, Team 6-1, Maness Fall 2009 Cal Poly, Team 6-1, Maness Fall 2009 üyesi
CPSU-MANESS-F09S6G1
5 Üyeler
4 adet Kılavuz yazıldı
Bir Yorum
Pictures are too dark to properly see where the structures mentioned in the text are, but worse than this, Steps 21 and 22 do not properly explain the “twist” method that you need to use with extreme caution! This is the Achille’s heel of dismantling the device and if you’re gonna make a mistake, let this not be the one…