Ana içeriğe geç

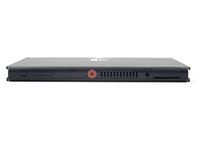
Nintendo Switch OLED Model Rear Case Replacement

Neye ihtiyacın var

  1. Nintendo Switch OLED Model Rear Case Replacement, Release the Joy Con controller locking tabs: adım 1, 3 resimden 1. Nintendo Switch OLED Model Rear Case Replacement, Release the Joy Con controller locking tabs: adım 1, 3 resimden 2. Nintendo Switch OLED Model Rear Case Replacement, Release the Joy Con controller locking tabs: adım 1, 3 resimden 3.
    • Before you begin this repair, make sure the device is completely powered off.

    • Press and hold down the small round button on the back of the Joy Con controller.

    • While you hold down the button, slide the controller upward.

  2. Nintendo Switch OLED Model Rear Case Replacement, Remove the Joy Con controllers: adım 2, 3 resimden 1. Nintendo Switch OLED Model Rear Case Replacement, Remove the Joy Con controllers: adım 2, 3 resimden 2. Nintendo Switch OLED Model Rear Case Replacement, Remove the Joy Con controllers: adım 2, 3 resimden 3.
    • Continue sliding the Joy Con upward until it's completely removed from the console.

    • Repeat this same process for the other Joy Con.

  3. Nintendo Switch OLED Model Rear Case Replacement, Remove the top screw: adım 3, 2 resimden 1. Nintendo Switch OLED Model Rear Case Replacement, Remove the top screw: adım 3, 2 resimden 2.
    • Use a Phillips driver, or a JIS driver, to remove the 2 mm-long screw securing the top of the rear case to the frame.

    • To prevent these tight screws from stripping, apply firm downward force, work slowly, and try another JIS or Phillips driver if the screws won't come out.

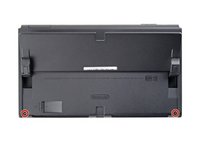
  4. Nintendo Switch OLED Model Rear Case Replacement, Remove the bottom screws: adım 4, 2 resimden 1. Nintendo Switch OLED Model Rear Case Replacement, Remove the bottom screws: adım 4, 2 resimden 2.
    • Use a Phillips driver to remove the two 2 mm-long screws securing the bottom of the rear case to the frame.

  5. Nintendo Switch OLED Model Rear Case Replacement, Remove the right screw: adım 5, 2 resimden 1. Nintendo Switch OLED Model Rear Case Replacement, Remove the right screw: adım 5, 2 resimden 2.
    • Use a Phillips driver to remove the 3.8 mm screw securing the right Joy-Con sensor rail to the rear case.

    • To prevent these tight screws from stripping, apply firm downward force, work slowly and try another JIS 000 or PH 000 driver if the screws won't come out.

  6. Nintendo Switch OLED Model Rear Case Replacement, Remove the left screw: adım 6, 2 resimden 1. Nintendo Switch OLED Model Rear Case Replacement, Remove the left screw: adım 6, 2 resimden 2.
    • Use a Phillips driver to remove the 3.8 mm screw securing the left Joy-Con sensor rail to the rear case.

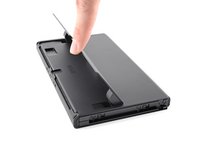
  7. Nintendo Switch OLED Model Rear Case Replacement, Open the kickstand: adım 7, 2 resimden 1. Nintendo Switch OLED Model Rear Case Replacement, Open the kickstand: adım 7, 2 resimden 2.
    • Use your finger to flip up the kickstand on the back of the device.

    • If there's a microSD card in the microSD card slot, remove it now before you continue to the next step.

  8. Nintendo Switch OLED Model Rear Case Replacement, Remove the back-side screws: adım 8, 2 resimden 1. Nintendo Switch OLED Model Rear Case Replacement, Remove the back-side screws: adım 8, 2 resimden 2.
    • Use a Y00 screwdriver to remove the two 4.3 mm screws securing the rear case to the frame.

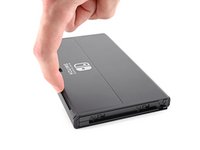
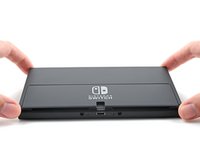
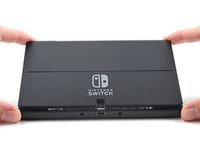
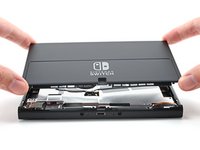
  9. Nintendo Switch OLED Model Rear Case Replacement, Remove the rear case: adım 9, 3 resimden 1. Nintendo Switch OLED Model Rear Case Replacement, Remove the rear case: adım 9, 3 resimden 2. Nintendo Switch OLED Model Rear Case Replacement, Remove the rear case: adım 9, 3 resimden 3.
    • Lift the rear case up from the top of the device and remove it.

    • If you're having trouble removing the case, use an opening pick to pry up the plastic clips.

Sonuç

To reassemble your device, follow these instructions in reverse order.

Repair didn’t go as planned? Try some basic troubleshooting, or ask our Nintendo Switch OLED Answers community for help.

Compare your new replacement part to the original part—you may need to transfer remaining components or remove adhesive backings from the new part before you install it.

Bir başkası bu kılavuzu tamamladı.

Alex Diaz-Kokaisl

Üyelik tarihi: 01/16/22

124.236 İtibar

581 adet Kılavuz yazıldı

Ekip

iFixit iFixit üyesi

Staff

135 Üyeler

17.199 adet Kılavuz yazıldı

2 Yorum

Where do I buy the rear case from not listed in this article

Ruben Canas - Yanıt

Hi Ruben!

I added the part to the guide. Unfortunately, at the time of me writing this, we are out of stock. You can get notified when we get more in stock on the part's page!

Alex Diaz-Kokaisl -

Yorum Ekle

İstatistikleri Görüntüle:

Son 24 Saat: 15

Son 7 gün: 97

Son 30 gün: 508

Her zaman: 7,734