Ana içeriğe geç
Nintendo Switch OLED Model Shield Plate Replacement

Nintendo Switch OLED Model Shield Plate Replacement

Alex Diaz-Kokaisl

Alex Diaz-Kokaisl ve 2 diğer katkıda bulunanlar

En son December 14, 2024 tarihinde güncellendi

30 dakika - 1 saat
Orta
Salt Önkoşul
Bu kılavuz yalnızca diğer kılavuzlar için bir ön koşul olarak kullanılmak üzere tasarlanmıştır. Tek başına eksiktir.

Use this guide to replace the shield plate and both Wi-Fi antennas in your Nintendo Switch OLED. This guide also includes the battery disconnection.

This is a prerequisite-only guide! This guide is part of another procedure and is not meant to be used alone.

The Switch OLED uses JIS screws, but you can use a Phillips screwdriver in a pinch. Be very careful not to strip the screws. iFixit's Phillips bits are designed to be cross-compatible with JIS-style screws.

Note: When you remove the shield plate, you’ll need to replace the thermal compound between the plate and the heatsink. Since normal thermal paste isn’t designed to bridge large gaps, the closest replacement is K5 Pro viscous thermal paste. You will, however, need regular replacement thermal paste for the CPU.

  1. Nintendo Switch OLED Model Shield Plate Replacement, Remove the shield plate's tape: adım 1, 2 resimden 1. Nintendo Switch OLED Model Shield Plate Replacement, Remove the shield plate's tape: adım 1, 2 resimden 2.
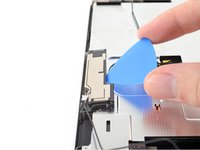
    • Use the flat end of a spudger to separate a corner of the tape from the shield plate.

  2. Nintendo Switch OLED Model Shield Plate Replacement: adım 2, 3 resimden 1. Nintendo Switch OLED Model Shield Plate Replacement: adım 2, 3 resimden 2. Nintendo Switch OLED Model Shield Plate Replacement: adım 2, 3 resimden 3.
    Bu adımda kullanılan alet:
    Tweezers
    $4.99
    • Use tweezers, or your fingers, to peel back and remove the tape.

    • Store the tape in a clean space for reinstallation.

  3. Nintendo Switch OLED Model Shield Plate Replacement, Disconnect the primary Wi-Fi antenna: adım 3, 2 resimden 1. Nintendo Switch OLED Model Shield Plate Replacement, Disconnect the primary Wi-Fi antenna: adım 3, 2 resimden 2.
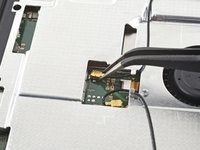
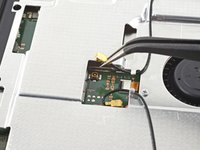
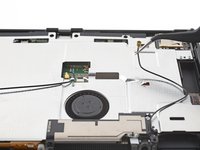
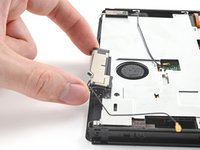
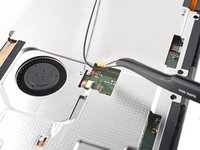
    • Use tweezers, or your fingers, to pull up and disconnect the primary Wi-Fi antenna's coaxial cable.

    • During reassembly, these can be tricky to reconnect. One at a time, hold each connector in place over its socket and press down with the flat end of a spudger. The connector should snap into place.

  4. Nintendo Switch OLED Model Shield Plate Replacement, Reroute the primary antenna's coaxial cable: adım 4, 3 resimden 1. Nintendo Switch OLED Model Shield Plate Replacement, Reroute the primary antenna's coaxial cable: adım 4, 3 resimden 2. Nintendo Switch OLED Model Shield Plate Replacement, Reroute the primary antenna's coaxial cable: adım 4, 3 resimden 3.
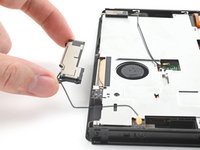
    • Use tweezers, or your fingers, to reroute the primary antenna's coaxial cable out of its slots in the shield plate.

  5. Nintendo Switch OLED Model Shield Plate Replacement, Unfasten the primary Wi-Fi antenna: adım 5, 2 resimden 1. Nintendo Switch OLED Model Shield Plate Replacement, Unfasten the primary Wi-Fi antenna: adım 5, 2 resimden 2.
    • Use a Phillips driver to remove the two 4.4 mm screws securing the primary Wi-Fi antenna to the shield plate.

  6. Nintendo Switch OLED Model Shield Plate Replacement, Remove the primary Wi-Fi antenna: adım 6, 3 resimden 1. Nintendo Switch OLED Model Shield Plate Replacement, Remove the primary Wi-Fi antenna: adım 6, 3 resimden 2. Nintendo Switch OLED Model Shield Plate Replacement, Remove the primary Wi-Fi antenna: adım 6, 3 resimden 3.
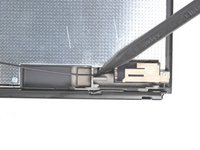
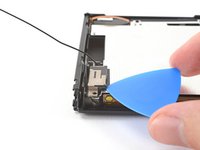
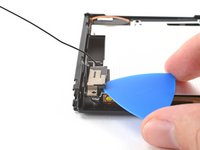
    • Insert an opening pick between the primary Wi-Fi antenna and the shield plate.

    • Pry up with the pick to separate the primary Wi-Fi antenna from the shield plate.

  7. Nintendo Switch OLED Model Shield Plate Replacement: adım 7, 2 resimden 1. Nintendo Switch OLED Model Shield Plate Replacement: adım 7, 2 resimden 2.
    • Remove the primary Wi-Fi antenna.

  8. Nintendo Switch OLED Model Shield Plate Replacement, Disconnect the secondary Wi-Fi antenna: adım 8, 2 resimden 1. Nintendo Switch OLED Model Shield Plate Replacement, Disconnect the secondary Wi-Fi antenna: adım 8, 2 resimden 2.
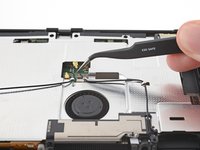
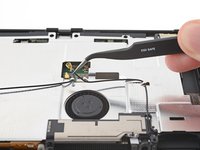
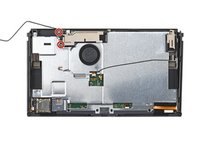
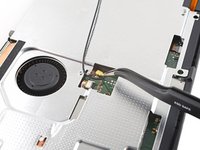
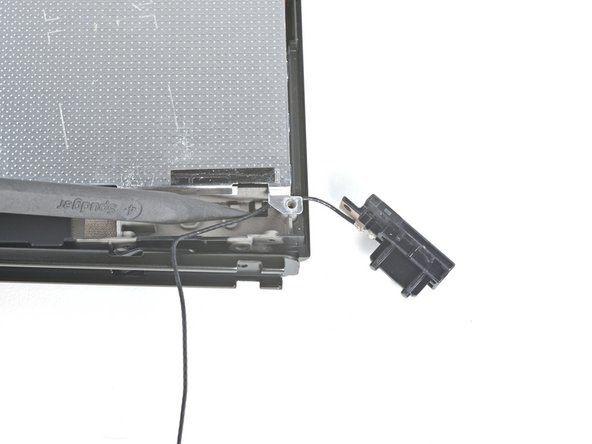
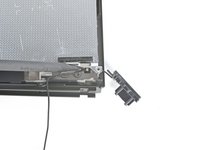
    • Use tweezers, or your fingers, to pull up and disconnect the secondary Wi-Fi antenna's coaxial cable.

  9. Nintendo Switch OLED Model Shield Plate Replacement, Reroute the secondary Wi-Fi antenna's coaxial cable: adım 9, 2 resimden 1. Nintendo Switch OLED Model Shield Plate Replacement, Reroute the secondary Wi-Fi antenna's coaxial cable: adım 9, 2 resimden 2.
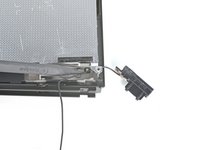
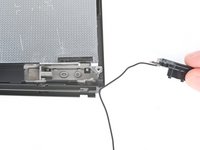
    • Use the point of a spudger to reroute the secondary Wi-Fi antenna's coaxial cable from its slot in the frame.

  10. Nintendo Switch OLED Model Shield Plate Replacement, Unfasten the secondary Wi-Fi antenna: adım 10, 2 resimden 1. Nintendo Switch OLED Model Shield Plate Replacement, Unfasten the secondary Wi-Fi antenna: adım 10, 2 resimden 2.
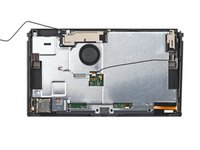
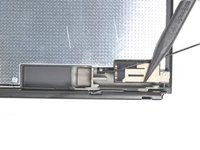
    • Use a Phillips driver to remove the 4.4 mm screw securing the secondary Wi-Fi antenna to the shield plate.

  11. Nintendo Switch OLED Model Shield Plate Replacement, Remove the secondary Wi-Fi antenna: adım 11, 3 resimden 1. Nintendo Switch OLED Model Shield Plate Replacement, Remove the secondary Wi-Fi antenna: adım 11, 3 resimden 2. Nintendo Switch OLED Model Shield Plate Replacement, Remove the secondary Wi-Fi antenna: adım 11, 3 resimden 3.
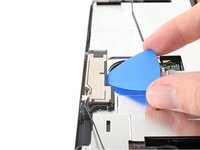
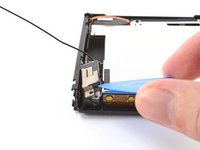
    • Insert an opening pick between the secondary Wi-Fi antenna and the shield plate.

    • Pry up with the pick to separate the secondary Wi-Fi antenna from the shield plate.

    • Don't attempt to completely remove the antenna yet, as its coaxial cable is still routed through the frame.

  12. Nintendo Switch OLED Model Shield Plate Replacement: adım 12, 3 resimden 1. Nintendo Switch OLED Model Shield Plate Replacement: adım 12, 3 resimden 2. Nintendo Switch OLED Model Shield Plate Replacement: adım 12, 3 resimden 3.
    • Use the point of a spudger to reroute the secondary Wi-Fi antenna's coaxial cable out of its slot in the frame.

    • Remove the secondary Wi-Fi antenna.

  13. Nintendo Switch OLED Model Shield Plate Replacement, Unfasten the shield plate: adım 13, 2 resimden 1. Nintendo Switch OLED Model Shield Plate Replacement, Unfasten the shield plate: adım 13, 2 resimden 2.
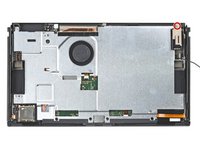
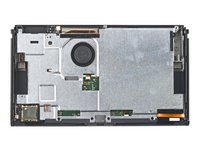
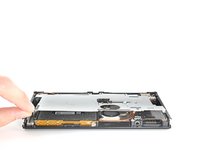
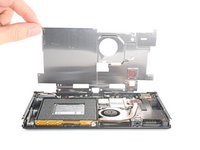
    • Use a Phillips driver to remove the six 4.4 mm screws securing the shield plate to the frame.

  14. Nintendo Switch OLED Model Shield Plate Replacement: adım 14, 2 resimden 1. Nintendo Switch OLED Model Shield Plate Replacement: adım 14, 2 resimden 2.
    • Use your fingers to lift the top of the shield plate up and away from the frame.

    • You may feel a bit of resistance. This is normal, since the shield plate is slightly bonded to the heat sink with thermal paste.

    • Remove the shield plate.

    • A thick pink thermal compound bridges the gap between the shield plate and the copper heat sink underneath. Whenever the shield plate is removed, refer to our thermal paste guide to remove the old thermal compound and replace it with an appropriate compound, such as K5 Pro, during reassembly.

  15. Nintendo Switch OLED Model Shield Plate Replacement, Disconnect the battery: adım 15, 2 resimden 1. Nintendo Switch OLED Model Shield Plate Replacement, Disconnect the battery: adım 15, 2 resimden 2.
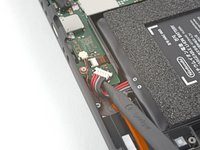
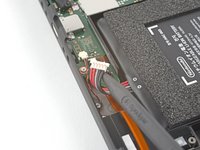
    • Use the point of a spudger to pry up and disconnect the battery.

Sonuç

To reassemble your device, follow these instructions in reverse order.

Compare your new replacement part to the original part—you may need to transfer remaining components or remove adhesive backings from the new part before you install it.

Repair didn’t go as planned? Try some basic troubleshooting, or ask our Nintendo Switch OLED Answers community for help.

Alex Diaz-Kokaisl

Üyelik tarihi: 01/16/22

162.642 İtibar

769 adet Kılavuz yazıldı

Ekip

iFixit iFixit üyesi

Staff

118 Üyeler

19.465 adet Kılavuz yazıldı

0 Yorum

Yorum Ekle

İstatistikleri Görüntüle:

Son 24 Saat: 2

Son 7 gün: 7

Son 30 gün: 18

Her zaman: 40