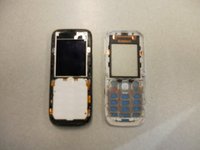
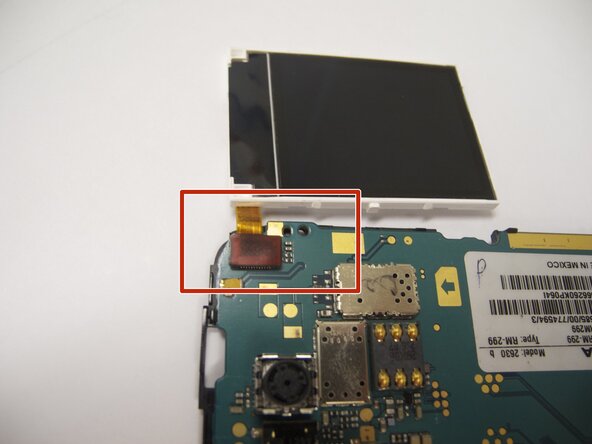
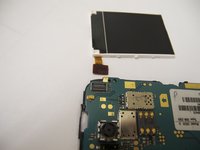
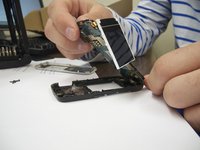
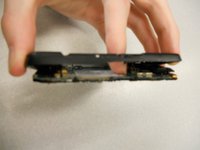
Ana içeriğe geç
Onarım Topluluğuna Katılın - Hesap Oluşturun

Nokia 2630b Back Case Replacement

Neye ihtiyacın var

  1. Nokia 2630b Back Case Replacement, Battery Case: adım 1, 2 resimden 1. Nokia 2630b Back Case Replacement, Battery Case: adım 1, 2 resimden 2.
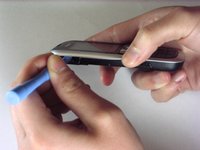
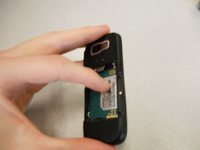
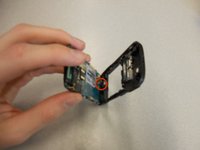
    • Press and the release button on both sides of the battery cover. While holding down the release buttons pull the battery cover away from the phone

    FixBot'a Sor

    Yorum Ekle

  2. Nokia 2630b Back Case Replacement: adım 2, 1 resimden 1.
    • Pull out the battery by holding the top of the battery and tilting out.

    FixBot'a Sor

    Yorum Ekle

  3. Nokia 2630b Back Case Replacement, Screen / Front Case: adım 3, 1 resimden 1.
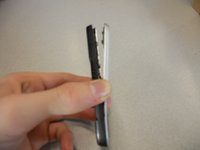
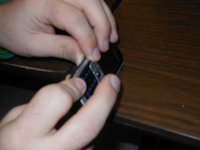
    • Remove the two screws on either side of the battery case using a T5 Torx screwdriver.

    FixBot'a Sor

    Yorum Ekle

  4. Nokia 2630b Back Case Replacement: adım 4, 3 resimden 1. Nokia 2630b Back Case Replacement: adım 4, 3 resimden 2. Nokia 2630b Back Case Replacement: adım 4, 3 resimden 3.
    • Separate the front case from the back case using the iPod opener.

    • The keypad is a loose piece and may fall out.

    FixBot'a Sor

    Yorum Ekle

  5. Nokia 2630b Back Case Replacement: adım 5, 1 resimden 1.
    • Remove screws using the T5 Torx screwdriver to release the computer chip from the case.

    FixBot'a Sor

    Yorum Ekle

  6. Nokia 2630b Back Case Replacement: adım 6, 1 resimden 1.
    • Carefully lift the black frame off the screen with your fingers.

    FixBot'a Sor

    Yorum Ekle

  7. Nokia 2630b Back Case Replacement: adım 7, 1 resimden 1.
    • Carefully remove the computer chip and screen out of the black case with your fingers.

    FixBot'a Sor

    Yorum Ekle

  8. Nokia 2630b Back Case Replacement: adım 8, 2 resimden 1. Nokia 2630b Back Case Replacement: adım 8, 2 resimden 2.
    • The screen is attached to the motherboard by an orange ribbon.

    • Carefully detach the ribbon from the motherboard using your fingers.

    FixBot'a Sor

    Yorum Ekle

  9. Nokia 2630b Back Case Replacement: adım 9, 1 resimden 1.
    • Reattach new screen by connecting the orange ribbon to the computer chip.

    FixBot'a Sor

    Yorum Ekle

  10. Nokia 2630b Back Case Replacement: adım 10, 2 resimden 1. Nokia 2630b Back Case Replacement: adım 10, 2 resimden 2.
    • Place computer chip and screen back into black case.

    FixBot'a Sor

    Yorum Ekle

  11. Nokia 2630b Back Case Replacement: adım 11, 1 resimden 1.
    • Place black frame back over screen.

    FixBot'a Sor

    Yorum Ekle

  12. Nokia 2630b Back Case Replacement: adım 12, 2 resimden 1. Nokia 2630b Back Case Replacement: adım 12, 2 resimden 2.
    • Carefully place keypad back in place.

    FixBot'a Sor

    Yorum Ekle

  13. Nokia 2630b Back Case Replacement: adım 13, 2 resimden 1. Nokia 2630b Back Case Replacement: adım 13, 2 resimden 2.
    • Snap the front case back in place with the bottom case with your fingers.

    FixBot'a Sor

    Yorum Ekle

  14. Nokia 2630b Back Case Replacement: adım 14, 1 resimden 1.
    • Reassemble screws with microscrewdriver.

    FixBot'a Sor

    Yorum Ekle

  15. Nokia 2630b Back Case Replacement: adım 15, 1 resimden 1.
    • Slide battery back into place.

    FixBot'a Sor

    Yorum Ekle

  16. Nokia 2630b Back Case Replacement: adım 16, 1 resimden 1.
    • Snap battery cover back into place.

    FixBot'a Sor

    Yorum Ekle

  17. Nokia 2630b Back Case Replacement, Back Case: adım 17, 2 resimden 1. Nokia 2630b Back Case Replacement, Back Case: adım 17, 2 resimden 2.
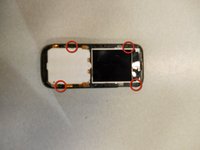
    • Locate the four screws that secure the back case to the rest of the phone.

    • Unscrew all four screws using a "T-5" star shaped screw driver, turning counter-clockwise.

    FixBot'a Sor

    Yorum Ekle

  18. Nokia 2630b Back Case Replacement: adım 18, 3 resimden 1. Nokia 2630b Back Case Replacement: adım 18, 3 resimden 2. Nokia 2630b Back Case Replacement: adım 18, 3 resimden 3.
    • DO NOT PULL APART! There is a wire attaching the speaker to the rear case. It is very important to NOT sever this connection. Because of this, the rear case does not completely detach from the rest of the phone.

    • Holding the rear case, applying pressure to the back of the phone near the location of the battery in order to separate the two components.

    FixBot'a Sor

    Yorum Ekle

Sonuç

To reassemble your device, follow these instructions in reverse order. Take your e-waste to an R2 or e-Stewards certified recycler.

İptal et: Bu kılavuzu tamamlamadım.

Eric

Üyelik tarihi: 04/07/11

57 İtibar

4 adet Kılavuz yazıldı

Ekip

Cal Poly, Team 9-61, Walters Spring 2011 Cal Poly, Team 9-61, Walters Spring 2011 üyesi

CPSU-WALTERS-S11S9G61

5 Üyeler

6 adet Kılavuz yazıldı

0Kılavuz Yorumları

Yorum Ekle

İstatistikleri Görüntüle:

Son 24 Saat: 0

Son 7 gün: 4

Son 30 gün: 33

Her zaman: 2,274