Ana içeriğe geç

Nokia G42 5G Charging Port Removal for Screen Replacement

Salt Önkoşul
Bu kılavuz yalnızca diğer kılavuzlar için bir ön koşul olarak kullanılmak üzere tasarlanmıştır. Tek başına eksiktir.
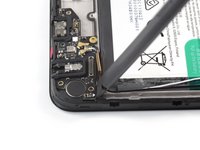
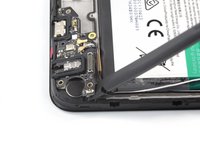
  1. Nokia G42 5G Charging Port Removal for Screen Replacement, Disconnect the interconnect cable: adım 1, 2 resimden 1. Nokia G42 5G Charging Port Removal for Screen Replacement, Disconnect the interconnect cable: adım 1, 2 resimden 2.
    • Use the flat end of a spudger to disconnect the interconnect cable by prying the connector straight up from its socket.

    • To re-attach press connectors like this one, carefully align and press down on one side until it clicks into place, then repeat on the other side. Don't press down on the middle. If the connector is misaligned, the pins can bend and cause permanent damage.

  2. Nokia G42 5G Charging Port Removal for Screen Replacement, Disconnect the antenna cables: adım 2, 3 resimden 1. Nokia G42 5G Charging Port Removal for Screen Replacement, Disconnect the antenna cables: adım 2, 3 resimden 2. Nokia G42 5G Charging Port Removal for Screen Replacement, Disconnect the antenna cables: adım 2, 3 resimden 3.
    • Use a spudger to disconnect both antenna cables by prying their connectors straight up from the sockets on the motherboard.

  3. Nokia G42 5G Charging Port Removal for Screen Replacement, Unseat the antenna cables: adım 3, 3 resimden 1. Nokia G42 5G Charging Port Removal for Screen Replacement, Unseat the antenna cables: adım 3, 3 resimden 2. Nokia G42 5G Charging Port Removal for Screen Replacement, Unseat the antenna cables: adım 3, 3 resimden 3.
    Bu adımda kullanılan alet:
    Tweezers
    $4.99
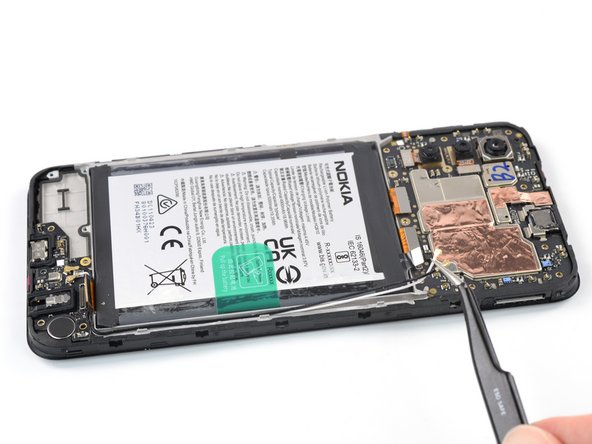
    • Use a pair of tweezers or your fingers to lift the antenna cables out of their recess in the frame.

    • During reassembly, connect the white antenna cable to the motherboard before connecting the black antenna cable. Then reseat the antenna cables into their recess.

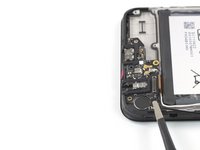
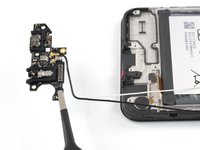
  4. Nokia G42 5G Charging Port Removal for Screen Replacement, Pry up the charging port assembly: adım 4, 3 resimden 1. Nokia G42 5G Charging Port Removal for Screen Replacement, Pry up the charging port assembly: adım 4, 3 resimden 2. Nokia G42 5G Charging Port Removal for Screen Replacement, Pry up the charging port assembly: adım 4, 3 resimden 3.
    • The charging port assembly is held in place with mild adhesive.

    • Insert the flat end of a spudger underneath the top right edge of the charging port assembly.

    • Pivot the charging port assembly up until you can grip it with your fingers.

  5. Nokia G42 5G Charging Port Removal for Screen Replacement, Remove the charging port assembly: adım 5, 2 resimden 1. Nokia G42 5G Charging Port Removal for Screen Replacement, Remove the charging port assembly: adım 5, 2 resimden 2.
    • Use a pair of tweezers or your fingers to remove the charging port assembly.

Sonuç

To reassemble your device, follow these instructions in reverse order.

Take your e-waste to an R2 or e-Stewards certified recycler.

Repair didn’t go as planned? Try some basic troubleshooting, or ask our Answers community for help.

Manuel Haeussermann

Üyelik tarihi: 07/13/22

19.651 İtibar

71 adet Kılavuz yazıldı

Ekip

iFixit iFixit üyesi

Staff

121 Üyeler

19.671 adet Kılavuz yazıldı

0Kılavuz Yorumları

Yorum Ekle

İstatistikleri Görüntüle:

Son 24 Saat: 0

Son 7 gün: 0

Son 30 gün: 12

Her zaman: 73