Bu sürüm, hatalı düzenlemeler içerebilir. En son doğrulanmış bellek kopyası dönün.
Neye ihtiyacın var
-
Bu adım çevrilmemiş. Çevrilmesine yardım edin
-
Flip over the turntable and remove the nine screws on the outer edges.
-
-
Bu adım çevrilmemiş. Çevrilmesine yardım edin
-
Find the audio jacks located on the back side of the turntable.
-
Remove the screw located in between the right and left audio jacks.
-
-
-
Bu adım çevrilmemiş. Çevrilmesine yardım edin
-
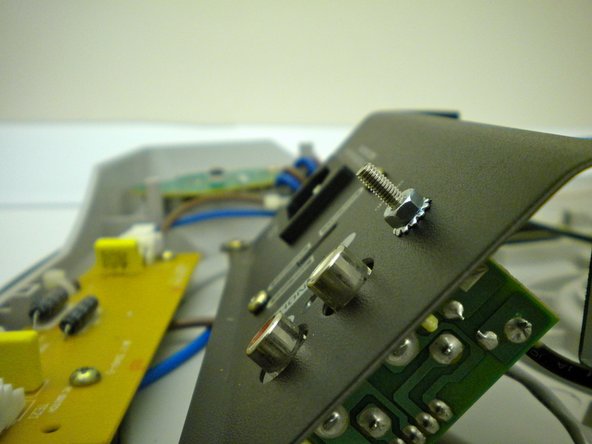
Remove the grounding hardware located next to the audio jacks.
-
-
Bu adım çevrilmemiş. Çevrilmesine yardım edin
-
Remove the screw located on the back panel of the audio jack housing.
-
-
Bu adım çevrilmemiş. Çevrilmesine yardım edin
-
Remove the screw that connects the audio jacks to the biggest circuit board via wire.
-
-
Bu adım çevrilmemiş. Çevrilmesine yardım edin
-
Gently pull out the audio input jacks from the audio input housing.
-


İptal et: Bu kılavuzu tamamlamadım.
Bir başkası bu kılavuzu tamamladı.
Ekip

Cal Poly, Team 17-14, Regan Fall 2011 Cal Poly, Team 17-14, Regan Fall 2011 üyesi
CPSU-REGAN-F11S17G14
4 Üyeler
11 adet Kılavuz yazıldı