Giriş
Use this guide to open your Apple Watch Series 6 for repairs.
You’ll need replacement adhesive to reattach the display when reassembling the device.
Neye ihtiyacın var
-
-
Before starting repairs, take your watch off the charger and power it down.
 FixBot'a Sor
-
-
-
Because the gap between the screen and watch body is so thin, a sharp blade is needed to separate the two. Read the following warnings carefully before proceeding.
-
-
-
Prepare an iOpener (or use a hair dryer or heat gun) and heat the face of the watch to loosen the display adhesive.
-
Leave the iOpener on the watch for at least two minutes to fully heat the screen and soften the adhesive holding it to the case.
-
-
-
-
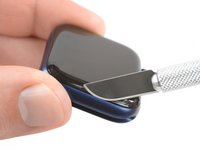
Place the edge of a curved blade into the thin gap between the display and the outer case. Start at the short side of the display, most distant to the digital crown.
-
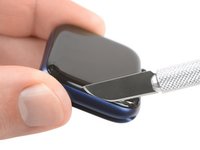
Press firmly straight down into the gap.
-
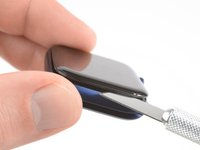
Once inserted, tilt the blade to pry the display open slightly.
-
-
-
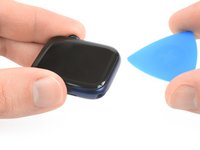
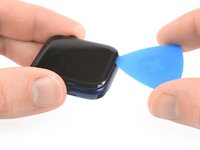
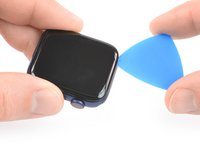
Insert an opening pick in the gap your created.
-
Slide the opening pick along the short edge of the watch to cut the adhesive.
-
-
-
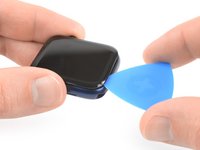
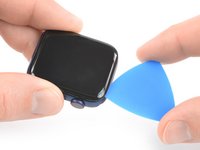
Slide the opening pick around the corner and along the long edge on the opposite side of the watch crown to cut the display adhesive.
-
-
-
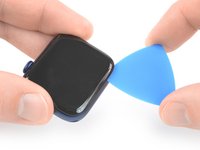
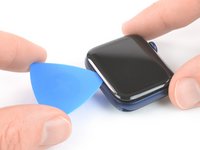
Slide the opening pick around the corner to cut the remaining adhesive on the short edge of the watch next to the watch crown.
-
-
-
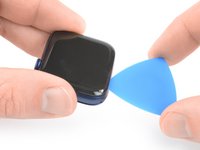
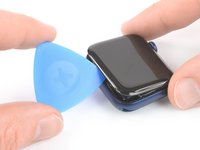
Place the watch on a flat surface and use an opening pick to slice through any remaining adhesive.
-
Slide an opening pick under the opposite display edge of the watch crown.
-
Twist the opening pick to loosen the display off the watch case.
-
-
-
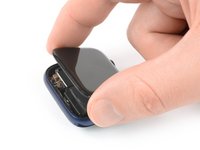
Lift the display and carefully pull it towards the watch crown.
-
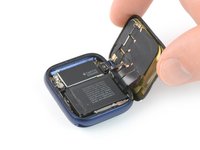
Swing the display open to an upward position.
-


To reassemble your Apple Watch Series 6, follow these instructions in reverse order.
Apply a little bit of high isopropyl alcohol (>90%) to a Q-tip or use a cleaning pad to gently remove the leftover adhesive on the edges of the watch case and the screen before installing new adhesive.
Opening didn’t go as planned? Check out our Answers community for troubleshooting help.
İptal et: Bu kılavuzu tamamlamadım.
5 farklı kişi bu kılavuzu tamamladı.


2Kılavuz Yorumları
Where are the instructions for installing the new adhesive? Also, it's not listed in the tools/parts list.
Here's the guide for resealing the watch
How to Reseal an Apple Watch