Ana içeriğe geç

Bu sürüm, hatalı düzenlemeler içerebilir. En son doğrulanmış bellek kopyası dönün.

Neye ihtiyacın var

  1. Bu adım çevrilmemiş. Çevrilmesine yardım edin

    : adım 1, 3 resimden 1. : adım 1, 3 resimden 2. : adım 1, 3 resimden 3.
    • Grip the PS4 with both hands along the gap in the top cover.

    • Push the glossy side of the top cover with your thumbs until it pops to the side.

    • Lift the glossy top cover up and back to remove it from the PS4.

  2. Bu adım çevrilmemiş. Çevrilmesine yardım edin

    : adım 2, 2 resimden 1. : adım 2, 2 resimden 2.
    • Use a Phillips screwdriver to remove the 6.5 mm screw securing the hard drive bracket to the enclosure.

  3. Bu adım çevrilmemiş. Çevrilmesine yardım edin

    : adım 3, 3 resimden 1. : adım 3, 3 resimden 2. : adım 3, 3 resimden 3.
    • Pull the hard drive bracket out of the enclosure.

    • Be careful not to drop the hard drive. The internal components are fragile and are susceptible to damage by sudden shock.

  4. Bu adım çevrilmemiş. Çevrilmesine yardım edin

    : adım 4, 1 resimden 1.
    • Flip the PS4 upside-down with the back side facing towards you.

  5. Bu adım çevrilmemiş. Çevrilmesine yardım edin

    : adım 5, 3 resimden 1. : adım 5, 3 resimden 2. : adım 5, 3 resimden 3.
    • Use tweezers to remove the two stickers in the center of the back of the PS4 exposing two case screws.

  6. Bu adım çevrilmemiş. Çevrilmesine yardım edin

    : adım 6, 2 resimden 1. : adım 6, 2 resimden 2.
    • Use tweezers to carefully remove the plastic screw covers in each corner, exposing two more case screws.

  7. Bu adım çevrilmemiş. Çevrilmesine yardım edin

    : adım 7, 2 resimden 1. : adım 7, 2 resimden 2.
    • Remove the four 7.2 mm Torx security screws on the back of the PS4.

  8. Bu adım çevrilmemiş. Çevrilmesine yardım edin

    : adım 8, 2 resimden 1. : adım 8, 2 resimden 2.
    • Use your thumbs to lift the lower case up and off the PS4.

    • The lower case is held into place by plastic clips. You may need to use significant force to release the lower case.

  9. Bu adım çevrilmemiş. Çevrilmesine yardım edin

    : adım 9, 2 resimden 1. : adım 9, 2 resimden 2.
    • Use a pair of tweezers to pull the power supply cable straight out and disconnect the power supply unit from the motherboard.

    • If your connector feels stuck, use a spudger to gently pry the connector out.

  10. Bu adım çevrilmemiş. Çevrilmesine yardım edin

    : adım 10, 2 resimden 1. : adım 10, 2 resimden 2.
    • Remove three 9.7 mm Torx security screws.

    • Remove two 41 mm Phillips screws and brackets.

  11. Bu adım çevrilmemiş. Çevrilmesine yardım edin

    : adım 11, 3 resimden 1. : adım 11, 3 resimden 2. : adım 11, 3 resimden 3.
    • Lift the power supply straight up and out of the PS4.

    • The power supply is held firmly in place by prongs on the left side. It may take multiple attempts to remove it.

    • During reassembly, ensure the prongs are aligned, then press the power supply into place.

  12. Bu adım çevrilmemiş. Çevrilmesine yardım edin

    : adım 12, 2 resimden 1. : adım 12, 2 resimden 2.
    • Use the tip of a spudger to disconnect the antenna cable from the motherboard.

  13. Bu adım çevrilmemiş. Çevrilmesine yardım edin

    : adım 13, 3 resimden 1. : adım 13, 3 resimden 2. : adım 13, 3 resimden 3.
    • Use a pair of tweezers or your fingers to grab the antenna cable and move it out from the cable guides.

  14. Bu adım çevrilmemiş. Çevrilmesine yardım edin

    : adım 14, 3 resimden 1. : adım 14, 3 resimden 2. : adım 14, 3 resimden 3.
    • Use a pair of tweezers or your fingers to thread the antenna cable out from underneath the optical drive cable.

  15. Bu adım çevrilmemiş. Çevrilmesine yardım edin

    : adım 15, 2 resimden 1. : adım 15, 2 resimden 2.
    • Remove the 9.7 mm Torx security screw securing the antenna.

  16. Bu adım çevrilmemiş. Çevrilmesine yardım edin

    : adım 16, 2 resimden 1. : adım 16, 2 resimden 2.
    • Remove the Wi-Fi antenna.

  17. Bu adım çevrilmemiş. Çevrilmesine yardım edin

    : adım 17, 3 resimden 1. : adım 17, 3 resimden 2. : adım 17, 3 resimden 3.
    • Use your fingernail to press down on the metal release lever of the ribbon cable on top of the optical drive.

    • Use your fingers or a pair of tweezers to disconnect the ribbon cable by pulling on the black tab.

    • You do not need to press the metal lever when inserting the ribbon cable back in. You will hear a click once it is fully inserted.

  18. Bu adım çevrilmemiş. Çevrilmesine yardım edin

    : adım 18, 3 resimden 1. : adım 18, 3 resimden 2. : adım 18, 3 resimden 3.
    • Use your fingernail to press down the metal release lever for the ribbon cable connected to the motherboard.

    • Use your fingers or a pair of tweezers to disconnect the ribbon cable by pulling on the black tab.

    • Set the ribbon cable aside for reassembly.

    • You do not need to press the metal lever when inserting the ribbon cable back in. You will hear a click once it is fully inserted.

  19. Bu adım çevrilmemiş. Çevrilmesine yardım edin

    : adım 19, 2 resimden 1. : adım 19, 2 resimden 2.
    • Use your fingers or a pair of tweezers to disconnect the optical drive cable from the motherboard.

  20. Bu adım çevrilmemiş. Çevrilmesine yardım edin

    : adım 20, 3 resimden 1. : adım 20, 3 resimden 2. : adım 20, 3 resimden 3.
    • Use your fingers or a pair of tweezers to remove the optical drive cable from the cable guides that hold it in place.

  21. Bu adım çevrilmemiş. Çevrilmesine yardım edin

    : adım 21, 2 resimden 1. : adım 21, 2 resimden 2.
    • Remove the four screws securing the optical drive.

    • Three 9.7 mm Torx screws

    • One 6.2 mm Phillips screw

  22. Bu adım çevrilmemiş. Çevrilmesine yardım edin

    : adım 22, 2 resimden 1. : adım 22, 2 resimden 2.
    • Lift the optical drive straight up and out of the PS4.

  23. Bu adım çevrilmemiş. Çevrilmesine yardım edin

    : adım 23, 2 resimden 1. : adım 23, 2 resimden 2.
    • Remove the two 9.7 mm Torx screws securing the upper case.

  24. Bu adım çevrilmemiş. Çevrilmesine yardım edin

    : adım 24, 3 resimden 1. : adım 24, 3 resimden 2. : adım 24, 3 resimden 3.
    • Lift the upper case up and back to remove it from the PS4.

    • The upper case in held in place by plastic tabs on the front side. It will take significant force to separate them.

  25. Bu adım çevrilmemiş. Çevrilmesine yardım edin

    : adım 25, 2 resimden 1. : adım 25, 2 resimden 2.
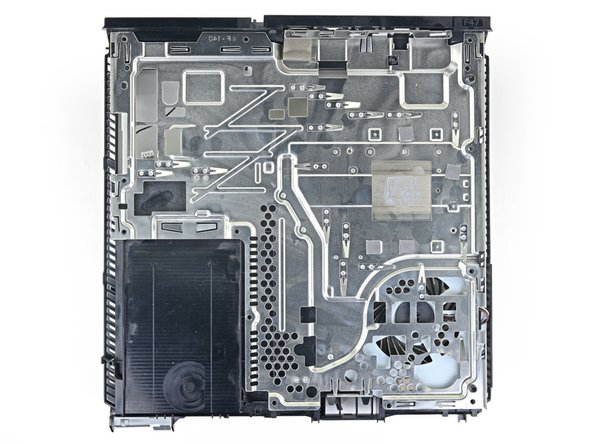
    • Remove the twelve 9.7 mm Torx screws securing the upper EMI shield.

  26. Bu adım çevrilmemiş. Çevrilmesine yardım edin

    : adım 26, 3 resimden 1. : adım 26, 3 resimden 2. : adım 26, 3 resimden 3.
    • This step shows you how to properly unscrew the pressure plate.

    • Remove the two 15.6 mm Phillips screws.

    • Gradually unscrew the pressure plate by turning each screw one half turn at a time.

    • Alternate between the two screws to maintain even pressure on the pressure plate.

    • Do not unscrew one side completely before unscrewing the other side or you may damage the processor.

  27. Bu adım çevrilmemiş. Çevrilmesine yardım edin

    : adım 27, 1 resimden 1.
    • Remove the pressure plate.

  28. Bu adım çevrilmemiş. Çevrilmesine yardım edin

    : adım 28, 2 resimden 1. : adım 28, 2 resimden 2.
    • Remove the upper EMI shield.

  29. Bu adım çevrilmemiş. Çevrilmesine yardım edin

    : adım 29, 2 resimden 1. : adım 29, 2 resimden 2.
    • Insert the flat end of a spudger in between the fan cable and the motherboard.

    • Twist the spudger to lift the connector straight up and disconnect it from the motherboard.

  30. Bu adım çevrilmemiş. Çevrilmesine yardım edin

    : adım 30, 2 resimden 1. : adım 30, 2 resimden 2.
    • Grab the edge of the motherboard on the front of the PS4.

    • Lift the motherboard until the USB ports clear the PS4 case.

  31. Bu adım çevrilmemiş. Çevrilmesine yardım edin

    : adım 31, 3 resimden 1. : adım 31, 3 resimden 2. : adım 31, 3 resimden 3.
    • Lift the motherboard out from the PS4.

    • Apply a new layer of thermal paste to the processor before installing a motherboard using this guide.

    • Failure to properly install new thermal paste will cause your PS4 to overheat.

    • Insert the I/O side of the Motherboard in first, then lower the other side in.

  32. Bu adım çevrilmemiş. Çevrilmesine yardım edin

    : adım 32, 2 resimden 1. : adım 32, 2 resimden 2.
    • Remove the three 6.2 mm Phillips screws from the lower EMI shield.

  33. Bu adım çevrilmemiş. Çevrilmesine yardım edin

    : adım 33, 2 resimden 1. : adım 33, 2 resimden 2.
    • Lift the lower EMI shield and heatsink straight up out of the PS4.

  34. Bu adım çevrilmemiş. Çevrilmesine yardım edin

    : adım 34, 2 resimden 1. : adım 34, 2 resimden 2.
    • Remove the two 6.2 mm Phillips screws from the fan.

  35. Bu adım çevrilmemiş. Çevrilmesine yardım edin

    : adım 35, 2 resimden 1. : adım 35, 2 resimden 2.
    • Lift the fan straight up out of the PS4 shell.

  36. Bu adım çevrilmemiş. Çevrilmesine yardım edin

    : adım 36, 3 resimden 1. : adım 36, 3 resimden 2. : adım 36, 3 resimden 3.
    • Use a pair of tweezers to carefully remove the foam padding strip from the fan.

    • Install the foam padding strip to the new fan in the same location.

  37. Bu adım çevrilmemiş. Çevrilmesine yardım edin

    : adım 37, 3 resimden 1. : adım 37, 3 resimden 2. : adım 37, 3 resimden 3.
    • Remove the foam padding pieces from the fan.

    • Use a hairdryer or heat gun to soften the adhesive if necessary.

    • Install these on the new fan in the same locations, using the adhesive left behind on the old fan as a reference.

  38. Bu adım çevrilmemiş. Çevrilmesine yardım edin

    : adım 38, 3 resimden 1. : adım 38, 3 resimden 2. : adım 38, 3 resimden 3.
    • Remove the adhesive strip securing the fan cable.

    • Place the adhesive strip on the new fan, securing the cable in the same location.

Bitiş Çizgisi

274 farklı kişi bu kılavuzu tamamladı.

Sam Omiotek

Üyelik tarihi: 02/25/19

73.116 İtibar

288 adet Kılavuz yazıldı

35 Yorum

Great guide, but where to buy a fan for the ps4?!

frankeinarhaugen - Yanıt

Look one ebay, that's where my store gets the majority of out parts from. considering we fix computers.

jonathon saygidia -

Will this guide work with the CUH-1200 model?

Jose Alvizo - Yanıt

excellent camarade !

Beaux travail !

Attention au principe de peter... Niveaux d'incom.......

je déconne !

P.S. Ne pas se ronger les ongles ca evite les pinces a épiler !

je déconne pas !

Inversement ce pas très esthétique...

Change rien !

Dall - Yanıt

My PS4 has been overheating so I decided to take it apart and clean it. I cleaned it well but it still over heats the fan will try to start up but cuts back off plz help

Tristen hudson - Yanıt

Yorum Ekle

İstatistikleri Görüntüle:

Son 24 Saat: 73

Son 7 gün: 584

Son 30 gün: 3,010

Her zaman: 499,786