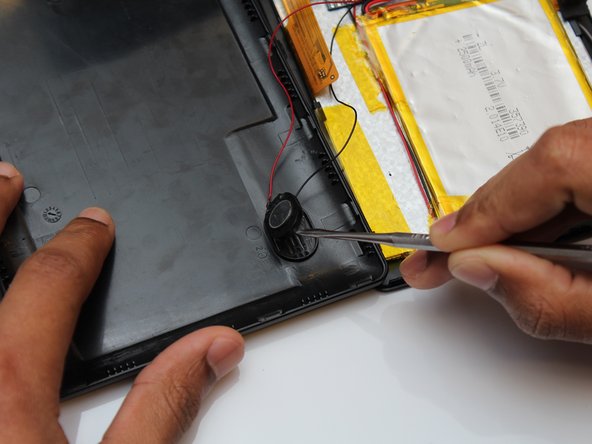
Ana içeriğe geç

ProntoTec Axius Speaker Replacement

Neye ihtiyacın var

  1. ProntoTec Axius Speaker Replacement, Speaker: adım 1, 1 resimden 1.
    • Make sure the device is completely turned off before you begging taking it apart to avoid electrocution risks.

    • Place tablet face-up on a flat table.

  2. ProntoTec Axius Speaker Replacement: adım 2, 1 resimden 1.
    • Starting near the headphone port, fit the flat end of the spudger in between the screen and back case.

    • Pry the back case from the screen around each point on the device to release the clips securing the case halves to each other.

  3. ProntoTec Axius Speaker Replacement: adım 3, 1 resimden 1.
    • Gently remove the back case of the device and lay it in a flat surface as shown in the photo.

    • Don't pull the back of the device too far apart so it doesn't damage the wires that are connected to the speaker in the back of the device

  4. ProntoTec Axius Speaker Replacement: adım 4, 3 resimden 1. ProntoTec Axius Speaker Replacement: adım 4, 3 resimden 2. ProntoTec Axius Speaker Replacement: adım 4, 3 resimden 3.
    • Disconnect the red wire connecting the speaker to the motherboard by using a soldering iron to melt the contact point.

    • Once the solder is melted, use pliers to pull the wire away from the motherboard

  5. ProntoTec Axius Speaker Replacement: adım 5, 2 resimden 1. ProntoTec Axius Speaker Replacement: adım 5, 2 resimden 2.
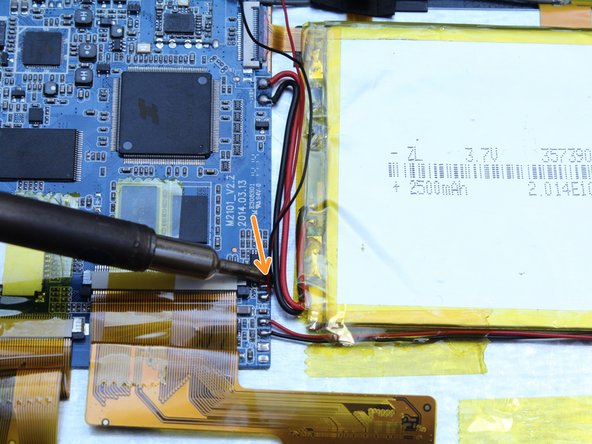
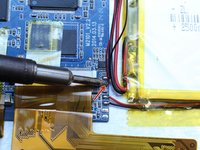
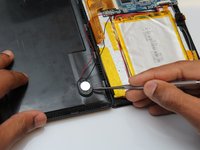
    • Repeat Step 4 with the black wire connecting the speaker to the motherboard.

    • Don't leave the soldering iron too long on top of the wire so it doesn't melt any other component in the motherboard or surrounding the area.

    • If soldering is new to you, check out this helpful guide on soldering and desoldering connections.

  6. ProntoTec Axius Speaker Replacement: adım 6, 2 resimden 1. ProntoTec Axius Speaker Replacement: adım 6, 2 resimden 2.
    • Using a spudger gently remove the speaker from the back of the device.

    • When working with electronics, it's important to choose a tool that's ESD-safe to avoid accidental damage to the device. The metal spudger is great when you need serious prying power, but the regular black nylon spudger should be used whenever possible.

Sonuç

To reassemble your device, follow these instructions in reverse order.

Antonio Irons

Üyelik tarihi: 10/20/16

441 İtibar

4 adet Kılavuz yazıldı

Ekip

UMass Dartmouth, Team 5-3, Martin Fall 2016 UMass Dartmouth, Team 5-3, Martin Fall 2016 üyesi

UMASSD-MARTIN-F16S5G3

3 Üyeler

10 adet Kılavuz yazıldı

0 Yorum

Yorum Ekle

İstatistikleri Görüntüle:

Son 24 Saat: 0

Son 7 gün: 0

Son 30 gün: 0

Her zaman: 116