Giriş
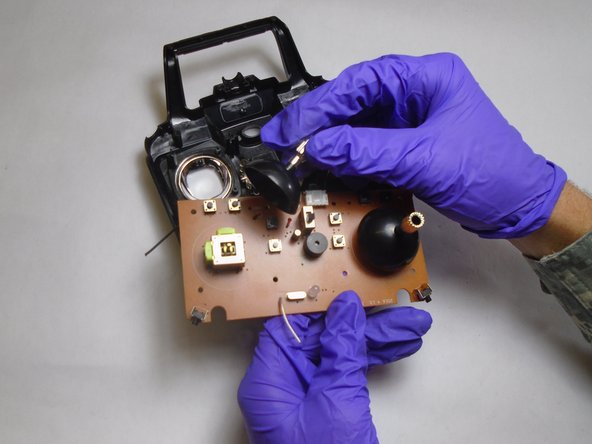
The TerraCopter Evo controller joysticks are used to guide and steer the drone in flight and on the ground. The joysticks can break off from the controller or separate from their assemblies. This guide will assist in opening the controller to the joysticks and completely replacing them. If your joysticks are just cosmetically damaged, you can just follow up to Step 2 and then reassemble with your new joysticks. However, if your joysticks are not processing input correctly or at all, you will need to solder to replace the electrical component. Check out our How to Solder and Desolder Connections guide if you are unfamiliar with soldering best practices.
Neye ihtiyacın var
-
-
Using a Phillips #0 screwdriver, remove the screw connecting the battery cover to the controller.
-
Remove the battery cover from the controller.
-
-
Adım 3 Protocol TerraCopter EVO Controller Opening
Dikkatli ol: adımlar 3-4 yapım altında olarak işaretlenen bir kılavuzdan alınmıştır.
-
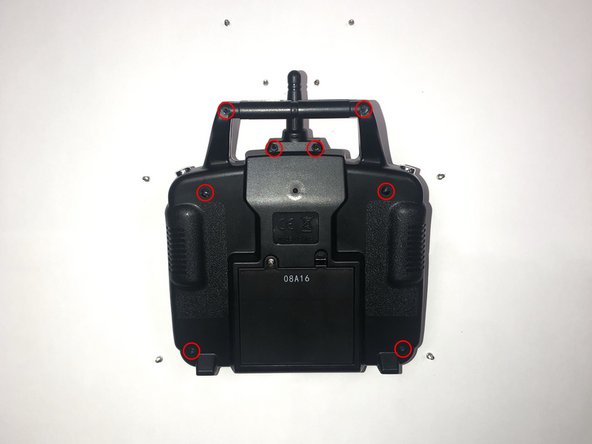
Orientate the controller to where the battery compartment is facing upwards.
-
Remove the four 5mm and four 4mm Phillips #1 screws from the case.
-
-


To reassemble your device, follow these instructions in reverse order.
Ekip

The Citadel Military College of South Carolina, Team S1-G22, Eggleston Fall 2019 The Citadel Military College of South Carolina, Team S1-G22, Eggleston Fall 2019 üyesi
CMCSC-EGGLESTON-F19S1G22
3 Üyeler
3 adet Kılavuz yazıldı