Ana içeriğe geç

Purple SmartVP Light Replacement

Neye ihtiyacın var

  1. Purple SmartVP Light Replacement, Light: adım 1, 3 resimden 1. Purple SmartVP Light Replacement, Light: adım 1, 3 resimden 2. Purple SmartVP Light Replacement, Light: adım 1, 3 resimden 3.
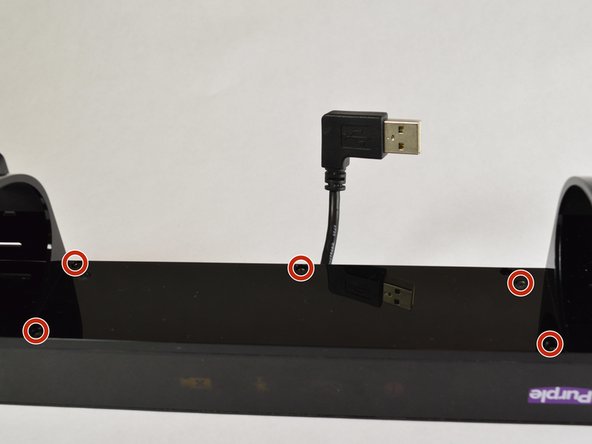
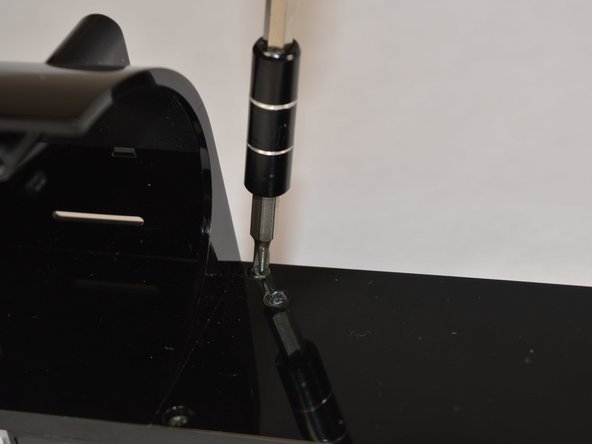
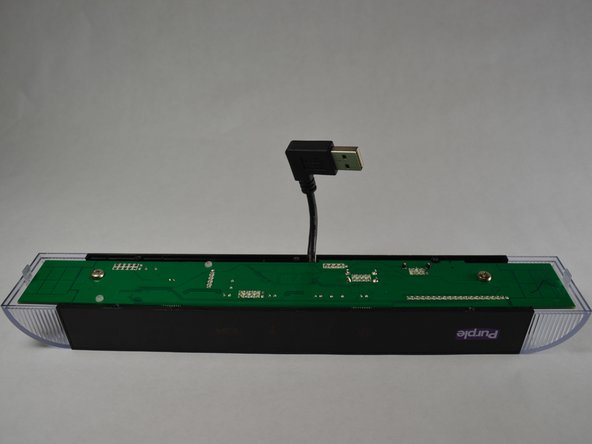
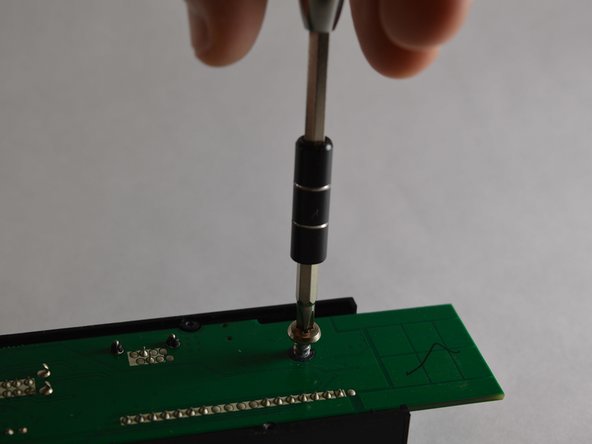
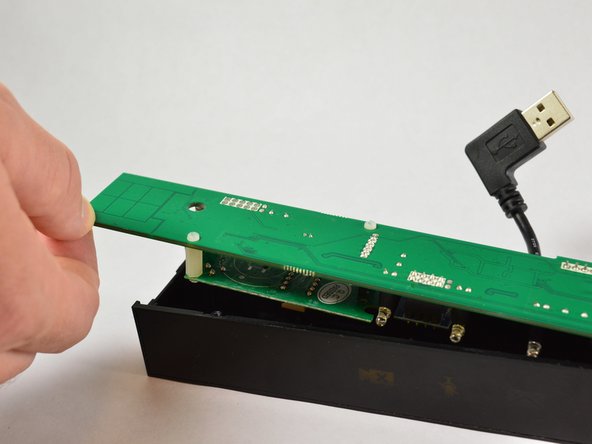
    • Remove the top bar by removing the 5cm hex T10 screws on the back of the device as shown. Then gently pull off the top bar from the main component.

  2. Purple SmartVP Light Replacement: adım 2, 2 resimden 1. Purple SmartVP Light Replacement: adım 2, 2 resimden 2.
    • Remove the 1.2 cm hex T9 screws and gently open up the device.

  3. Purple SmartVP Light Replacement: adım 3, 2 resimden 1. Purple SmartVP Light Replacement: adım 3, 2 resimden 2.
    • Flip the top bar over and using a #00 phillips head screwdriver, remove the five 7mm screws holding the bar together.

  4. Purple SmartVP Light Replacement: adım 4, 2 resimden 1. Purple SmartVP Light Replacement: adım 4, 2 resimden 2.
    • Carefully pry off the plastic panel, revealing the motherboard.

  5. Purple SmartVP Light Replacement: adım 5, 2 resimden 1. Purple SmartVP Light Replacement: adım 5, 2 resimden 2.
    • Remove the two 7mm screws holding the motherboard in place with a phillips head screwdriver size #00.

  6. Purple SmartVP Light Replacement: adım 6, 2 resimden 1. Purple SmartVP Light Replacement: adım 6, 2 resimden 2.
    • To release the motherboard from its plastic housing, first pull the plastic light covers up and away from the device.

  7. Purple SmartVP Light Replacement: adım 7, 2 resimden 1. Purple SmartVP Light Replacement: adım 7, 2 resimden 2.
    • Heat the solder on the underside of the affected light to remove and replace it using tweezers.

    • Check out this helpful guide for some soldering and desoldering tips.

Sonuç

To reassemble your device, follow these instructions in reverse order.

0 Yorum

Yorum Ekle

İstatistikleri Görüntüle:

Son 24 Saat: 0

Son 7 gün: 0

Son 30 gün: 2

Her zaman: 110