
Removing the HP Elitebook 6930p Display Assembly

Giriş
1. adıma gitThis guide will show you how to remove the display assembly from the laptop
Neye ihtiyacın var
Aletler


Daha fazlasını göster…
-
-
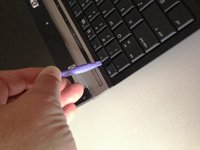
Flip laptop over and locate the battery release button
-
Push release button to the left to release battery and gently pull battery from the laptop
-
-
-
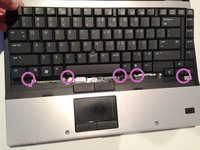
Loosen the three Phillips 2.5×9.0 captive screws that secure the keyboard to the laptop
-
Turn the laptop so the keyboard is facing up and locate the 4 retention tabs along the back edge of the keyboard
-
Slide the retention clips toward the keyboard to release the keyboard
-
-
-
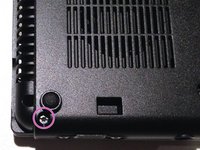
Remove the two M2.0×4.0 broad-head screws.
-
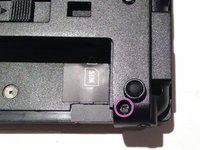
Remove the three Torx T8 M2.5×7.0 screws.
-
-
-
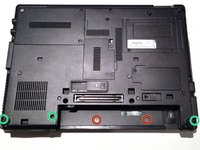
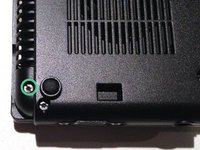
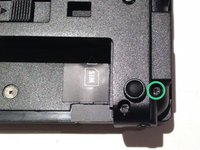
Close the lid and turn the laptop so the rear is facing you
-
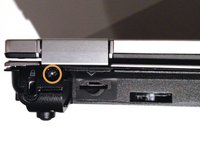
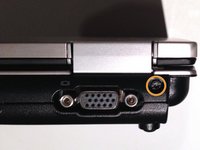
Locate and remove the two Torx T8 2.5×7.0 screws at each corner
-
-
-
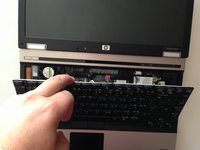
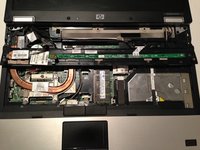
Turn the computer right-side up with the front toward you and open the computer lid past 90 degrees.
-
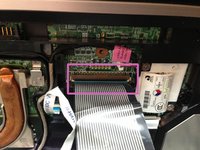
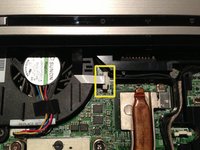
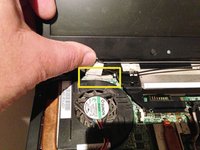
Locate and disconnect the display panel cable.
-
Locate and disconnect the microphone cable.
-
Locate and disconnect the webcam cable.
-
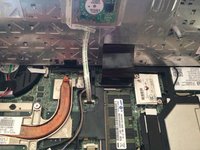
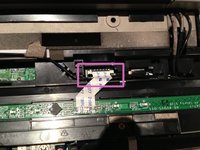
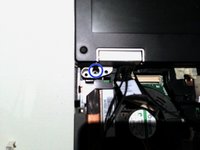
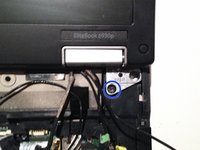
Locate and disconnect the 3 antenna cables.
-
Unclip the antenna cables from the retaining clips.
-
NOTE There are 2 antenna cables that go from the display assembly through the hole shown and connect to the WWAN (3G) WiFi card if it is installed. In my case they were just threaded into the hole to make things tidy as I didn't have a WWAN card.
-


To reassemble your device, follow these instructions in reverse order.
To reassemble your device, follow these instructions in reverse order.
İptal et: Bu kılavuzu tamamlamadım.
11 farklı kişi bu kılavuzu tamamladı.

Ekip
