Giriş
A guide to replacing the screen or LCD on an LG VX9200, also known as the enV3. Involves a little soldering and a bit of tedious micro-work, but not enough to be impossible for the newcomer.
Oops... it happens to almost everyone. Dropped, stepped on, twisted, sent through the wrong cycle in life. Your LCD got busted. Well, for many that involves shelling out a few hundred bucks on a new phone, or scrapping one phone for a different, lesser model. Not anymore. For under $50 and about an hour of work (maybe half an hour if you're quick), you can replace that broken screen! Get ready to get your hands dirty...
Neye ihtiyacın var
-
-
Obvious time! Turn off the phone. Can't see the shutdown screen for the obvious fact that... it's broken!
-
Remove the battery.
-
-
-
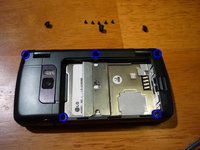
Prepare for the next step by flipping all the covers open. Helps to avoid them getting stuck when cracking the case open.
-
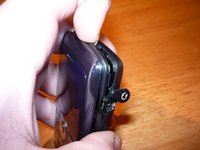
Use a fingernail or other non-metal object (to avoid denting/marking the plastic) to separate the case around the edge. The whole edge is held together with snaps that will come apart with just a little snap.
-
-
-
-
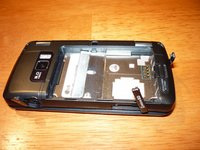
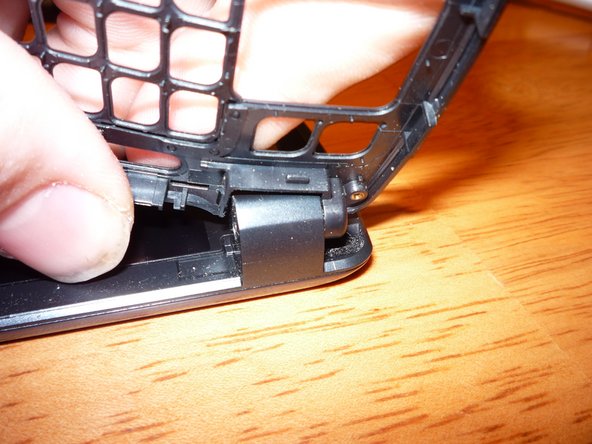
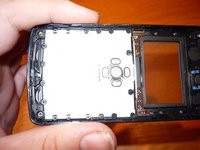
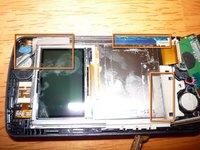
The case comes off the front display by bending the frame around clips in the hinges. On the side with the cable, bend the outer edge toward the screen to get it around a post.
-
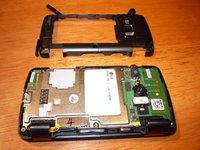
To get the mechanism side off, it takes a little more bending force. Bend the left edge (hence the rest of the frame) outwards toward the screen to get it off, and it'll release around the metal hinge mechanism.
-
-
-
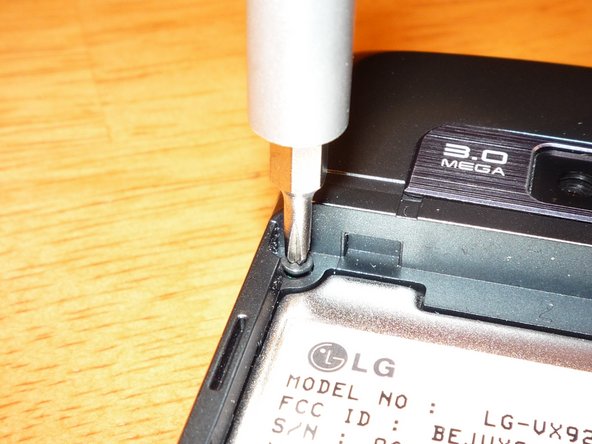
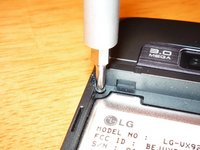
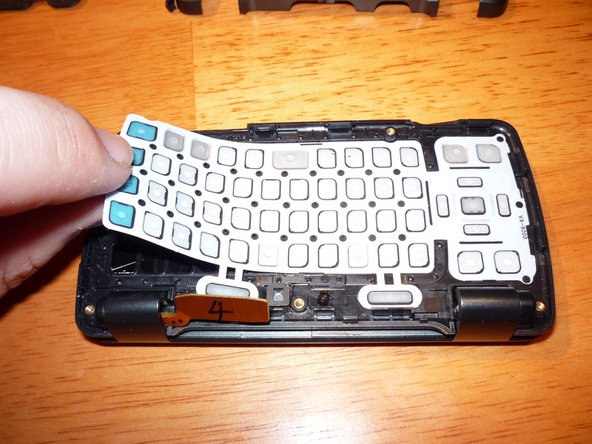
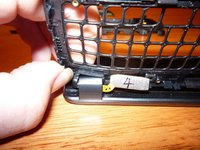
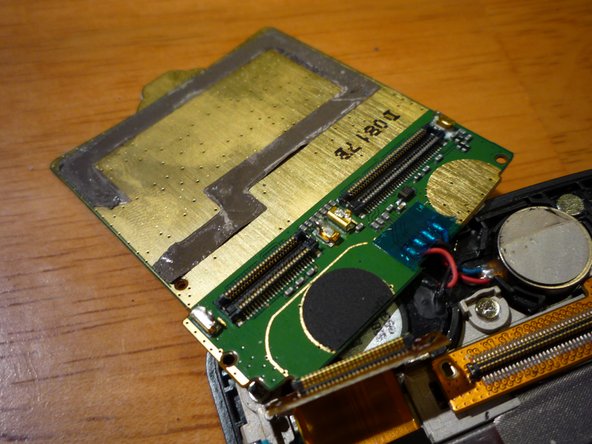
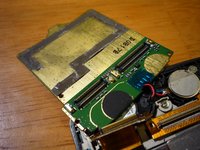
Here comes the fun part. You see that? LG decided to solder down the snap connectors to the display and keypad. It's your job to disconnect them... somehow.
-
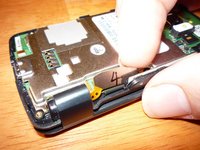
To disconnect them, I applied upward pressure to the edge of the connector (which also held the board up with one hand), and applied the tip of the soldering iron to the edge I was pulling up on. When it melted, it popped off, leaving the other side. Repeat for each side until both cables are disconnected.
-
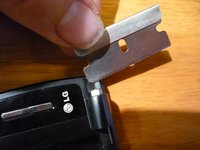
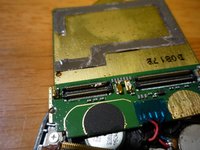
When I disconnected the LCD cable, it splashed a little solder onto the contacts. Fortunately, it requires heat to prep the metal to adhere to solder, so it simply flaked off with the edge of the razor blade. DO NOT use the soldering iron to try to clean any accidental blobs, it will only result in disaster.
-
When reassembling, be sure not to keep the heat on it too long. Plastic likes to melt.
-
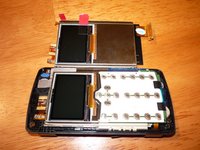
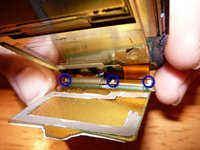
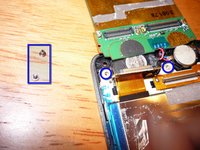
After the LCD display has been removed, you'll have to desolder the connection holding the little speaker(?) in the upper corner. The way this is assembled is there are two layers sandwiched together. So just heat the two connections while pulling them slightly and they'll come right apart when the solder melts. You'll have to re-attach it to the new LCD.
-


To reassemble your device, follow these instructions in reverse order.
To reassemble your device, follow these instructions in reverse order.
İptal et: Bu kılavuzu tamamlamadım.
10 farklı kişi bu kılavuzu tamamladı.

12Kılavuz Yorumları
Great writing, thanks for showing how to fix your phone!
Luke Soules kullanıcısından alıntı:
Great writing, thanks for showing how to fix your phone!
Hey, I learned from the best... I didn't have a nice clean white background to work with, but I did what I could :) Thanks for the comment! More to come as I end up with more things to fix...
Do you know where a small black rectangular piece (has another small rectangle w/a tab on top & a light grey outline of a rectangle underneath) goes inside of the env3? It popped out sometime between steps 4-6 and I can't figure out where I should put it. Any help would be great. Thanks!
J S kullanıcısından alıntı:
Do you know where a small black rectangular piece (has another small rectangle w/a tab on top & a light grey outline of a rectangle underneath) goes inside of the env3? It popped out sometime between steps 4-6 and I can't figure out where I should put it. Any help would be great. Thanks!
Hmm, without a picture I really couldn't tell ya. All I can do is look at the pictures and take a stab guess... you can click the pictures in the guide to get a bigger version, maybe that'll help?
Heck, at either rate, thanks for posting! I know for every 1 person having a problem there's at least 10 other people that ran it all the way through without a problem :)
has another small rectangle w/a tab on top & a light grey outline of a rectangle underneath...
Wait... that could be the earpiece, although that'd be further down than step 6, that's for sure. That's the only thing I had pop out of mine...