
Roccat Ryos MK Glow key led and key switch Replacement

Giriş
1. adıma gitregardless if you want to replace a burned out led, or replace a switch for a different kind. this guide will show you the the steps necessary to open your keyboard, desolder the led, desolder the switch, remove both and resolder the new led and the new switch.
in my case, I spilled tea on the keyboard, this burned the left shift led and switch. instead of buying new parts, I used the "break" key switch and led as a donor.
the tools you'll need are:
a Phillips head screw driver( I recommend the protech toolkit)]
a Jimmy or a similar tool to separate the foam feet.
Tweezers or a small plier to help you pull the leds and key switches from their sockets
a soldering iron
some desoldering braid or a desoldering pump (personally, I prefer the pump and this guide is done using the pump)
you will void your warranty with this fix and I take no responsibility for anything that goes wrong or any damange that may incur, that said. the changes are very slim that something will go wrong (if I didnt break my keyboard, you wont either!)
Neye ihtiyacın var


-
-
there are 7 screws in total, you will need to rip the warranty information to get to the 7th
-
-
Bu adımda kullanılan alet:Jimmy$7.95
-
Using a Jimmy, separate the foam feet from the body to expose the hidden screws underneath.
-
Go slow and try to conserve as much glue as possible on the feet or the keyboard itself, this way you should be able to just stick it back once you are done.
-
-
-
there are another 7 hidden screws that need to be removed. once that is done you can slowly start separating the plastic shell
-
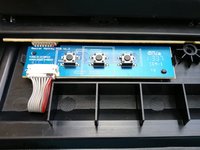
be careful, the thumb keys(underneath the spacebar) mas a tendency to stay stuck to the the top plastic part but its attached to the main PCB that is attched to the bottom, hence the next step.
-
-
-
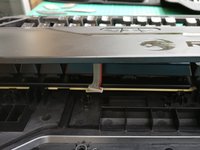
carefully separate the cable from the main body
-
remove the thumb key PCB from the top plastic bit ( you can put the top plastic part to the side as you'll only need it when you are closing up the keyboard
-
I recommend reconnecting the thumb key PCB to the main keyboard as it can be easily forgotten when closing up.
-
enjoy the easter egg.(after all you are now a l337 h4x0r yourself)
-
-
-
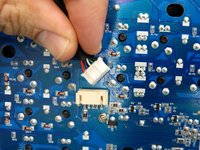
flip over the PCB and remove the USB cable. (more of an optional step but wort the effort)
-
-
-
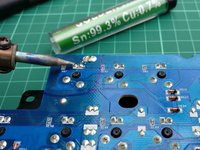
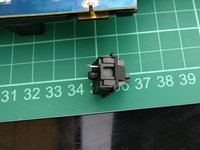
here we are removing the shift led and switch with the "break" key led and switch.
-
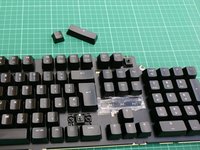
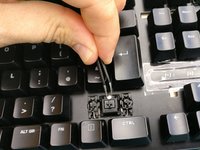
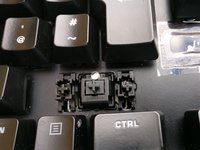
if you want to take out all the key caps and do some basic maintenance on your keyboard, now is a good time but erm.. take a picture of your layout first.
-
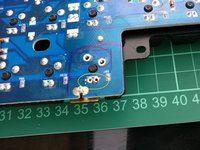
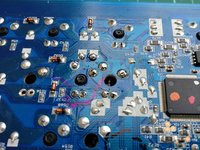
flip the keyboard over and identify the keys, here I have outlined them with a sharpie
-
-
-
Every key will have at least four solder points. Two for the LED, and two for the switch.
-
The ones that are parallel to each other are for the LED.
-
The switch solder points are in an offset placement (like a knight in chess).
-
after removing the solder , you should be able to pull the led free. take it slow and if you feel that it is still stuck, repeat the process to ensure there isn't any solder holding it in place.
-
if you are replacing the switch, after removing the solder push the switch from the back
-
-
-
get your new donor switch and let and get ready to resolder. look at other keys for reference on the correct way to pop in your led
-
if you have access to bluetac, it may help hold the key and led in place without leaving any residue (and being easy to clean)
-
when soldering, less is more, I actually redid this because I used too much solder
-
-
-
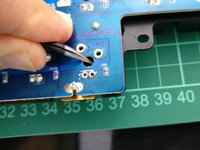
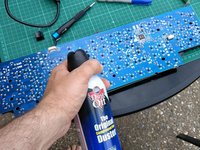
before testing your changes, hit the keyboard with some compressed air to remove any solder that may have fallen on it and could cause a short. doing basic maintenance now is also a good idea.
-
reconnect the usb power and test your keyboard while it is still open and easier for you to work on.
-
success! everything is working and you can now go ahead and close up your keyboard, you are finished
-


To reassemble your device, follow these instructions in reverse order.
To reassemble your device, follow these instructions in reverse order.
İptal et: Bu kılavuzu tamamlamadım.
4 farklı kişi bu kılavuzu tamamladı.

9 Yorum
Aww, just saw that you used a "donor". I have a number of burned out LEDs, so I will have to buy replacements. There are about 724 bazillion different options to chose from though.
these guys can hook you up: http://www.maxkeyboard.com/products/part...
Guy -