Ana içeriğe geç

Samsung WB2100 Flash Assembly Replacement

Neye ihtiyacın var

  1. Samsung WB2100 Flash Assembly Replacement, Back Cover Assembly: adım 1, 3 resimden 1. Samsung WB2100 Flash Assembly Replacement, Back Cover Assembly: adım 1, 3 resimden 2. Samsung WB2100 Flash Assembly Replacement, Back Cover Assembly: adım 1, 3 resimden 3.
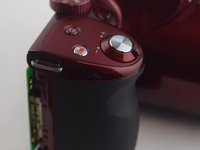
    • Remove the 7 screws on the outside of the camera

    • Two 5 mm PH000 screws on the right side of the camera body

    • Four 3mm PH000 screws on the bottom and the left side of the camera body.
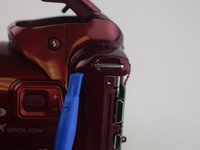
    • Use the plastic spundger to push the back casing out. Start from the right side and work your way clockwise around the case.

    • The HDMI / AV tab might fall out. this is supposed to happen as it is not screwed into place in the back casing.

  2. Samsung WB2100 Flash Assembly Replacement: adım 2, 2 resimden 1. Samsung WB2100 Flash Assembly Replacement: adım 2, 2 resimden 2.
    • Disconnect the set of wires from the back casing to the motherboard. Do this by using the plastic spundger to flip the black tab up and the wires will pull out.

    • Unscrew the four 3 mm and two silver 1 mm PH000 screw from the green logic board

  3. Samsung WB2100 Flash Assembly Replacement, Flash Assembly: adım 3, 1 resimden 1.
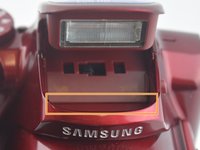
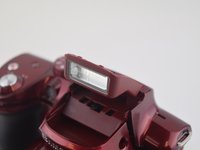
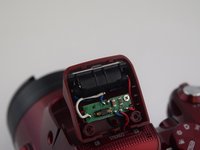
    • Unscrew the two 3 mm screws from the top cover with the PH000 driver.

    • Along with the one 2 mm screw, also a PH000 screw.

  4. Samsung WB2100 Flash Assembly Replacement: adım 4, 3 resimden 1. Samsung WB2100 Flash Assembly Replacement: adım 4, 3 resimden 2. Samsung WB2100 Flash Assembly Replacement: adım 4, 3 resimden 3.
    • Use the spudger and pry the top cover off starting on the left side and working your way down.

  5. Samsung WB2100 Flash Assembly Replacement: adım 5, 1 resimden 1.
    • After the top is disconnected, fold it back so the two PH000 flash screws are accessible and remove the cover.

  6. Samsung WB2100 Flash Assembly Replacement: adım 6, 3 resimden 1. Samsung WB2100 Flash Assembly Replacement: adım 6, 3 resimden 2. Samsung WB2100 Flash Assembly Replacement: adım 6, 3 resimden 3.
    • Remove the flash bulb from the red housing and clear cover. Do this by pushing back the flash bulb back out of the red housing.

    • When reassembling make sure the tab on the flash cover faces up.

    • Desolder the wires from the circuit board. Learn more about soldering here.

Sonuç

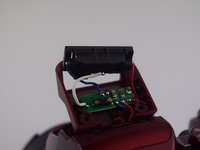
To reassemble your device, follow these instructions in reverse order.

2 farklı kişi bu kılavuzu tamamladı.

McGregor Coyne

Üyelik tarihi: 01/20/16

248 İtibar

1 Kılavuz yazıldı

Ekip

USF Tampa, Team 15-3, Remmell Spring 2016 USF Tampa, Team 15-3, Remmell Spring 2016 üyesi

USFT-REMMELL-S16S15G3

4 Üyeler

6 adet Kılavuz yazıldı

Bir Yorum

Hola, mi camara wb2100 se queda colgada y los comandos responden pasados varios segundos y al iniciar arranca con valores por defecto, es decir que no graba las configuraciones luego que se apaga, es muy molesto usarla de esta forma y quisiera saber si hay forma de resetearla para ver si se soluciona el problema. Alguien tiene idea de como resetear esta cámara? se agradece vuestra ayuda.

Alain Chiesa - Yanıt

Yorum Ekle

İstatistikleri Görüntüle:

Son 24 Saat: 0

Son 7 gün: 2

Son 30 gün: 4

Her zaman: 513