Giriş
Use this guide to replace a cracked or broken screen assembly on your Samsung Galaxy Watch Active.
Note: Some replacement screens come as screen-only without a new frame. That's a different procedure from what's shown in this guide. If you're replacing the screen only, follow this guide instead.
Neye ihtiyacın var
-
-
Turn off the Galaxy Watch Active by pushing and holding the bottom button for approximately 3 seconds. You should feel a short vibration.
-
When the "Power off" symbol appears tap the center of the screen to make it shut down. You should feel a longer vibration for confirmation.
-
-
-
Use a Tri-point Y00 screwdriver to remove the four 4 mm-long screws on the back of the watch.
-
-
-
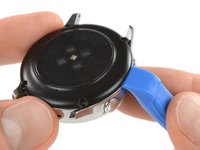
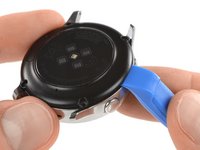
Use an opening tool and place it between the plastic back cover and the metal housing near the buttons.
-
Push the tip of the opening tool into the gap to separate the back cover from the housing.
Do i need heat for this? i can't get a pry tool in
EDIT: use a Rasor knife in the corner nest to the screw holes and it's a lot easier and less damaging to take off.
In my case there was quite a bit of glue on the edge of the back cover, and a knife was indeed the only way to pry it open. No way to get the first gap with a plastic tool.
-
-
-
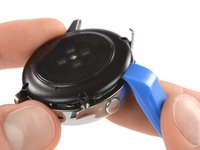
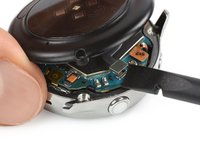
Carefully lift the back cover approximately 2 cm to access the sensor array connector near the two buttons.
-
Use a spudger to disconnect the sensor array from the motherboard.
-
-
-
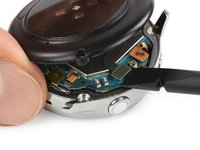
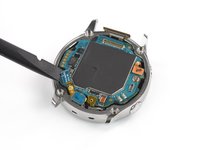
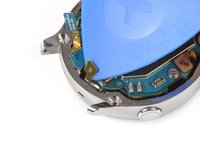
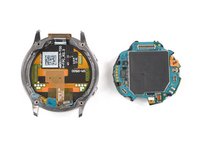
Remove the back cover.
-
-
-
-
Use a spudger to disconnect the display assembly and the microphone and pressure sensor array.
-
-
-
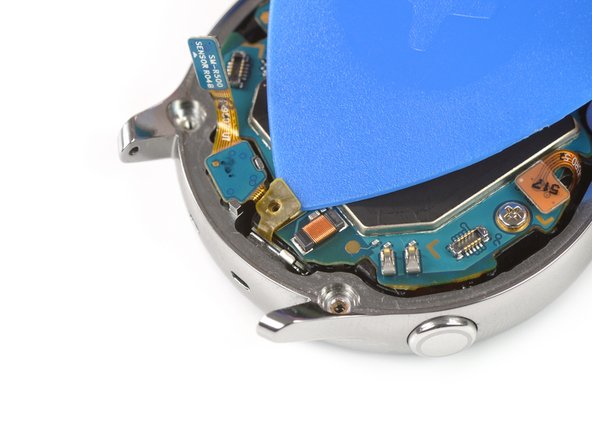
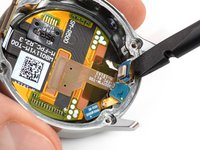
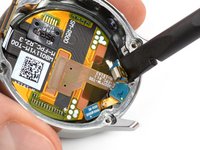
Use an opening pick to peel back the thin tape belonging to the microphone array.
What can I use if the glue no longer holds?
Just make sure it lays flat and the counterpart on the back cover (the white thing at the bottom in the image of step 5) will press it down and hold it in place.
What can I use to make it lay flat?
Every time I press it down it just pops up again.
-
-
-
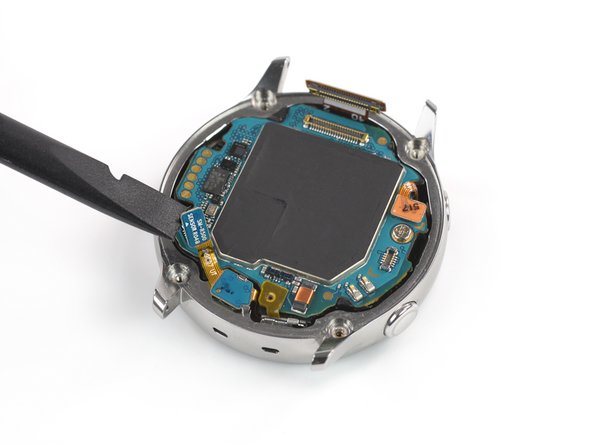
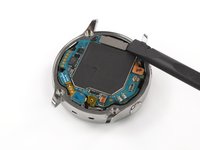
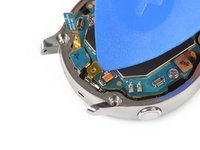
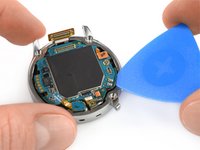
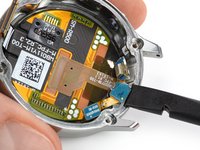
Insert an opening pick at the bottom right between the motherboard and the frame to lift up the core assembly.
-
-
-
Use a spudger to loosen the microphone which is fixed to the frame with mild adhesive.
What can I use to stick this back on during reassembly?
The leftover adhesive is not strong enough to hold it in place.
-
-
-
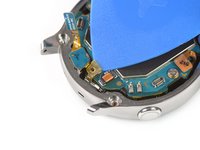
Use a spudger to lift the pressure sensor up and out of its recess in the frame.
-
-
-
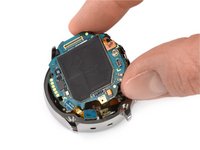
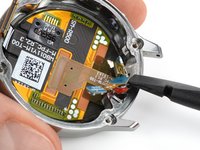
Carefully remove the microphone and barometric sensor array from the frame.
-
-
-
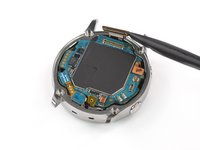
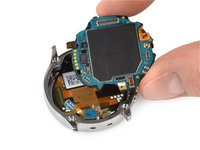
You’re left with the screen assembly.
This looks like a great guide but you stopped short of removing the face and reattaching it. Isn't there some adhesive needed?
It says the guide is for removing and replacing the screen but it stops seemingly one step before
Anyone know where I can find the last steps or video covering roving the face and replacing it?
Doug Apr 19,2023
-


Compare your new replacement part to the original part—you may need to transfer remaining components or remove adhesive backings from the new part before installing.
To reassemble your device, follow these instructions in reverse order.
Take your e-waste to an R2 or e-Stewards certified recycler.
Repair didn’t go as planned? Try some basic troubleshooting, or ask our Answers community for help.
İptal et: Bu kılavuzu tamamlamadım.
15 farklı kişi bu kılavuzu tamamladı.

Ekip

Tobias Isakeit - Repairability Engineer Tobias Isakeit - Repairability Engineer üyesi
Business
1 Üye
1.132 adet Kılavuz yazıldı
12Kılavuz Yorumları
These instructions look very good! My screen has several cracks and I want to replace the front module. Do you have any idea where I can order one?
Yes there s one on eBay for $31.76 https://www.google.com/aclk?sa=l&ai=DChc...
My screen was black or showing static. I disassembled and reassembled and now it's back to normal. Might have been a bad internal connection.
Think I have the same issue may have to try opening it. Do you still have it? Is it still good?
this is a rather silly question, but which model is that diode on the LCD panel? I couldn't find the schematics for the screen
This looks like a great guide but you stopped short of removing the face and reattaching it. Isn't there some adhesive needed?
Hello my screen crack/charger not working can you refer.
I've ordered a screen on aliexpress which came with two adhesives, and I'm glad they did, because I messed up with the first one.
I had trouble following the step three, there was nowhere to put the opening tool. I had to use a metal tool instead of the plastic one between the two buttons (put on gloves to avoid injuries). It did slightly scratch the plastic side, but I was able to pop it open and follow the rest of the tutorial.
The mic tape is a mess to put back properly, and I gave up, maybe I needed some tape or glue to put it back on ? Anyway I never use the watch's mic, but I always need a screen :D
Update : the adhesive provided with the spare screen lasted only 2 weeks, and I got the screen glued instead. It' still sticking for now.
I would like it to be fixed and I will need to buy a bumper case for it