Ana içeriğe geç

Sony BDP-S3500 Disk Drive Replacement

Neye ihtiyacın var

  1. Sony BDP-S3500 Disk Drive Replacement, Front Panel: adım 1, 2 resimden 1. Sony BDP-S3500 Disk Drive Replacement, Front Panel: adım 1, 2 resimden 2.
    • Use the Phillips #2 screwdriver to remove the two 9mm screws located on the back of the device.

  2. Sony BDP-S3500 Disk Drive Replacement: adım 2, 1 resimden 1.
    • Slide the top panel off towards the back of the device.

    • Remove the top panel.

  3. Sony BDP-S3500 Disk Drive Replacement: adım 3, 2 resimden 1. Sony BDP-S3500 Disk Drive Replacement: adım 3, 2 resimden 2.
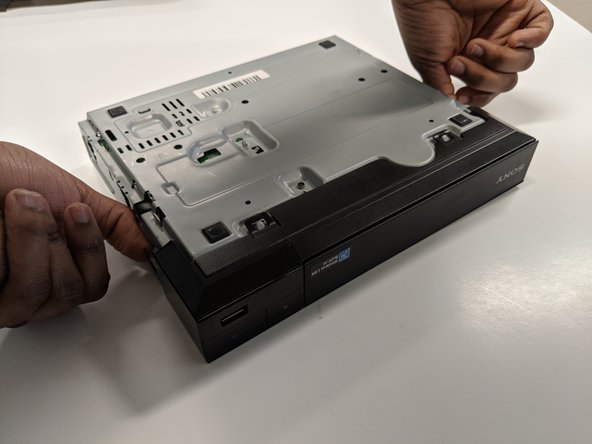
    • Unclip the plastic tags from the bottom of the device.

    • Unclip the plastic tags from the sides of the device.

    • Slide the front panel off.

  4. Sony BDP-S3500 Disk Drive Replacement, Disk Drive: adım 4, 2 resimden 1. Sony BDP-S3500 Disk Drive Replacement, Disk Drive: adım 4, 2 resimden 2.
    • Remove the three ribbon cables by gently pulling the cables out of each connector.

    • Be sure to only handle the circuit board from the edges so that the PCB is not damaged.

  5. Sony BDP-S3500 Disk Drive Replacement: adım 5, 2 resimden 1. Sony BDP-S3500 Disk Drive Replacement: adım 5, 2 resimden 2.
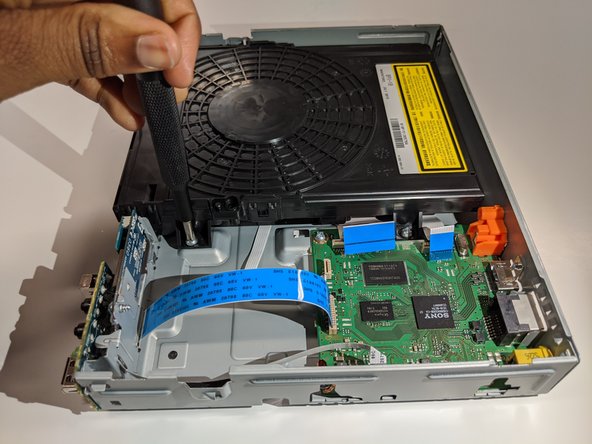
    • Use a Phillips #2 screwdriver to remove the two 9mm screws that are holding the disk drive in place.

  6. Sony BDP-S3500 Disk Drive Replacement: adım 6, 2 resimden 1. Sony BDP-S3500 Disk Drive Replacement: adım 6, 2 resimden 2.
    • Carefully lift and slide the disk drive out of the casing.

Sonuç

To reassemble your device, follow these instructions in reverse order.

V W

Üyelik tarihi: 01/22/20

197 İtibar

1 Kılavuz yazıldı

Ekip

Bir Yorum

Hello, great guide thank you. How do you go about finding the correct replacement drive?

Andy Day - Yanıt

Yorum Ekle

İstatistikleri Görüntüle:

Son 24 Saat: 0

Son 7 gün: 0

Son 30 gün: 2

Her zaman: 358