
Sony Cyber-Shot DSC-H1 Back Panel Replacement
3 - 5 dakika
Kolay
Giriş
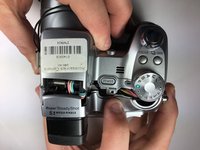
1. adıma gitKeeping the back panel in good condition is key to extending the lifetime of the camera.
Neye ihtiyacın var
Aletler


Neredeyse bitti!
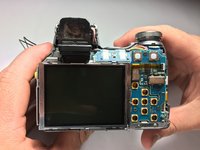
To reassemble your device, follow these instructions in reverse order.
Sonuç
To reassemble your device, follow these instructions in reverse order.
Ekip

Baylor, Team S5-G4, Williams Spring 2018 Baylor, Team S5-G4, Williams Spring 2018 üyesi
BU-WILLIAMS-S18S5G4
3 Üyeler
10 adet Kılavuz yazıldı