Ana içeriğe geç

Sony Cyber-shot DSC-WX350 Control Wheel Replacement

Neye ihtiyacın var

  1. Sony Cyber-shot DSC-WX350 Control Wheel Replacement, Control Wheel: adım 1, 3 resimden 1. Sony Cyber-shot DSC-WX350 Control Wheel Replacement, Control Wheel: adım 1, 3 resimden 2. Sony Cyber-shot DSC-WX350 Control Wheel Replacement, Control Wheel: adım 1, 3 resimden 3.
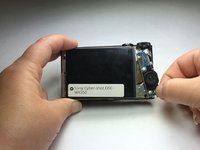
    • Begin with the battery cover closed.

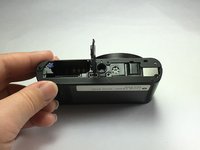
    • Remove 6 black Phillips 4 mm screws using the Ph000 head screwdriver tip from the bottom covering.

  2. Sony Cyber-shot DSC-WX350 Control Wheel Replacement: adım 2, 2 resimden 1. Sony Cyber-shot DSC-WX350 Control Wheel Replacement: adım 2, 2 resimden 2.
    • Using the plastic opening tool, carefully insert it between the camera cover and the bottom cover. Pull it apart.

    • Using a plastic tool will prevent the device from being permanently damaged. Avoid using metal tools for this device.

    • The bottom covering is attached by a hinge. Removing this part will also require a small amount of force to separate.

  3. Sony Cyber-shot DSC-WX350 Control Wheel Replacement: adım 3, 2 resimden 1. Sony Cyber-shot DSC-WX350 Control Wheel Replacement: adım 3, 2 resimden 2.
    • Once the part is separated, move it toward the battery slot.

    • Push the piece towards the camera to separate it from the hinge.

    • Do not pull up otherwise you will break the piece off.

  4. Sony Cyber-shot DSC-WX350 Control Wheel Replacement: adım 4, 1 resimden 1.
    • Remove 1 black Phillps 4 mm screw using a Ph000 screwdriver tip from under battery cover.

  5. Sony Cyber-shot DSC-WX350 Control Wheel Replacement: adım 5, 3 resimden 1. Sony Cyber-shot DSC-WX350 Control Wheel Replacement: adım 5, 3 resimden 2. Sony Cyber-shot DSC-WX350 Control Wheel Replacement: adım 5, 3 resimden 3.
    • Separate the back of the camera frame from the body by taking apart the bottom and the sides of the camera.

    • This will require a little force. You will feel tension and hear clicking noises. That is normal.

  6. Sony Cyber-shot DSC-WX350 Control Wheel Replacement: adım 6, 2 resimden 1. Sony Cyber-shot DSC-WX350 Control Wheel Replacement: adım 6, 2 resimden 2.
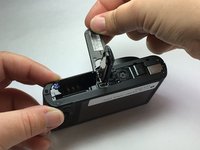
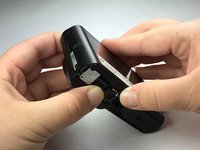
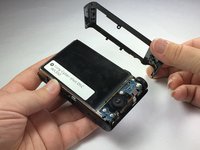
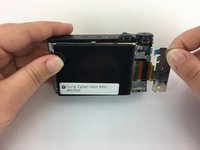
    • To remove the control wheel from its position, grab the bottom of the part and pivot to the side and away from the camera.

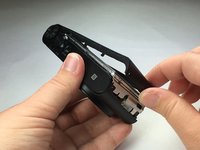
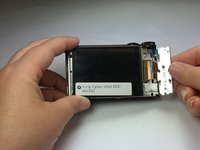
    • After the part is fully away from the camera, move the part downward and out. It should now be fully extended and able to bend at the band that is attached to the body.

  7. Sony Cyber-shot DSC-WX350 Control Wheel Replacement: adım 7, 2 resimden 1. Sony Cyber-shot DSC-WX350 Control Wheel Replacement: adım 7, 2 resimden 2.
    • Pull blue band holding the control wheel away from the camera body.

Sonuç

To reassemble your device, follow these instructions in reverse order.

Bir başkası bu kılavuzu tamamladı.

Jenna Newman

Üyelik tarihi: 10/05/16

34 İtibar

1 Kılavuz yazıldı

Ekip

USF Tampa, Team 1-2, Lacy Fall 2016 USF Tampa, Team 1-2, Lacy Fall 2016 üyesi

USFT-LACY-F16S1G2

5 Üyeler

3 adet Kılavuz yazıldı

0 Yorum

Yorum Ekle

İstatistikleri Görüntüle:

Son 24 Saat: 1

Son 7 gün: 3

Son 30 gün: 22

Her zaman: 1,875