Giriş
Use this guide to remove the main flex cable assembly including vibration motor and microphone, the loudspeaker and the side button flex cable including the charging port.
Opening the Sony Xperia Z4 will damage the waterproof seals on the device. If you do not replace the adhesive seals, your phone will function normally but will lose its water protection.
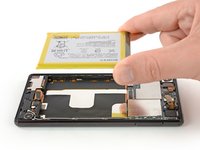
Due to the phone’s design, you must remove the lithium-ion battery in order to access the flex cable assemblies. Do not re-use a bent or damaged battery, as doing so is a potential safety hazard.
Before disassembling your phone, discharge the battery below 25%. The battery can catch fire and/or explode if accidentally punctured, but the chances of that happening are much lower if discharged.
You’ll need replacement adhesive to reattach components when reassembling the device.
Neye ihtiyacın var
-
-
Before you begin, switch off your phone.
-
Apply a heated iOpener to the back of the phone to loosen the adhesive beneath the back cover. Apply the iOpener for at least two minutes.
-
-
-
If the adhesive becomes hard to cut it most likely cooled down. Use your iOpener to reheat it.
-
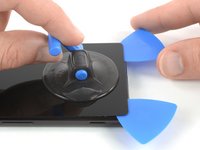
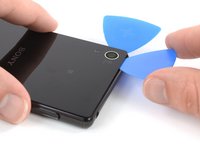
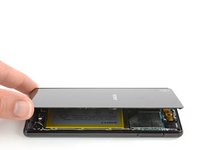
Insert a fourth opening pick under the top left corner of the back cover.
-
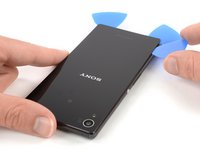
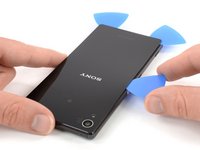
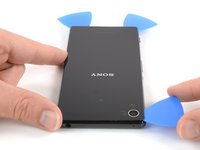
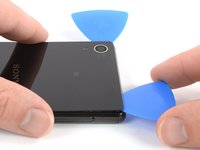
Slide the opening pick along the top edge of the phone to cut the adhesive.
-
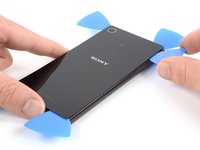
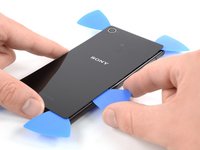
Leave the opening pick in the top right corner to prevent the adhesive from resealing.
-
-
Bu adımda kullanılan alet:Tweezers$4.99
-
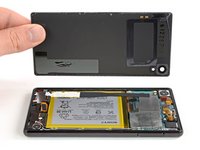
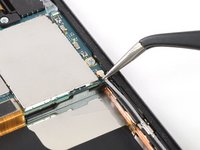
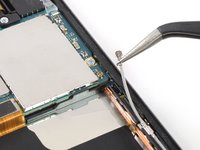
Use a pair of tweezers to carefully peel the adhesive strip off the mother board and the battery and remove it.
-
-
Bu adımda kullanılan alet:Tweezers$4.99
-
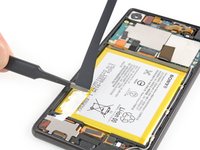
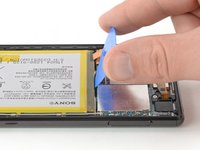
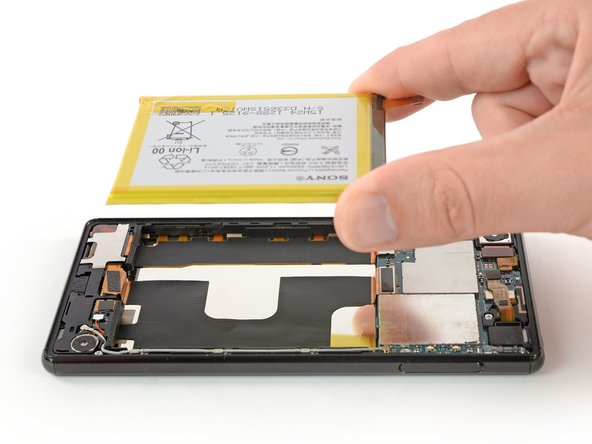
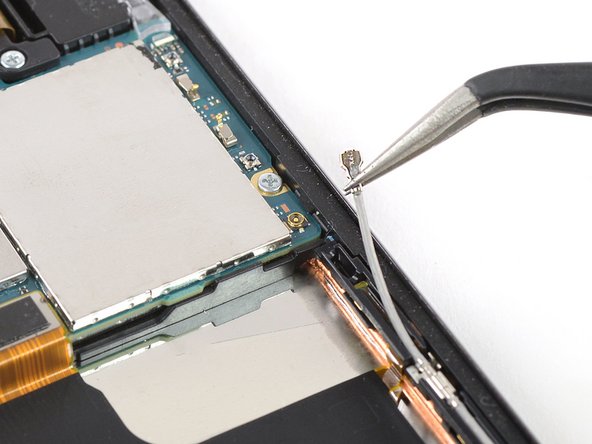
Use a pair of tweezers and grab the pull tab at the top right corner of the battery.
-
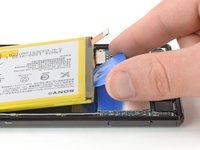
Pull out the adhesive strip with a pair of tweezers.
-
-
-
-
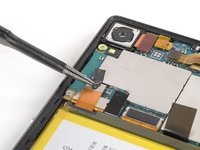
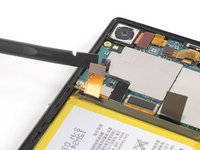
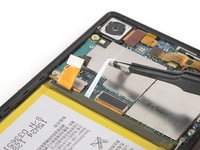
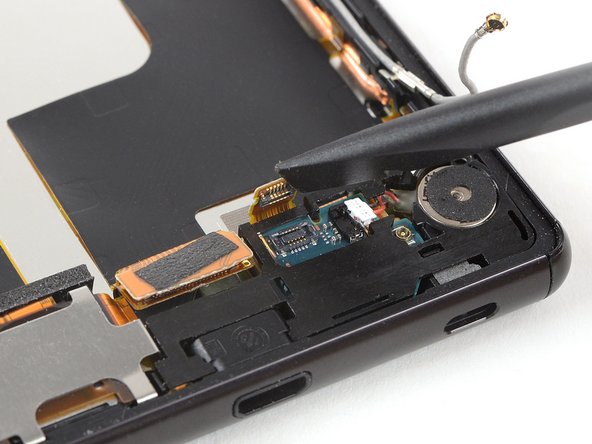
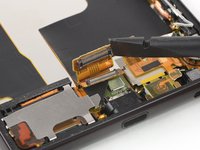
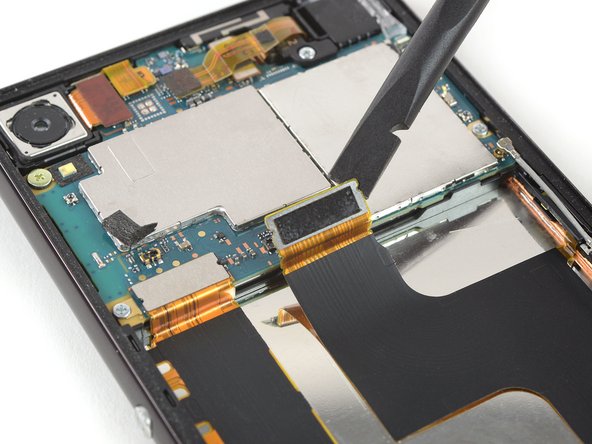
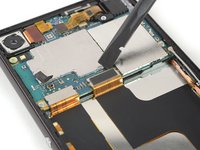
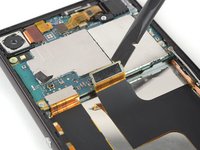
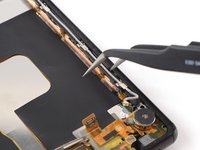
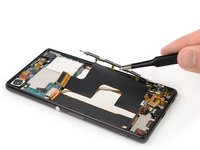
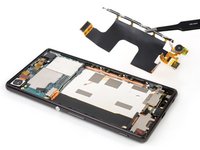
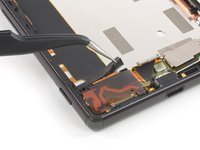
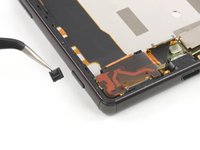
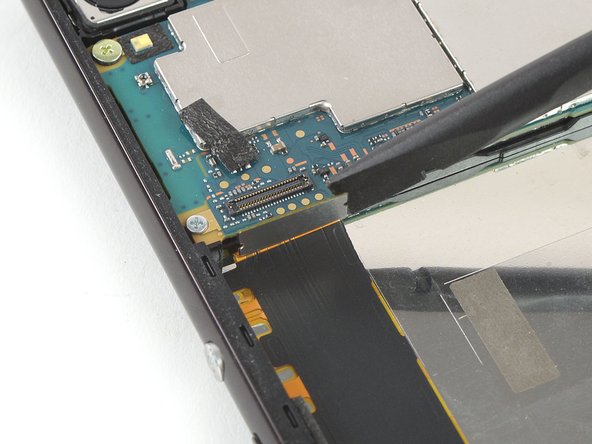
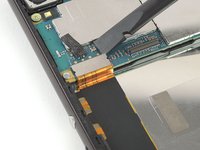
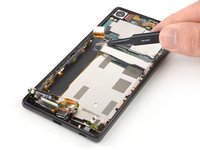
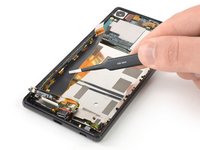
Use the flat end of a spudger to pry up and disconnect the main flex cable connector.
-
-
-
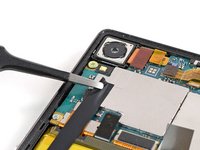
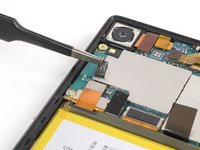
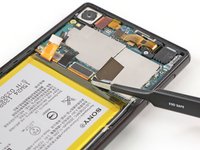
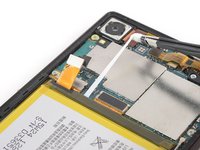
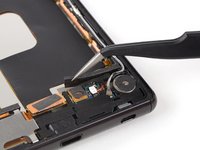
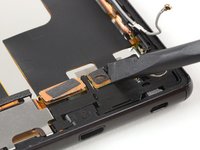
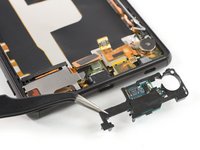
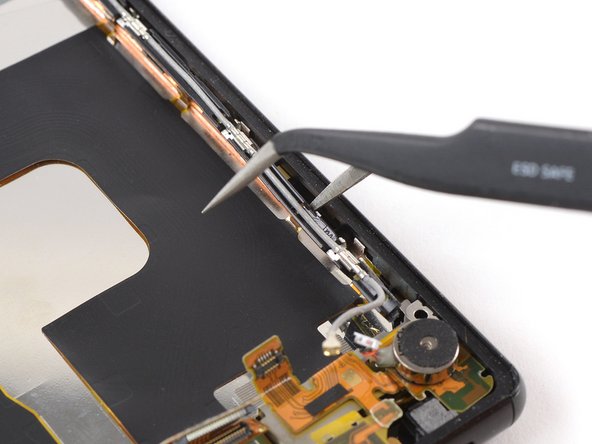
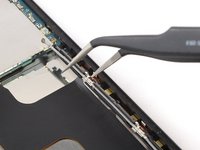
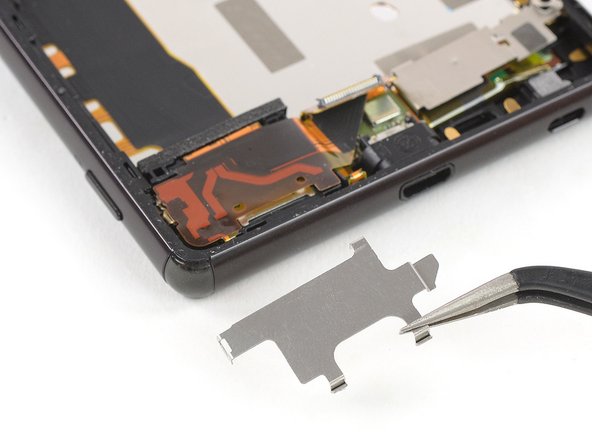
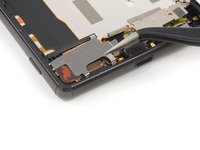
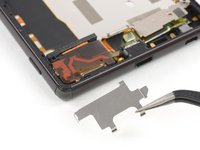
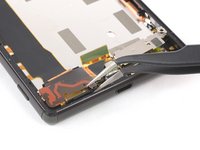
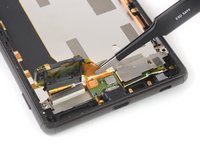
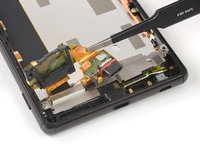
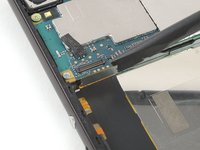
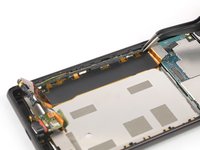
Unhook and remove the metal shield above the loudspeaker cover located at the bottom left.
-
-
-
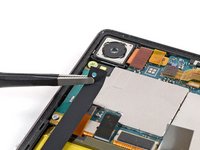
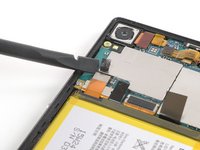
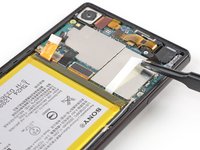
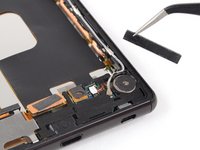
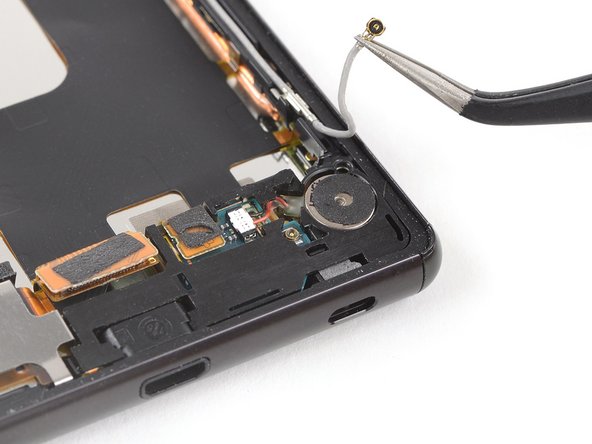
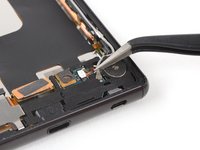
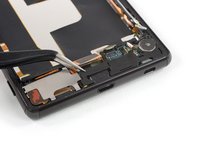
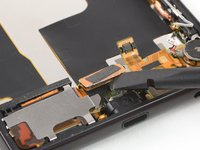
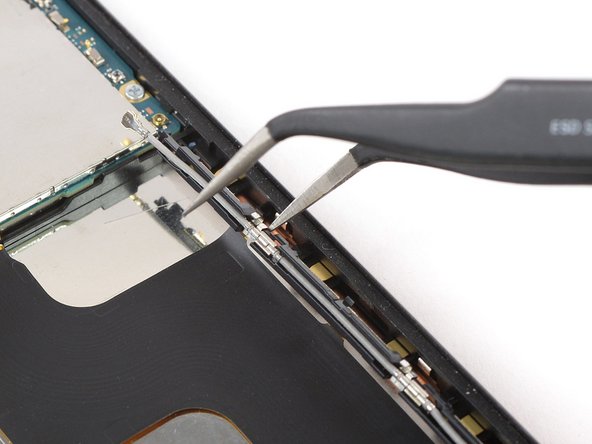
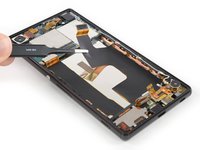
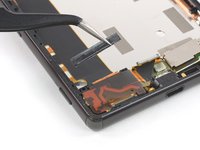
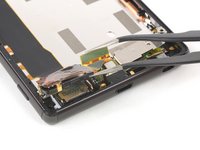
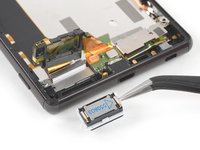
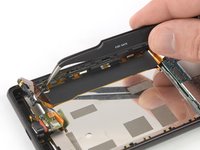
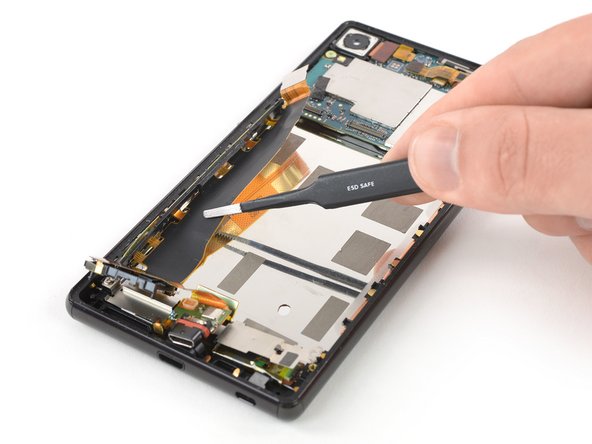
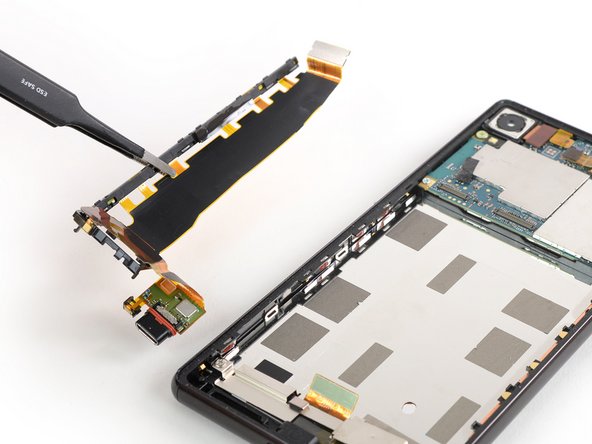
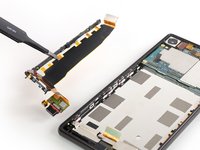
Use a pair of blunt nose tweezers to grab the flex cable between the charging port and the loudspeaker cover.
-
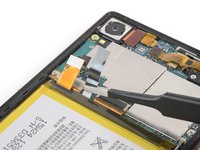
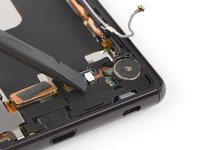
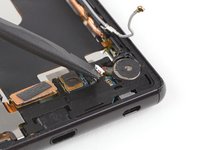
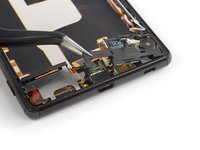
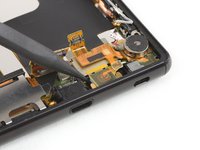
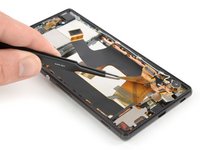
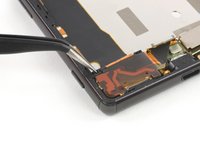
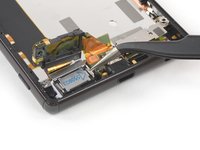
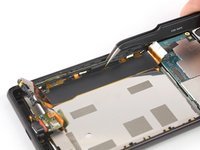
Carefully pull the charging port out of its housing.
-


If possible, turn on your phone and test your repair before installing new adhesive and resealing the phone.
Secure the new battery with pre-cut adhesive or double-sided adhesive tape. In order to position it correctly, apply the new adhesive into the phone at the places where the old adhesive was located, not directly onto the battery. Press the new battery firmly into place.
To reassemble your device, follow these instructions in reverse order.
Take your e-waste to an R2 or e-Stewards certified recycler.
Repair didn’t go as planned? Check out our Answers community for troubleshooting help.

