Bu sürüm, hatalı düzenlemeler içerebilir. En son doğrulanmış bellek kopyası dönün.
Neye ihtiyacın var
-
Bu adım çevrilmemiş. Çevrilmesine yardım edin
-
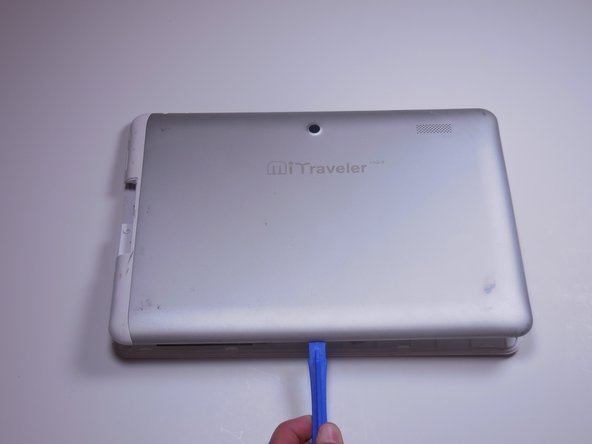
With the device face down, slide the charging port cover off on the left side of device.
-
-
Bu adım çevrilmemiş. Çevrilmesine yardım edin
-
To pry the back plate off, use the plastic opening tool between the back plate and front plate; start at the headphone jack.
-
-
Bu adım çevrilmemiş. Çevrilmesine yardım edin
-
Move around the device with the plastic opening tool, pushing down to release the back plate from clips.
-
-
Bu adım çevrilmemiş. Çevrilmesine yardım edin
-
Once you’ve moved around the whole device with the plastic opening tool, the back plate will completely release from the rest of the device.
-
-
Bu adım çevrilmemiş. Çevrilmesine yardım edin
-
The battery rests flat on the inside surface of the tablet. It is a rectangular shape and has blue and yellow tape.
-
-
Bu adım çevrilmemiş. Çevrilmesine yardım edin
-
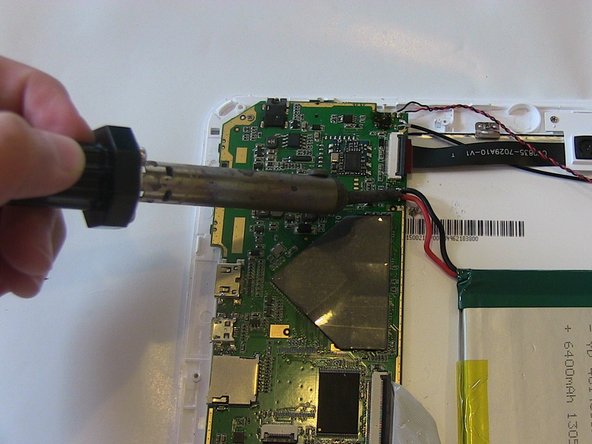
Two wires, one red and one black, which run from the motherboard to the battery, need to be desoldered from the motherboard.
-
Review how to solder here.
-
-
Bu adım çevrilmemiş. Çevrilmesine yardım edin
-
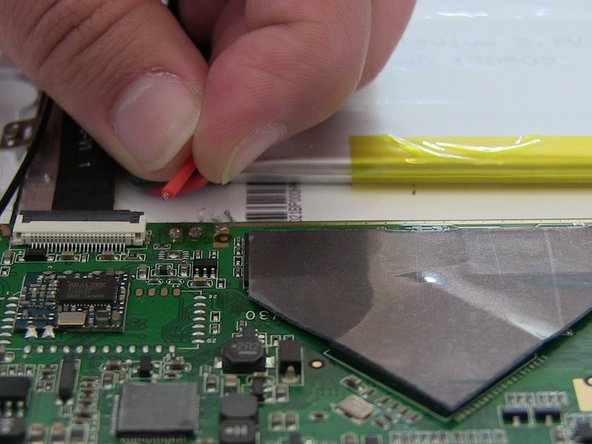
Work the soldering gun on the red wire where it is connected to the motherboard. It should release from the motherboard.
-
Work the soldering gun on the black wire where it is connected to the motherboard. It will release from the motherboard.
-
-
Bu adım çevrilmemiş. Çevrilmesine yardım edin
-
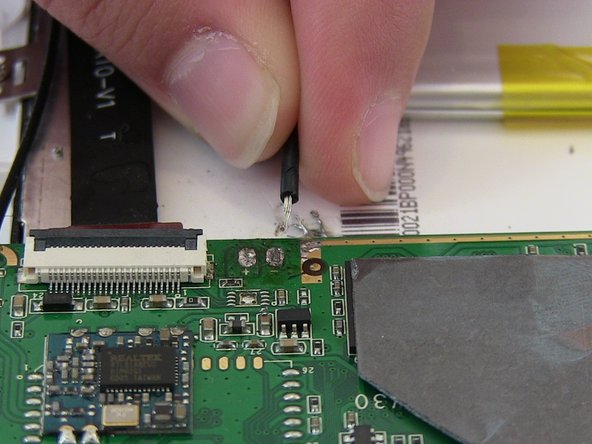
Once both wires have been desoldered, remove the battery from the device.
-


Ekip

Colorado Springs, Team 4-3, Panko Spring 2015 Colorado Springs, Team 4-3, Panko Spring 2015 üyesi
UCCS-PANKO-S15S4G3
3 Üyeler
10 adet Kılavuz yazıldı