
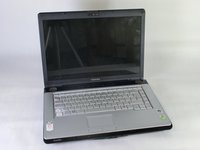
Toshiba Satellite A210 Keyboard Replacement
Giriş
1. adıma gitIn this guide you will learn how to remove a keyboard safely. Before you begin this guide you should have all required materials and tools necessary to properly remove the keyboard.
Neye ihtiyacın var
Aletler

-
-
Slide the battery lock tab away from the center of the laptop to unlock the battery.
-


To reassemble your device, follow these instructions in reverse order.
To reassemble your device, follow these instructions in reverse order.
İptal et: Bu kılavuzu tamamlamadım.
3 farklı kişi bu kılavuzu tamamladı.
Ekip

Cal Poly, Team 17-5, Regan Spring 2013 Cal Poly, Team 17-5, Regan Spring 2013 üyesi
CPSU-REGAN-S13S17G5
4 Üyeler
18 adet Kılavuz yazıldı